
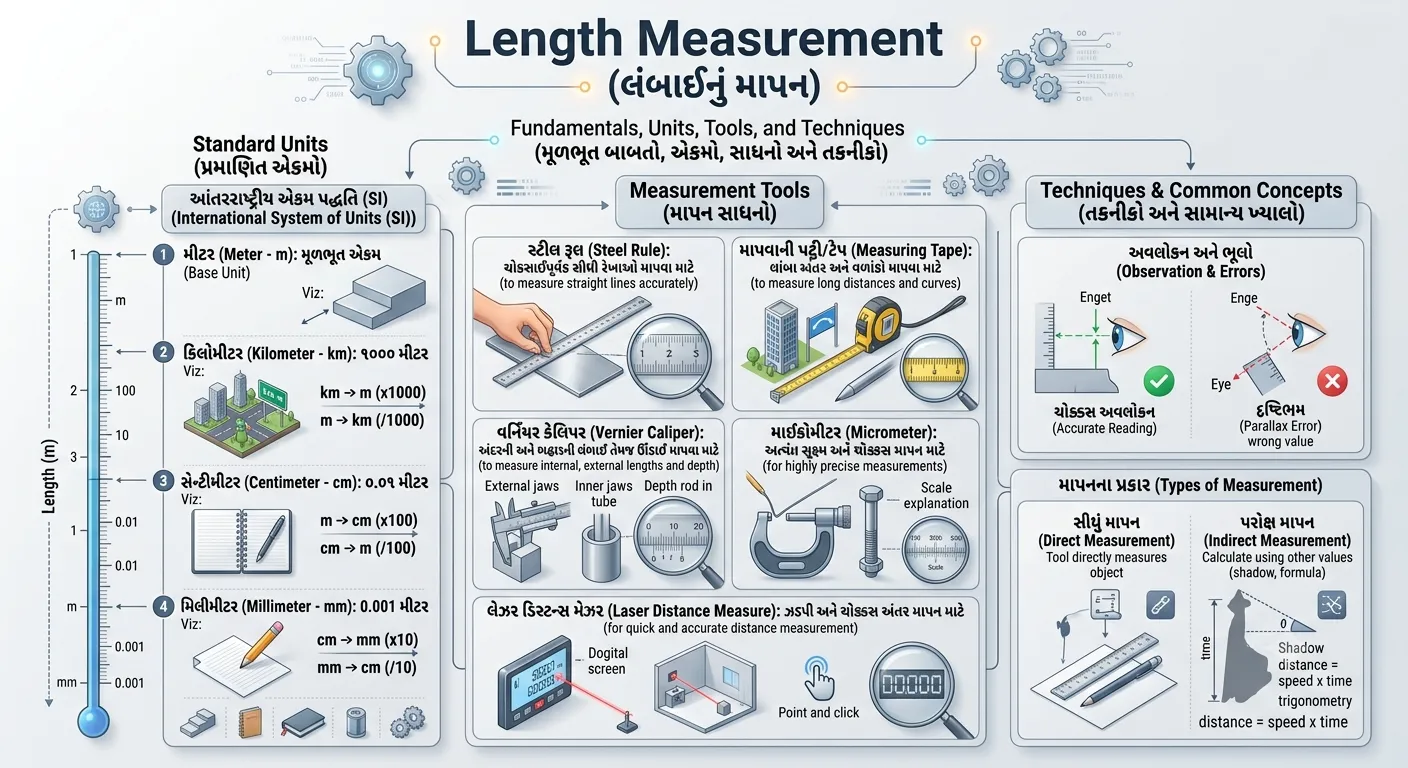
🛠️ Automotive Mechanic Diesel: Measuring and Marking Practice
🏗️ Flaring, Flare Fittings, and Testing the Joints
Objectives (ઉદ્દેશ્યો):
આ લેસનના અંતે તમે આ બાબતો શીખશો:
- Flaring ની જરૂરિયાત અને પદ્ધતિઓ સમજાવવી. 💡
- Flare fittings ના પ્રકારો અને તેના ઉપયોગોની યાદી બનાવવી.
- Joint system માં pressure આપીને leaks (લીકેજ) ચેક કરવા. 🔍
Flaring Necessity (ફ્લેરિંગની જરૂરિયાત):
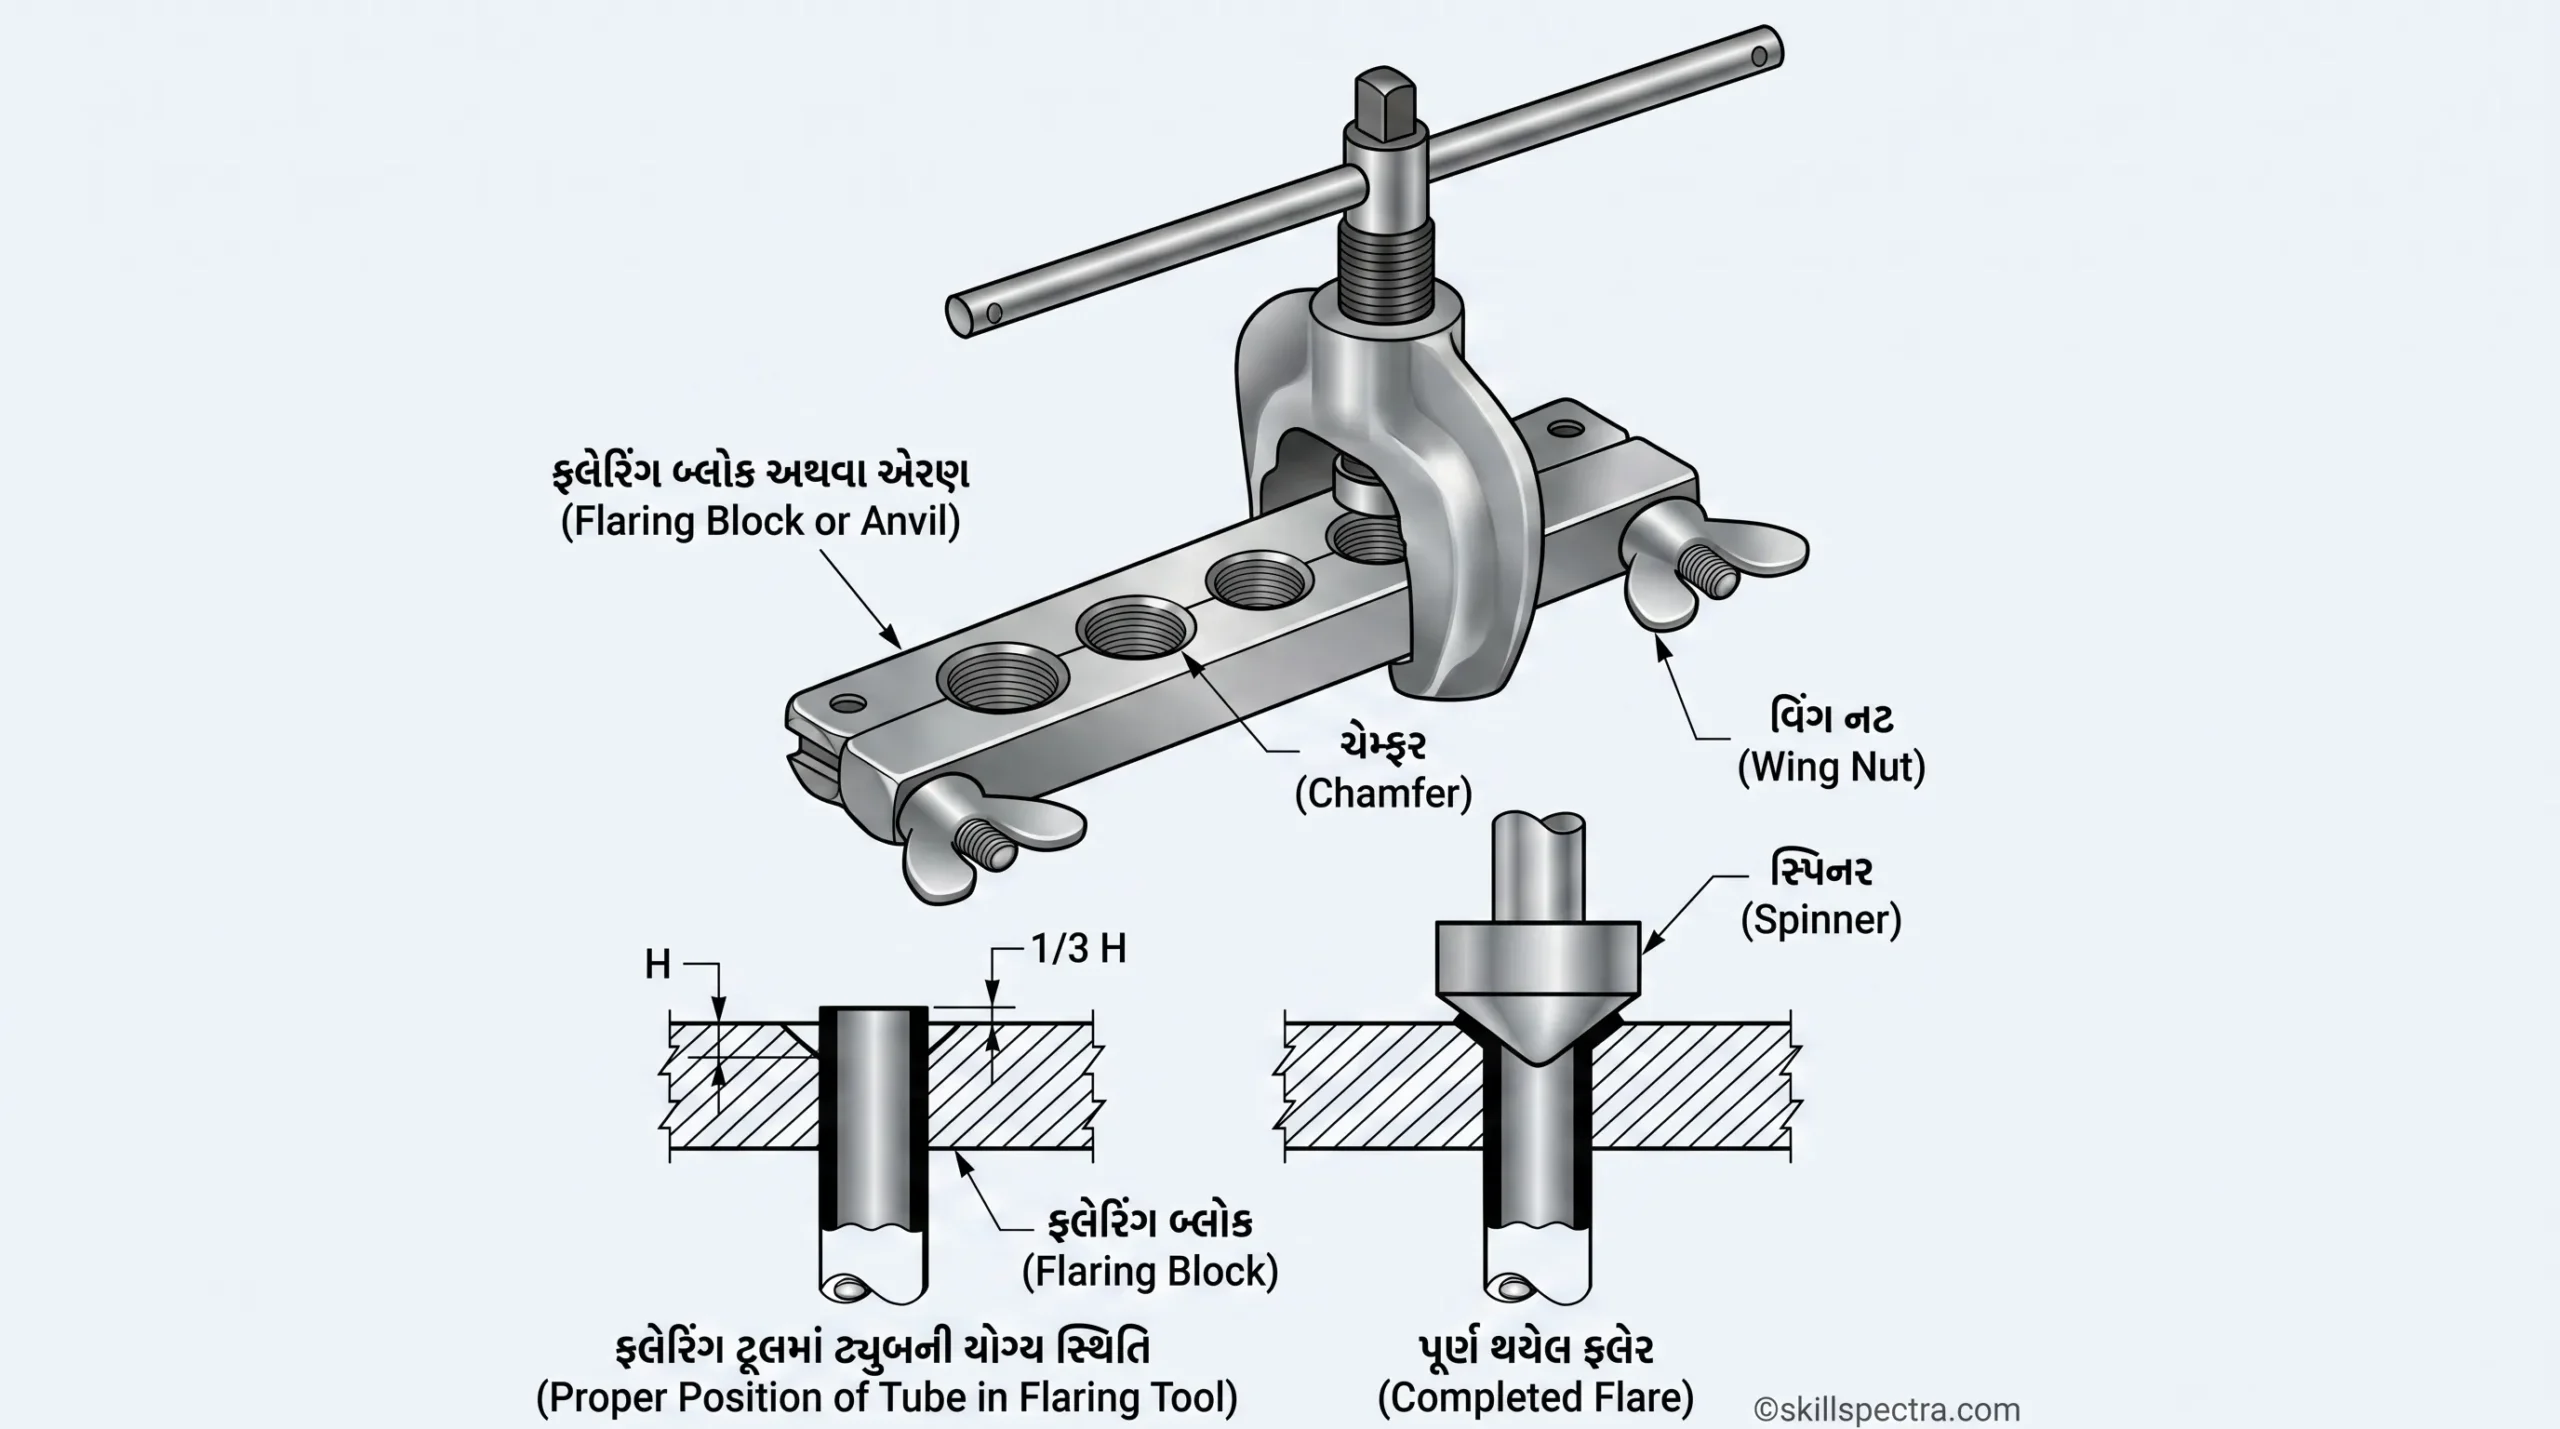
જ્યારે tubing ને fittings સાથે connect કરવાની હોય, ત્યારે tube ના છેડાને flare કરવો એ સામાન્ય પ્રક્રિયા છે જેથી vapor tight seal (વરાળ ન નીકળે તેવું સીલ) મેળવી શકાય. આ માટે ખાસ special tools વપરાય છે. જો ફ્લેરિંગ બરાબર ન હોય, તો આખી સિસ્ટમમાં પ્રોબ્લેમ આવી શકે છે. સિસ્ટમ ચાલુ કરતા પહેલા pressure test કરવો અનિવાર્ય છે.
Types of Flaring (ફ્લેરિંગના પ્રકારો):
મુખ્યત્વે બે પ્રકારના ફ્લેરિંગ હોય છે:
- Single thickness flare: આ નાના કદની કોપર ટ્યુબિંગ (copper tubing) પર કરવામાં આવે છે.
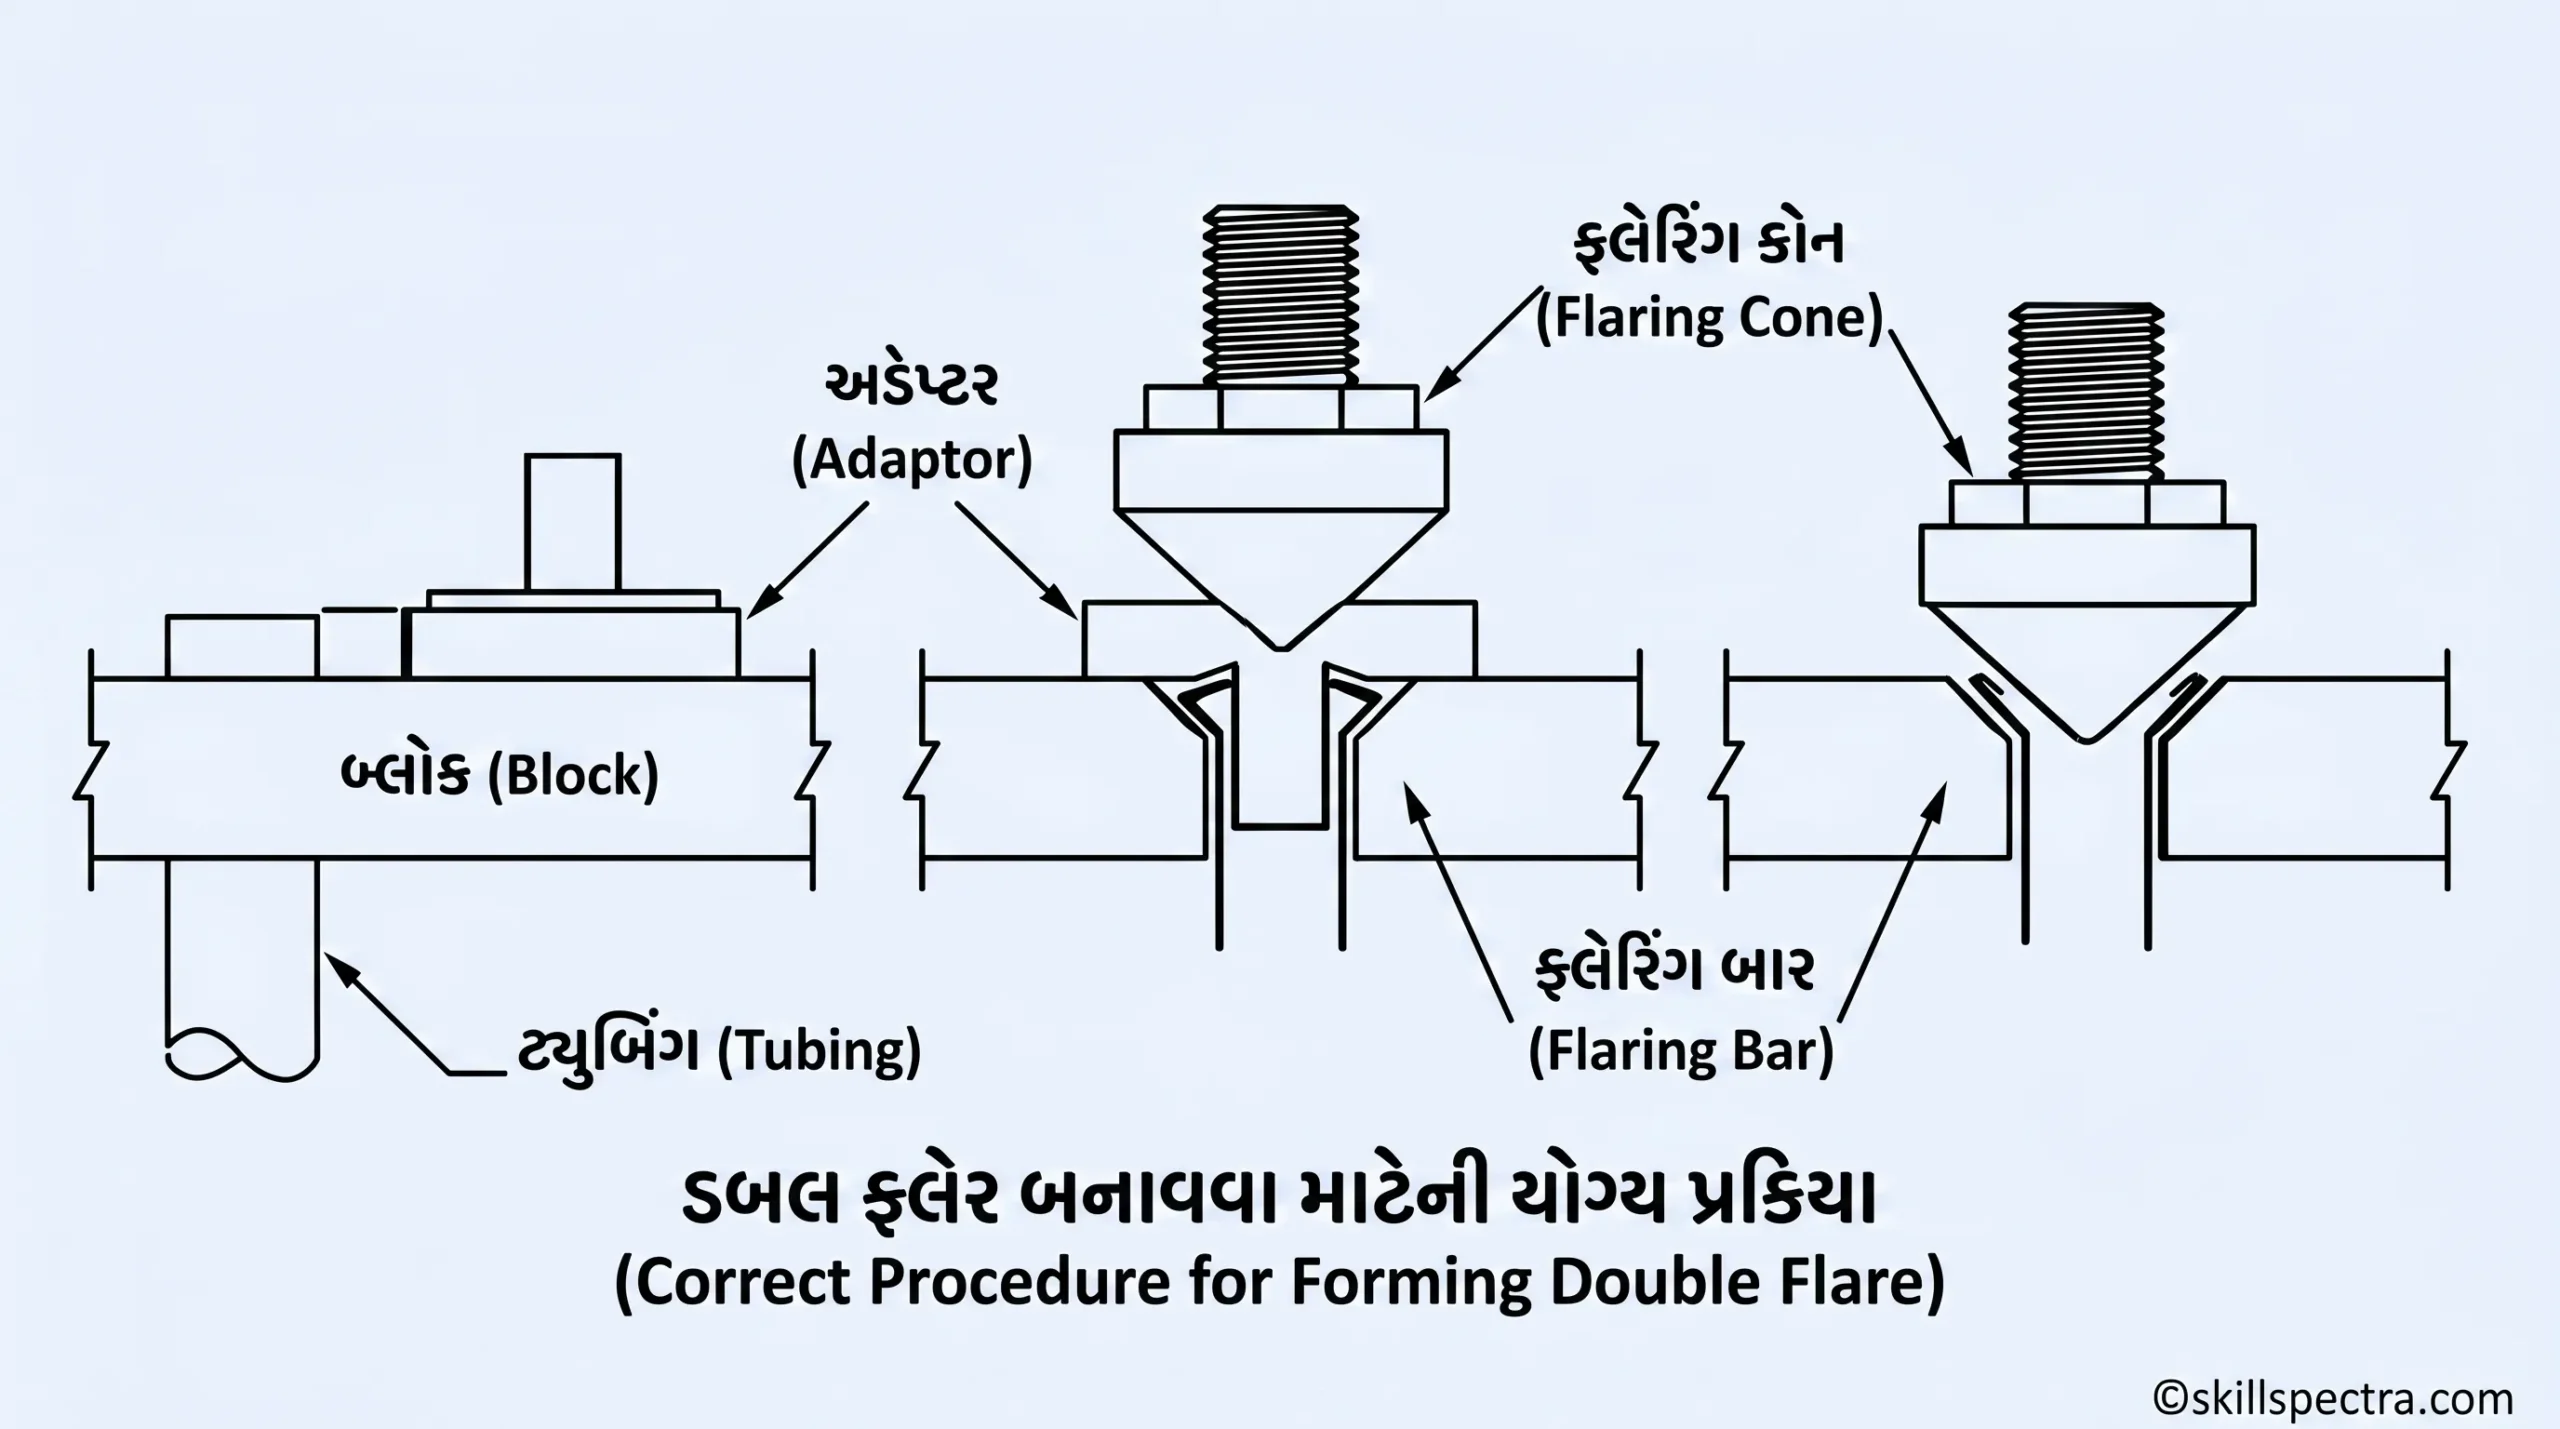
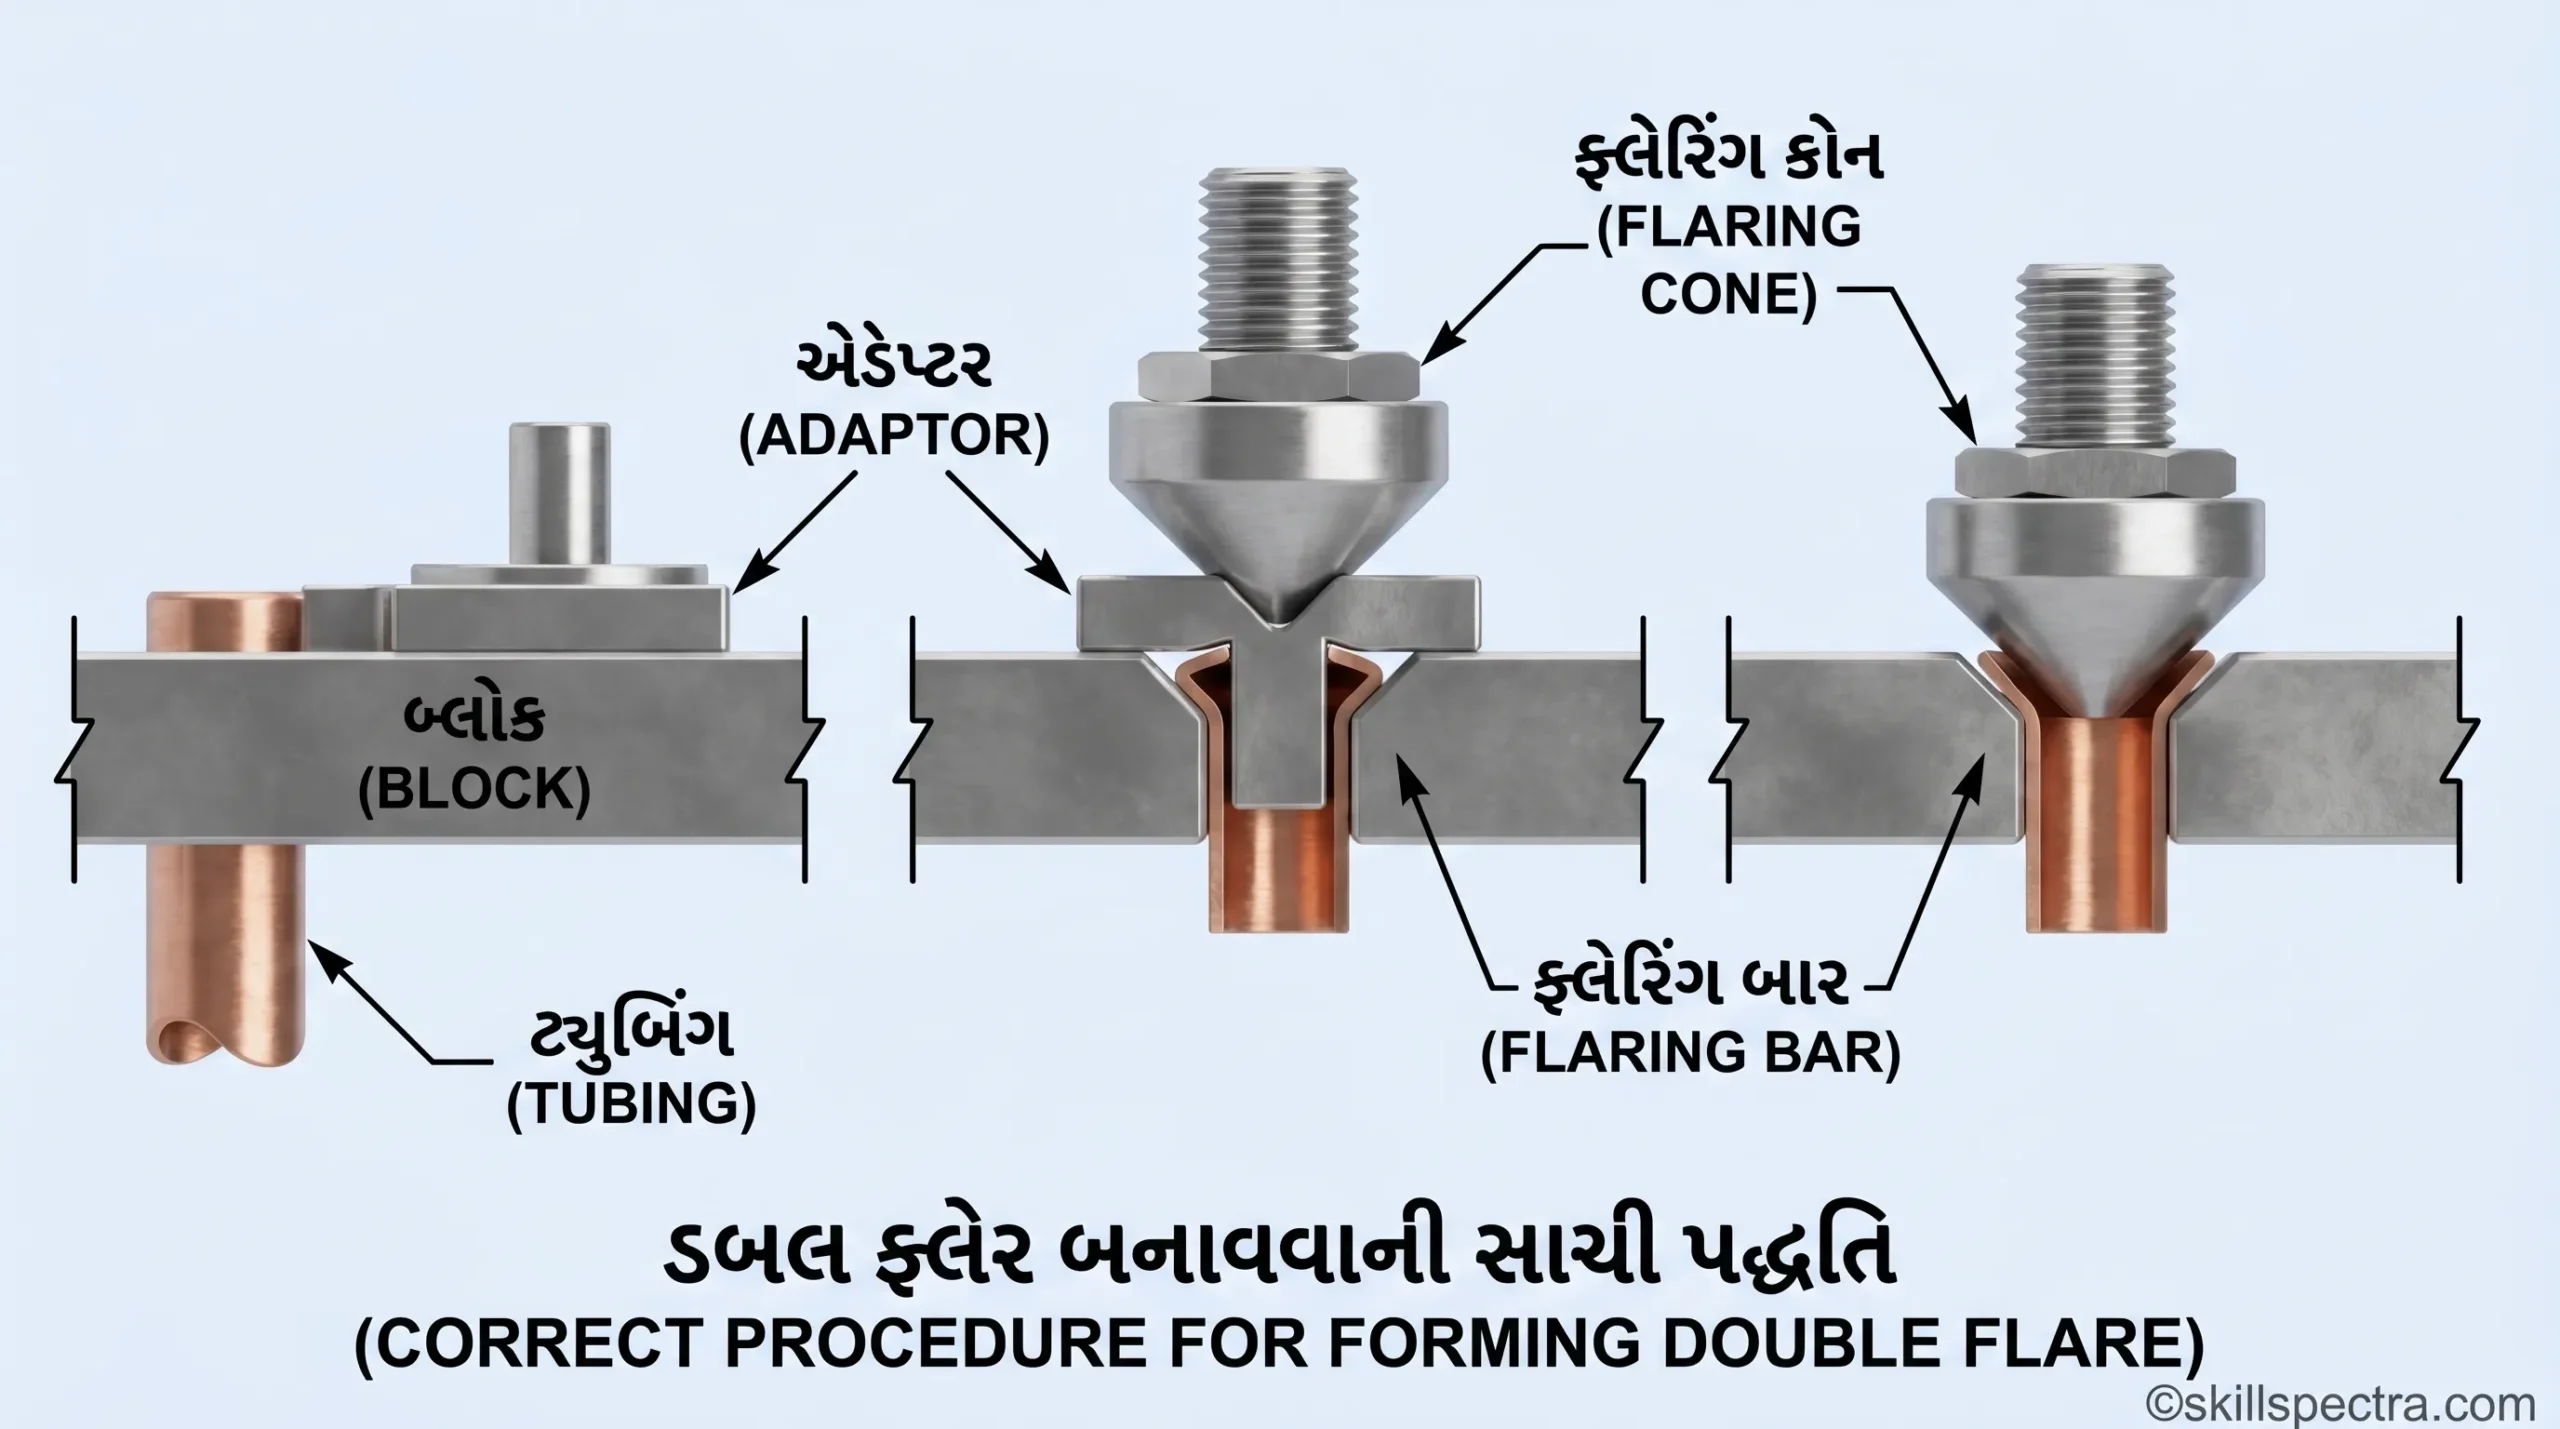
- Double thickness flare: 5/16 inch (9mm) OD કે તેથી મોટી ટ્યુબિંગ માટે આ ભલામણ કરવામાં આવે છે. નાના ટ્યુબિંગ પર આ કરવું અઘરું છે, પણ double flare સિંગલ ફ્લેર કરતા વધુ મજબૂત જોઈન્ટ બનાવે છે.
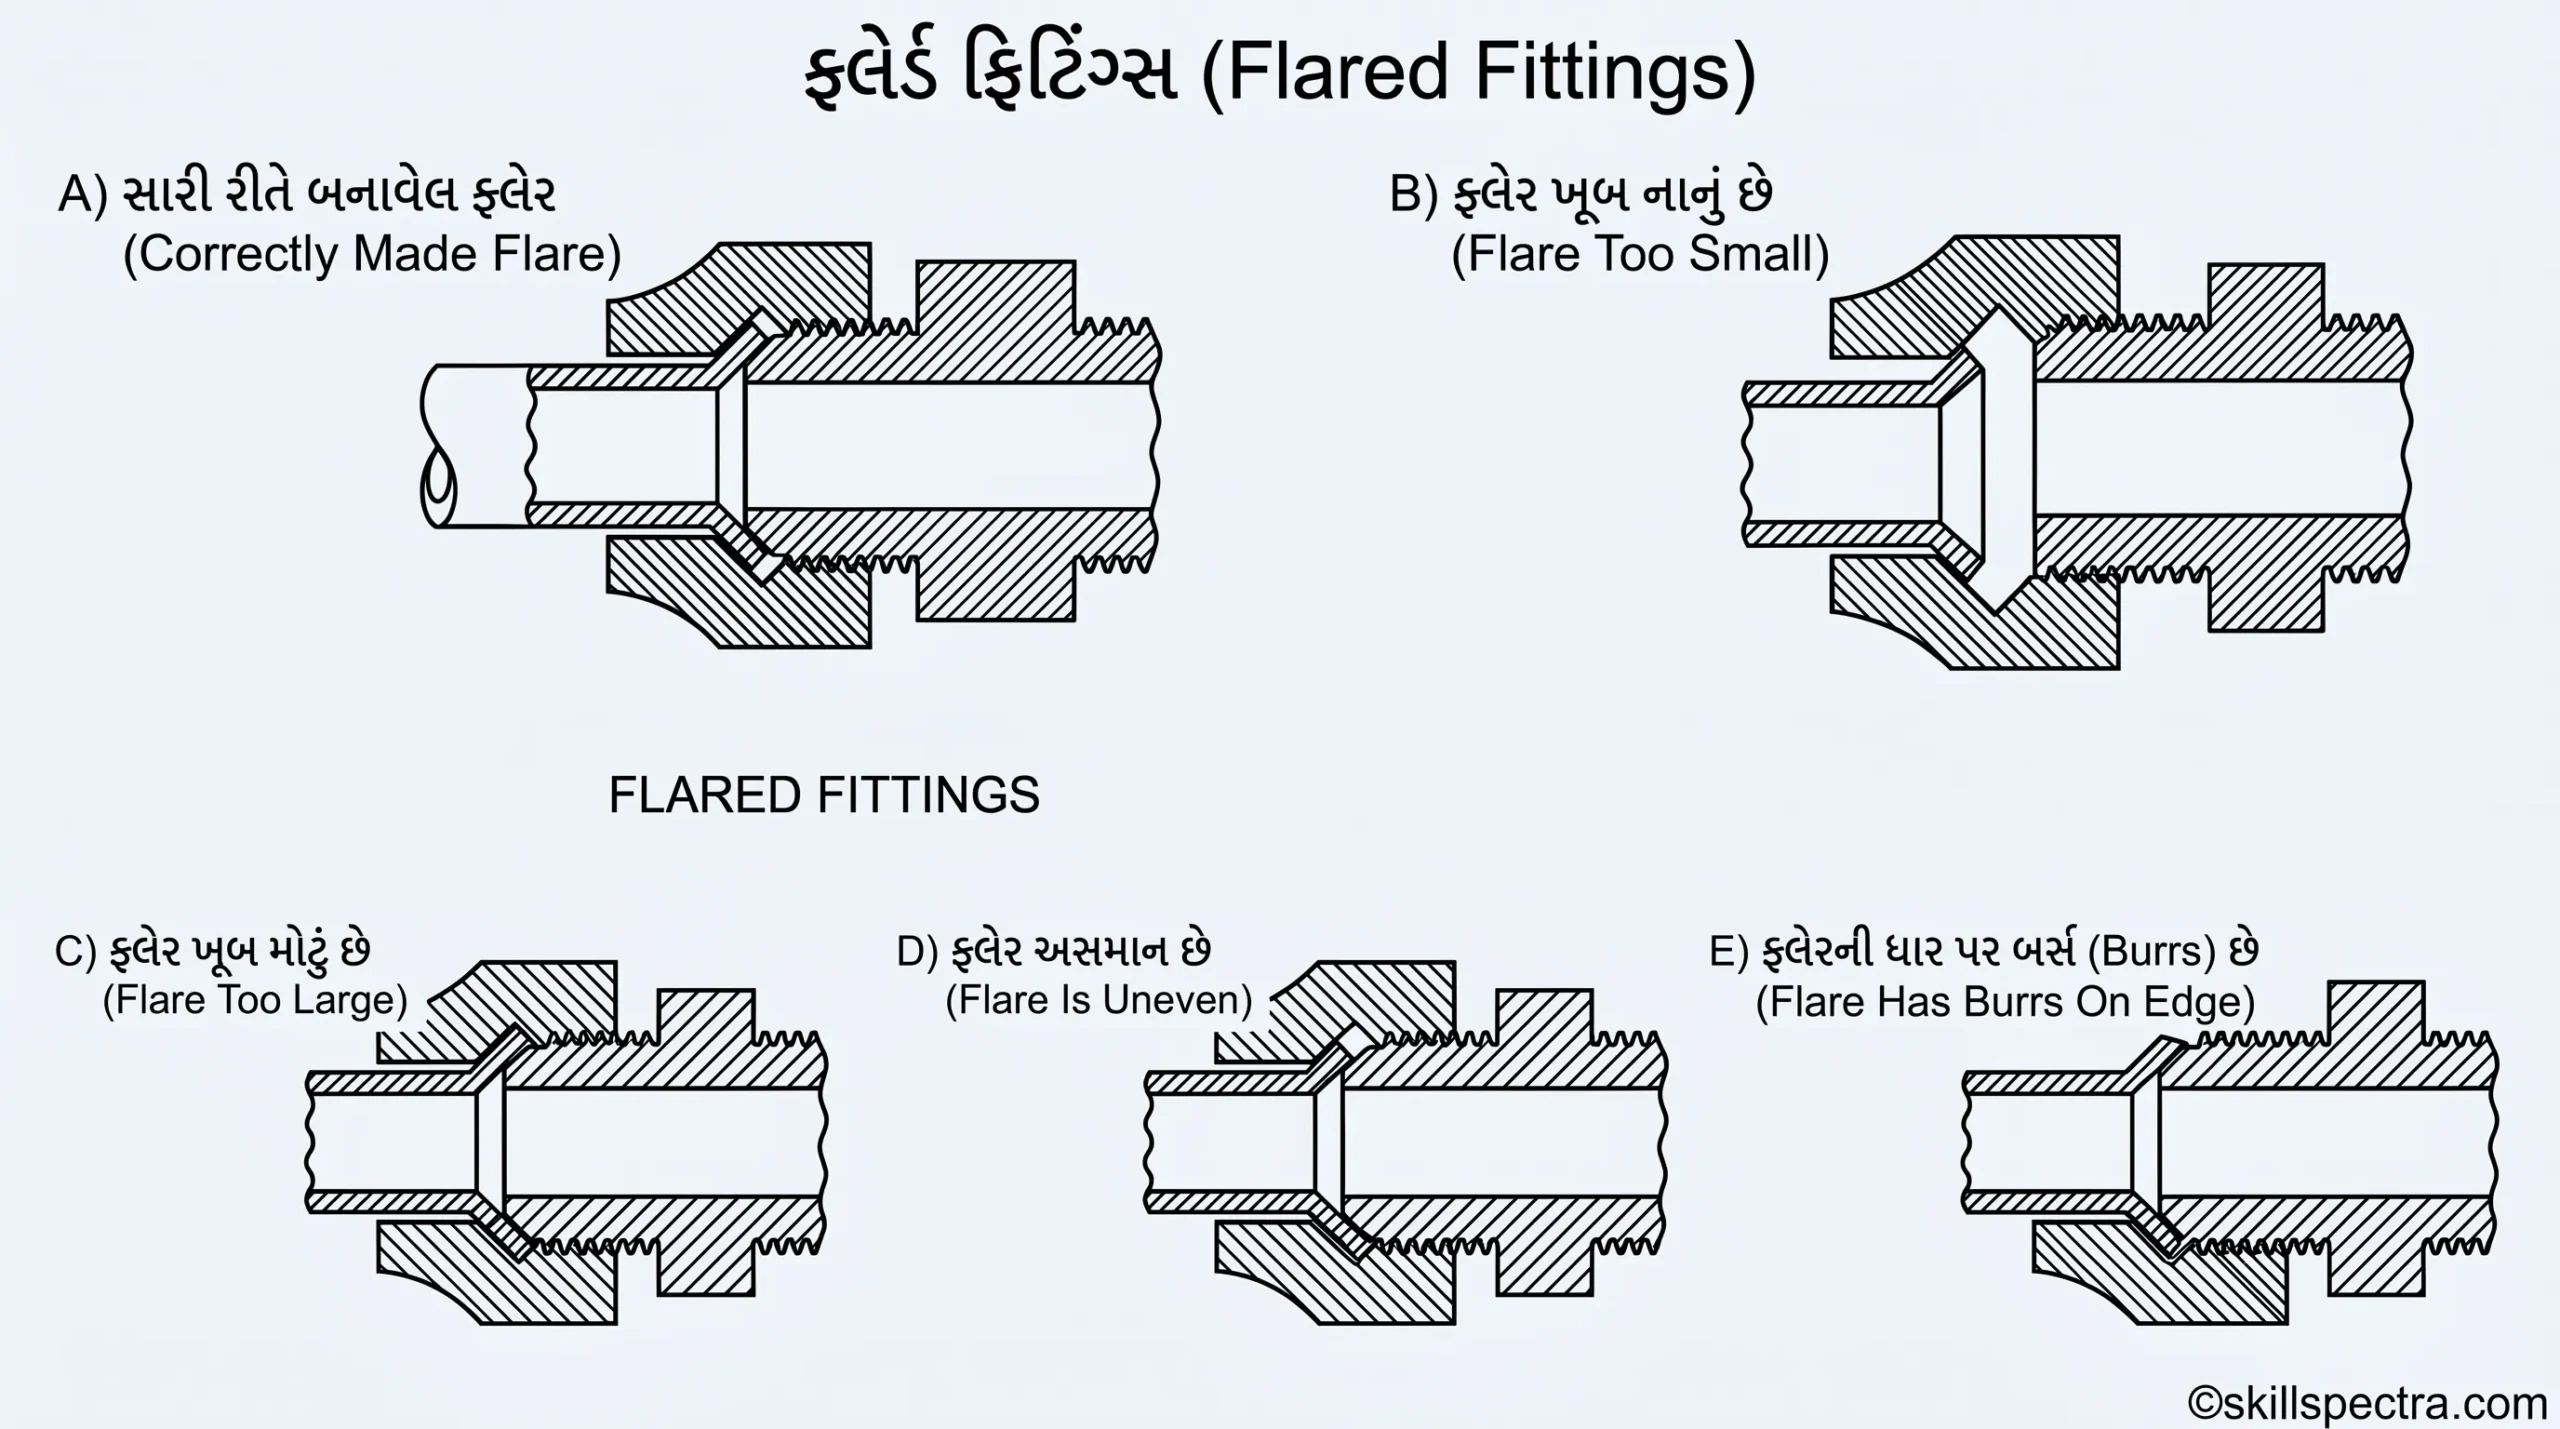
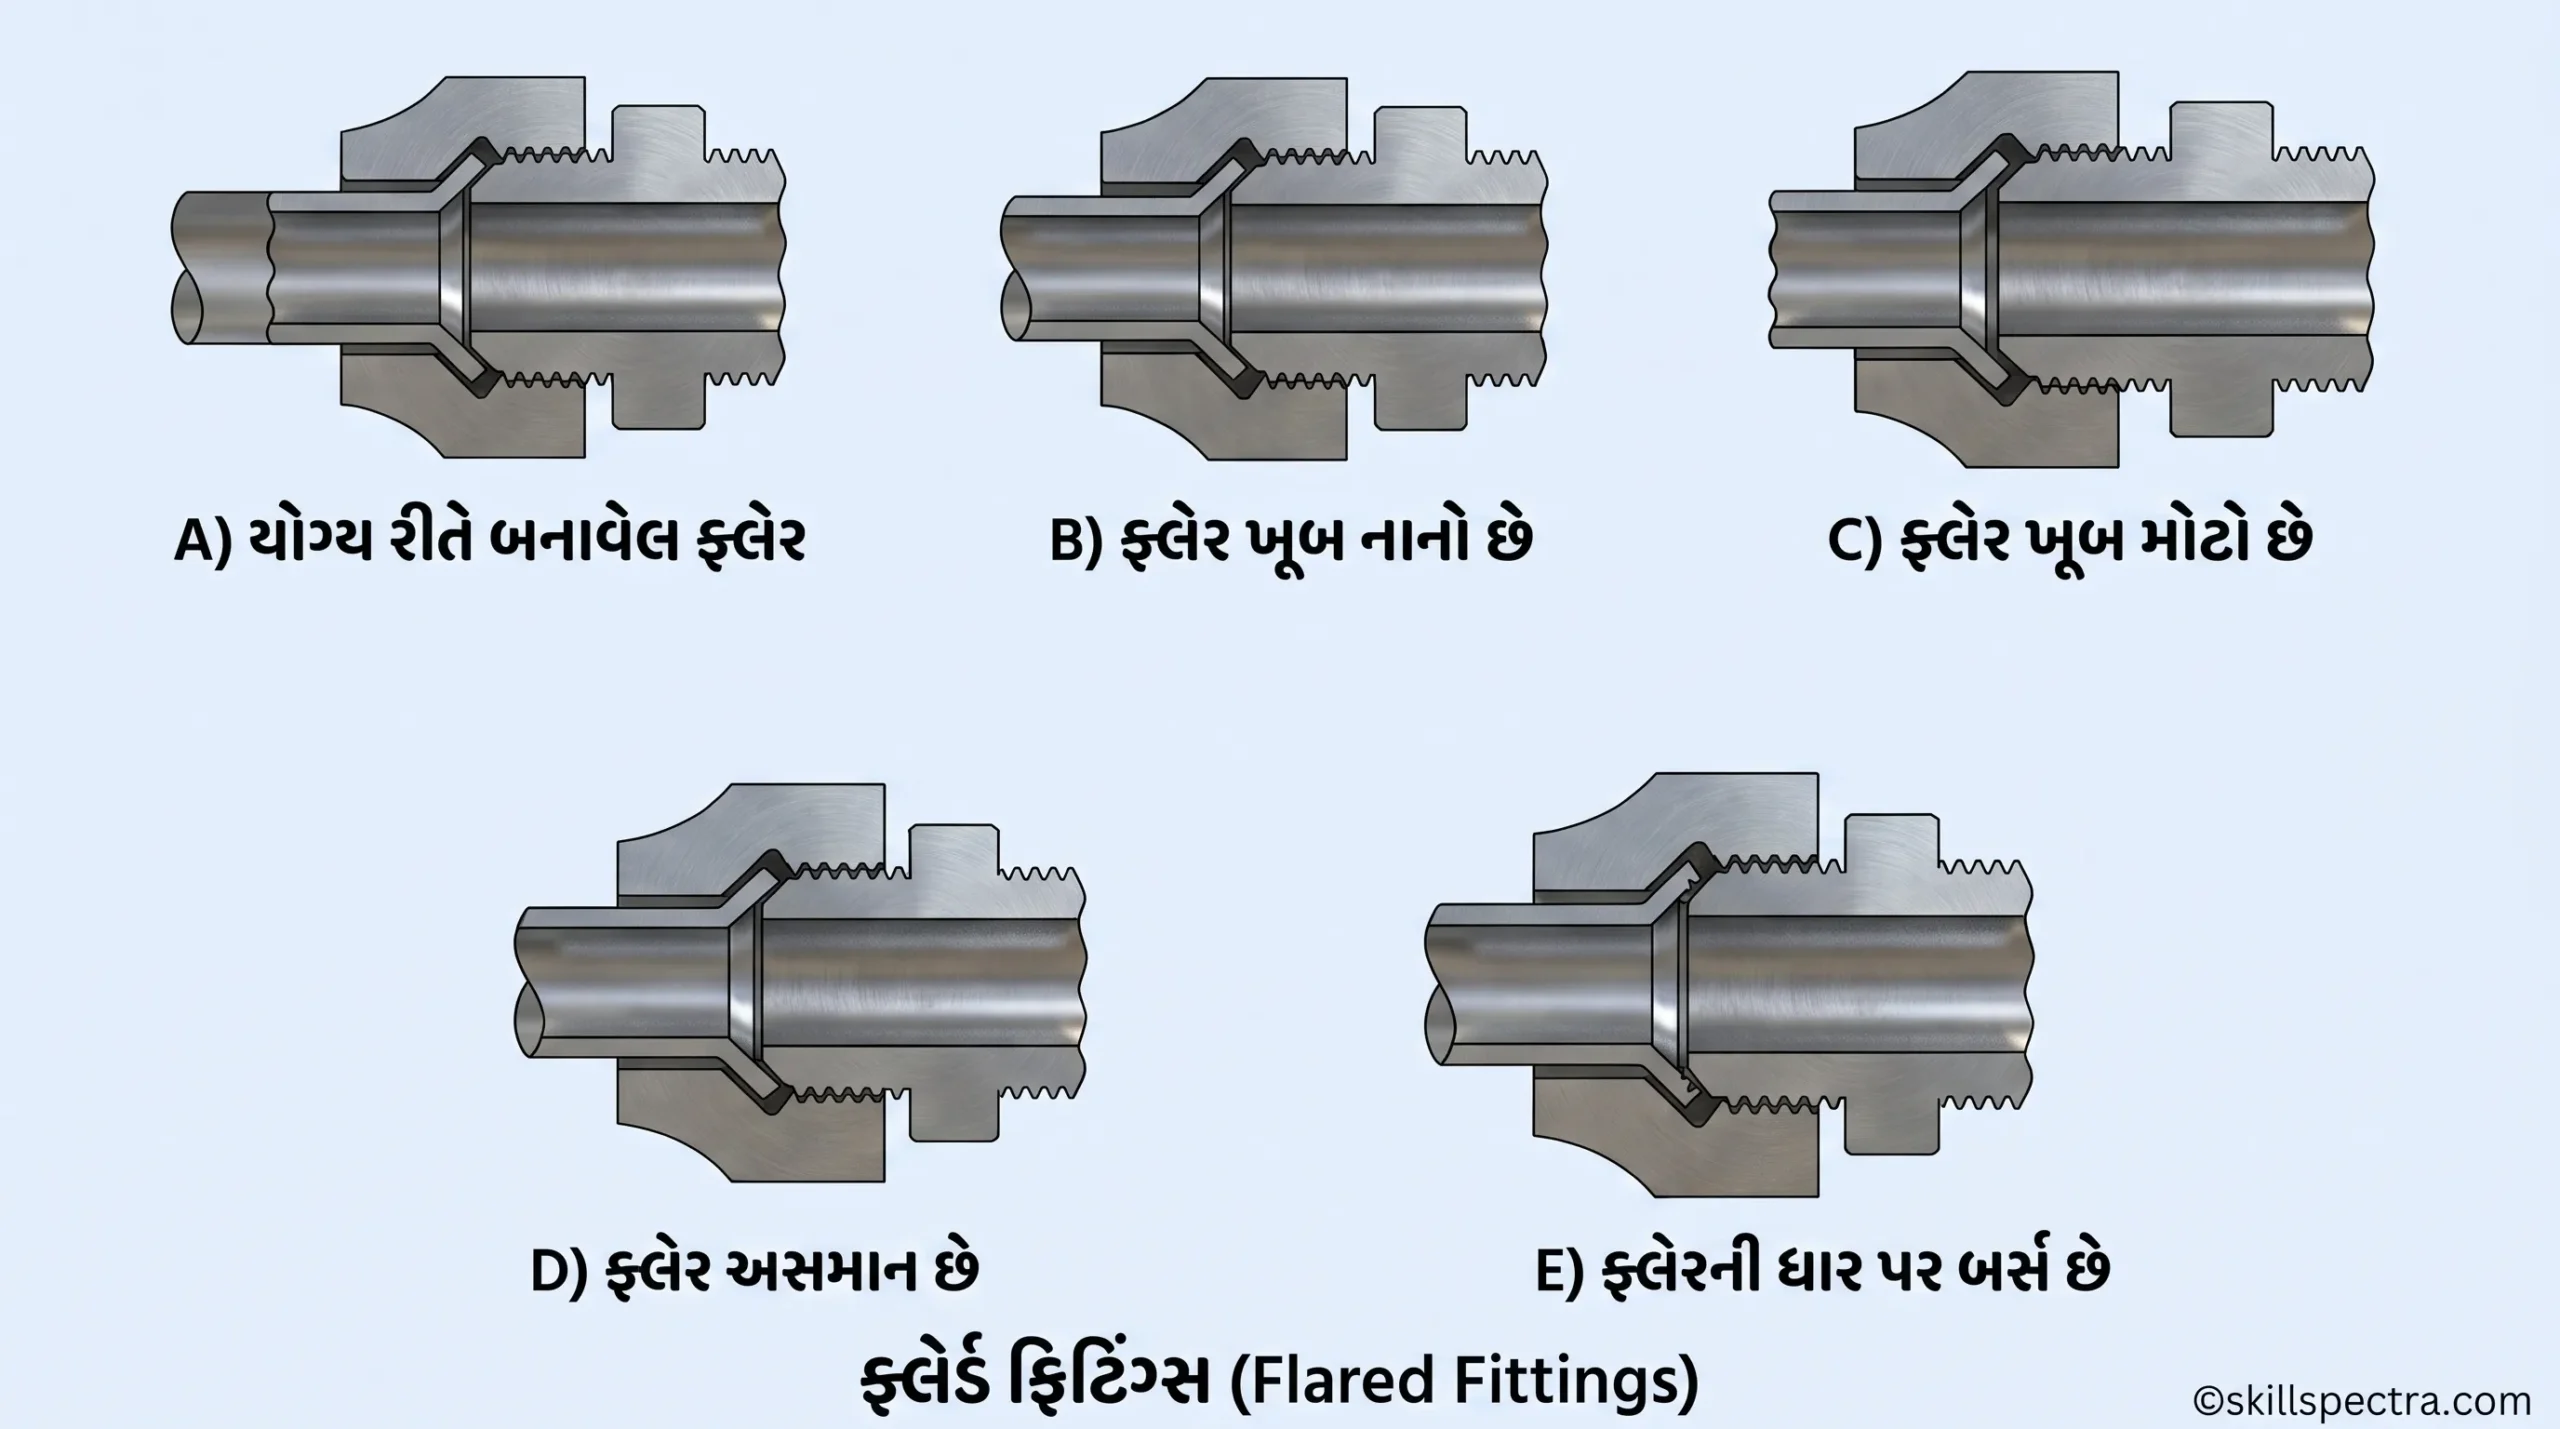
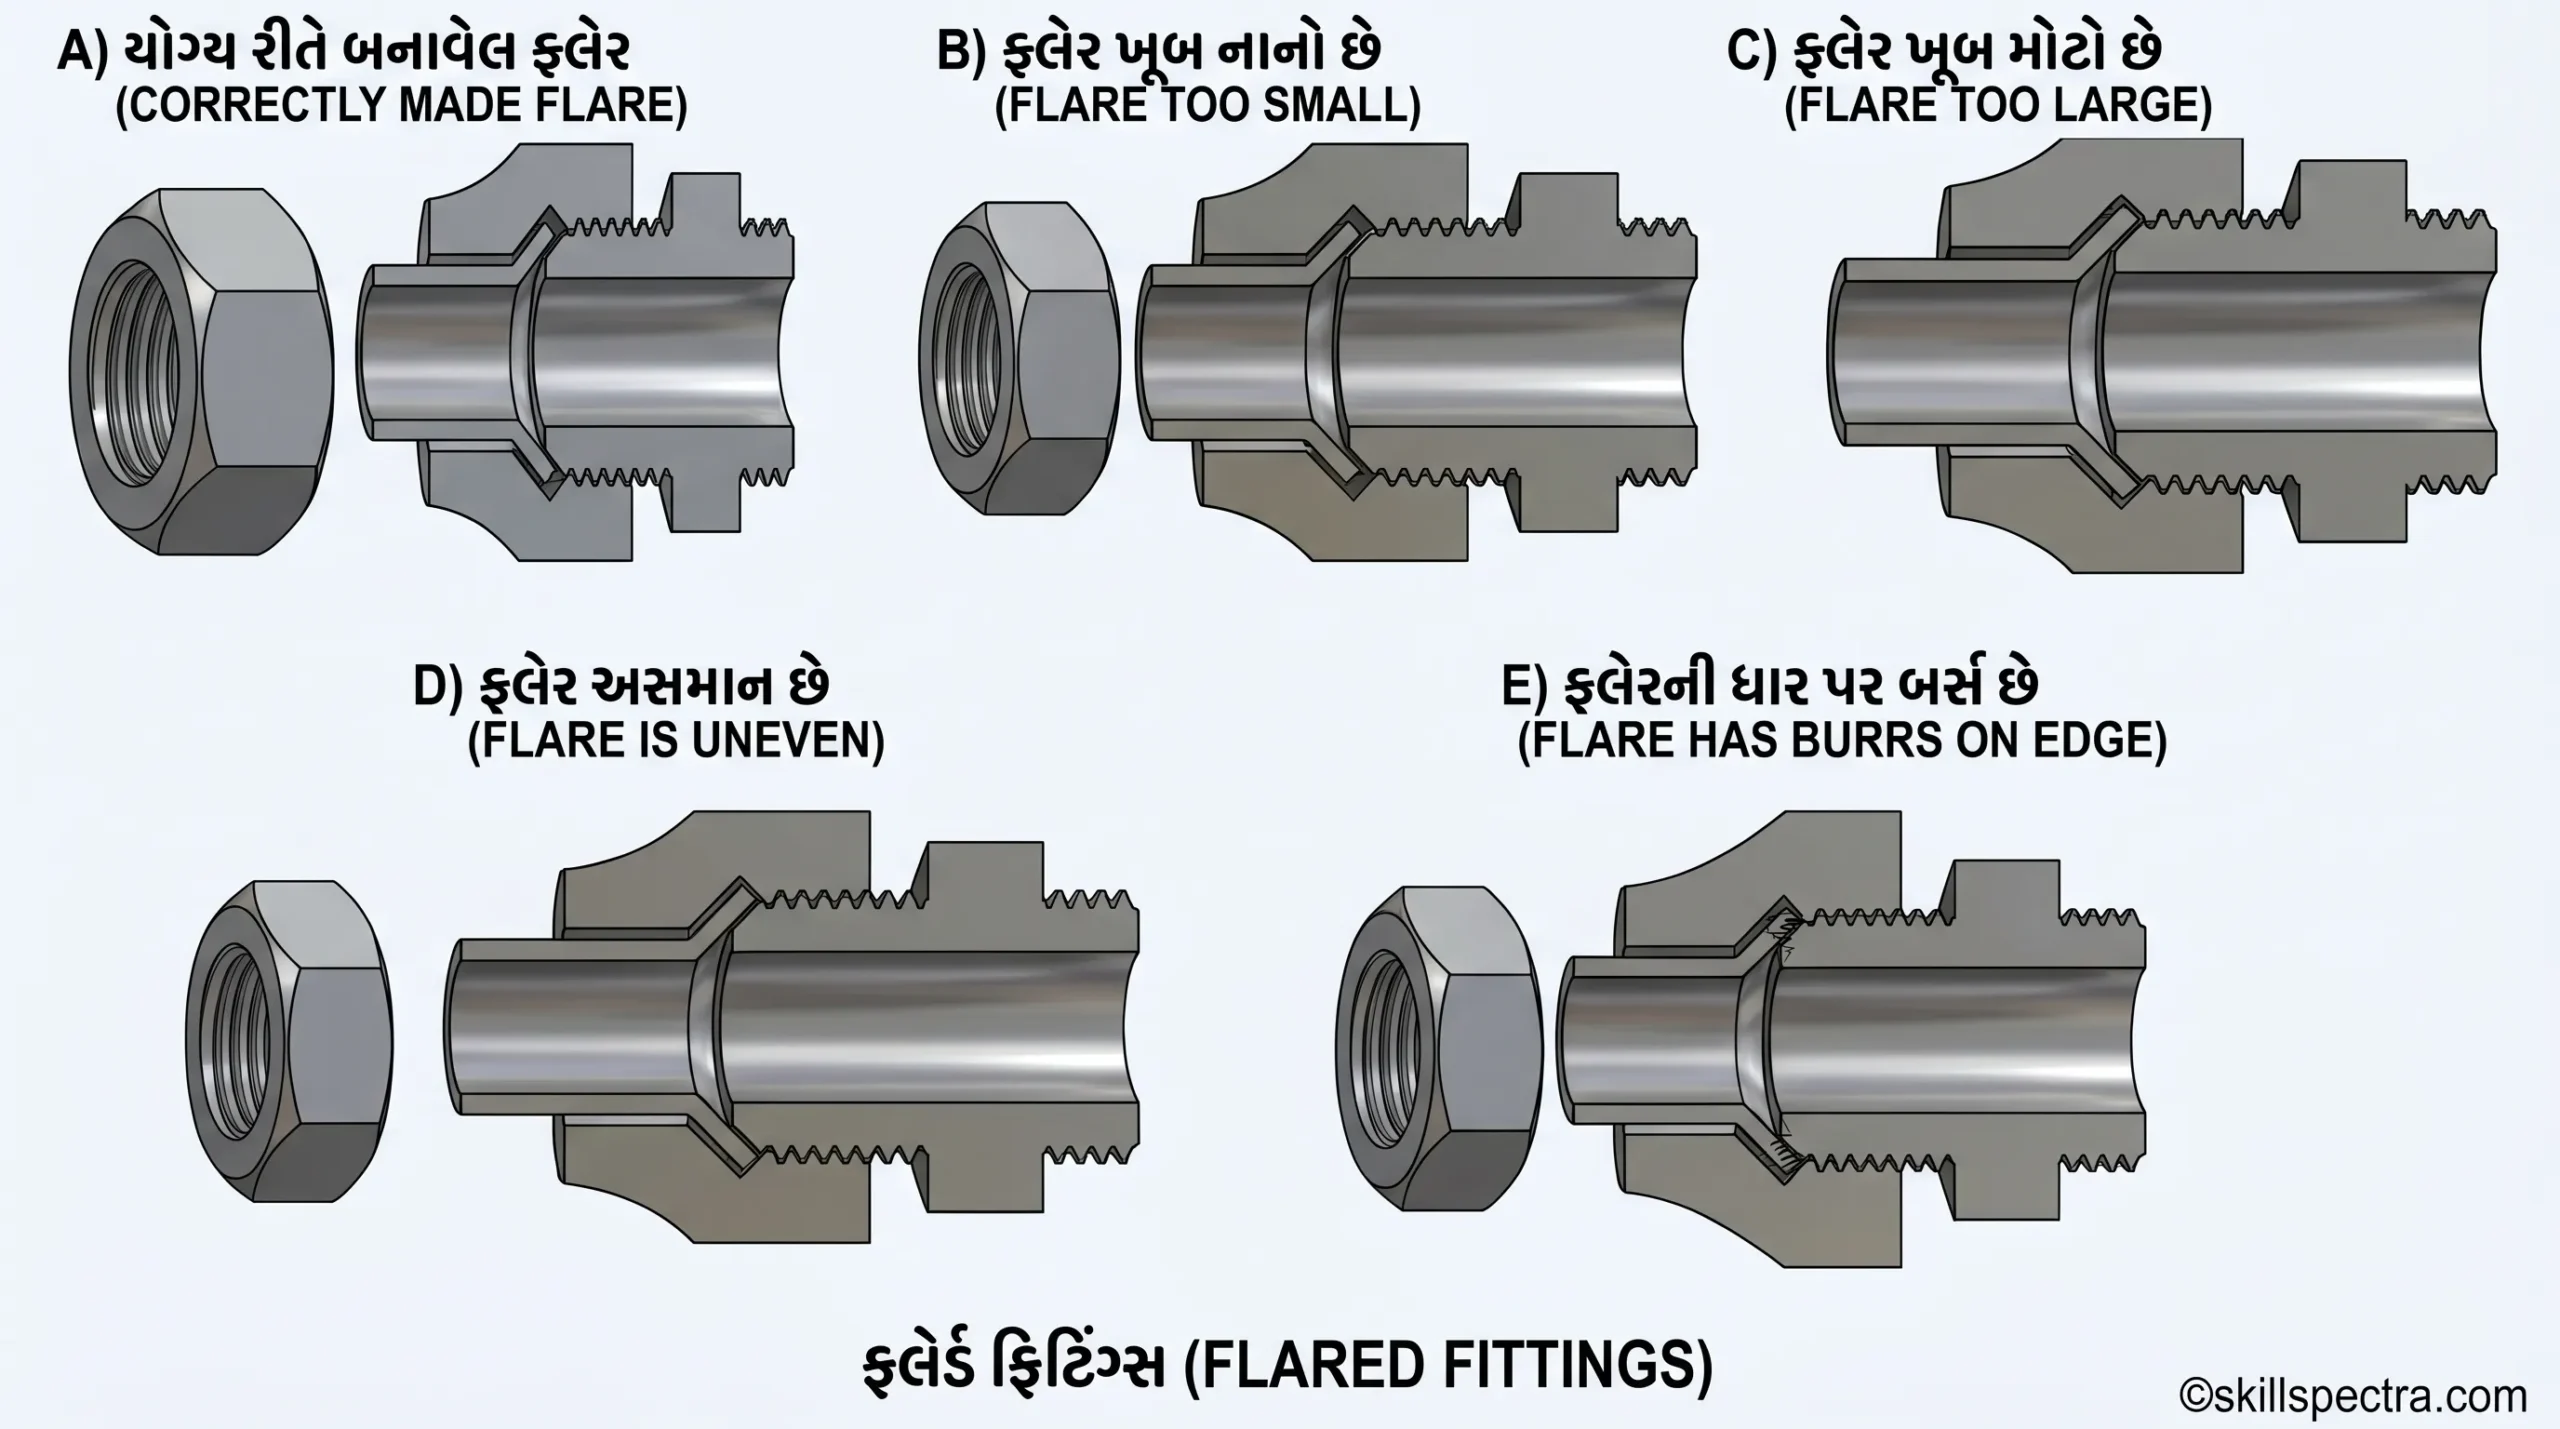
નોંધ: Figure માં સાચા અને ખામીયુક્ત (defective) ફ્લેર દર્શાવવામાં આવ્યા છે.
Flared Tubing Fittings:
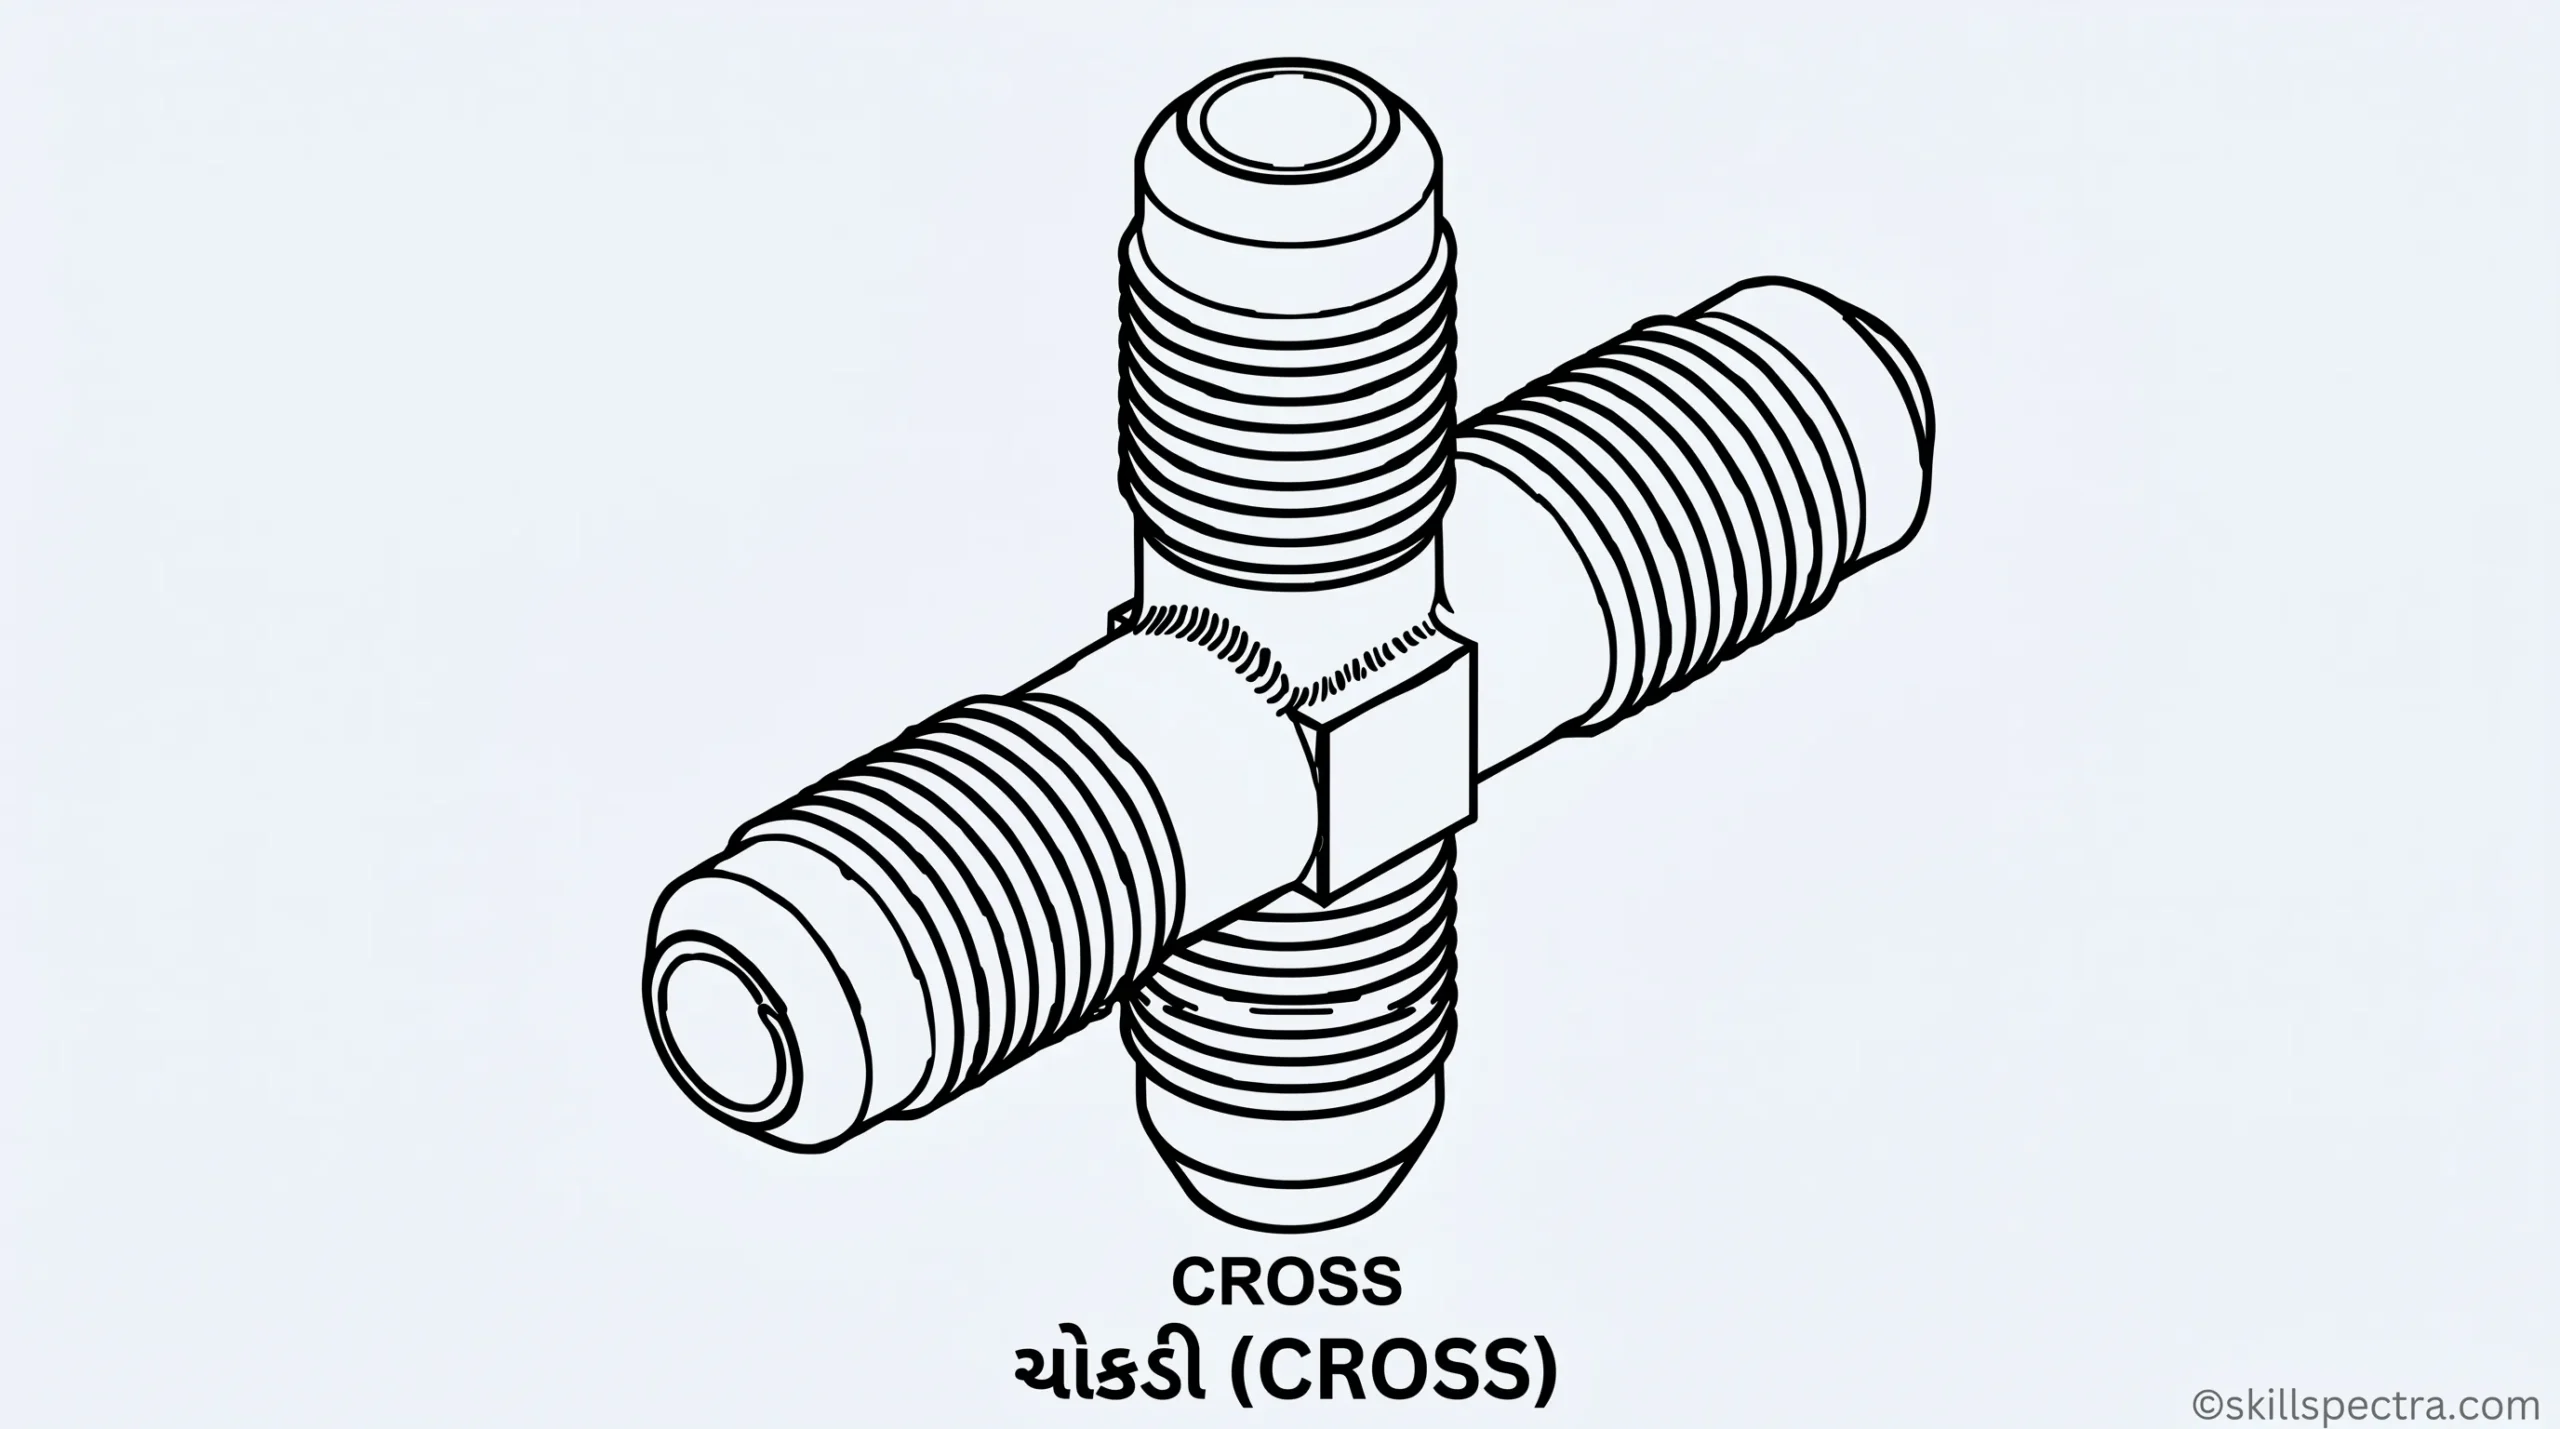
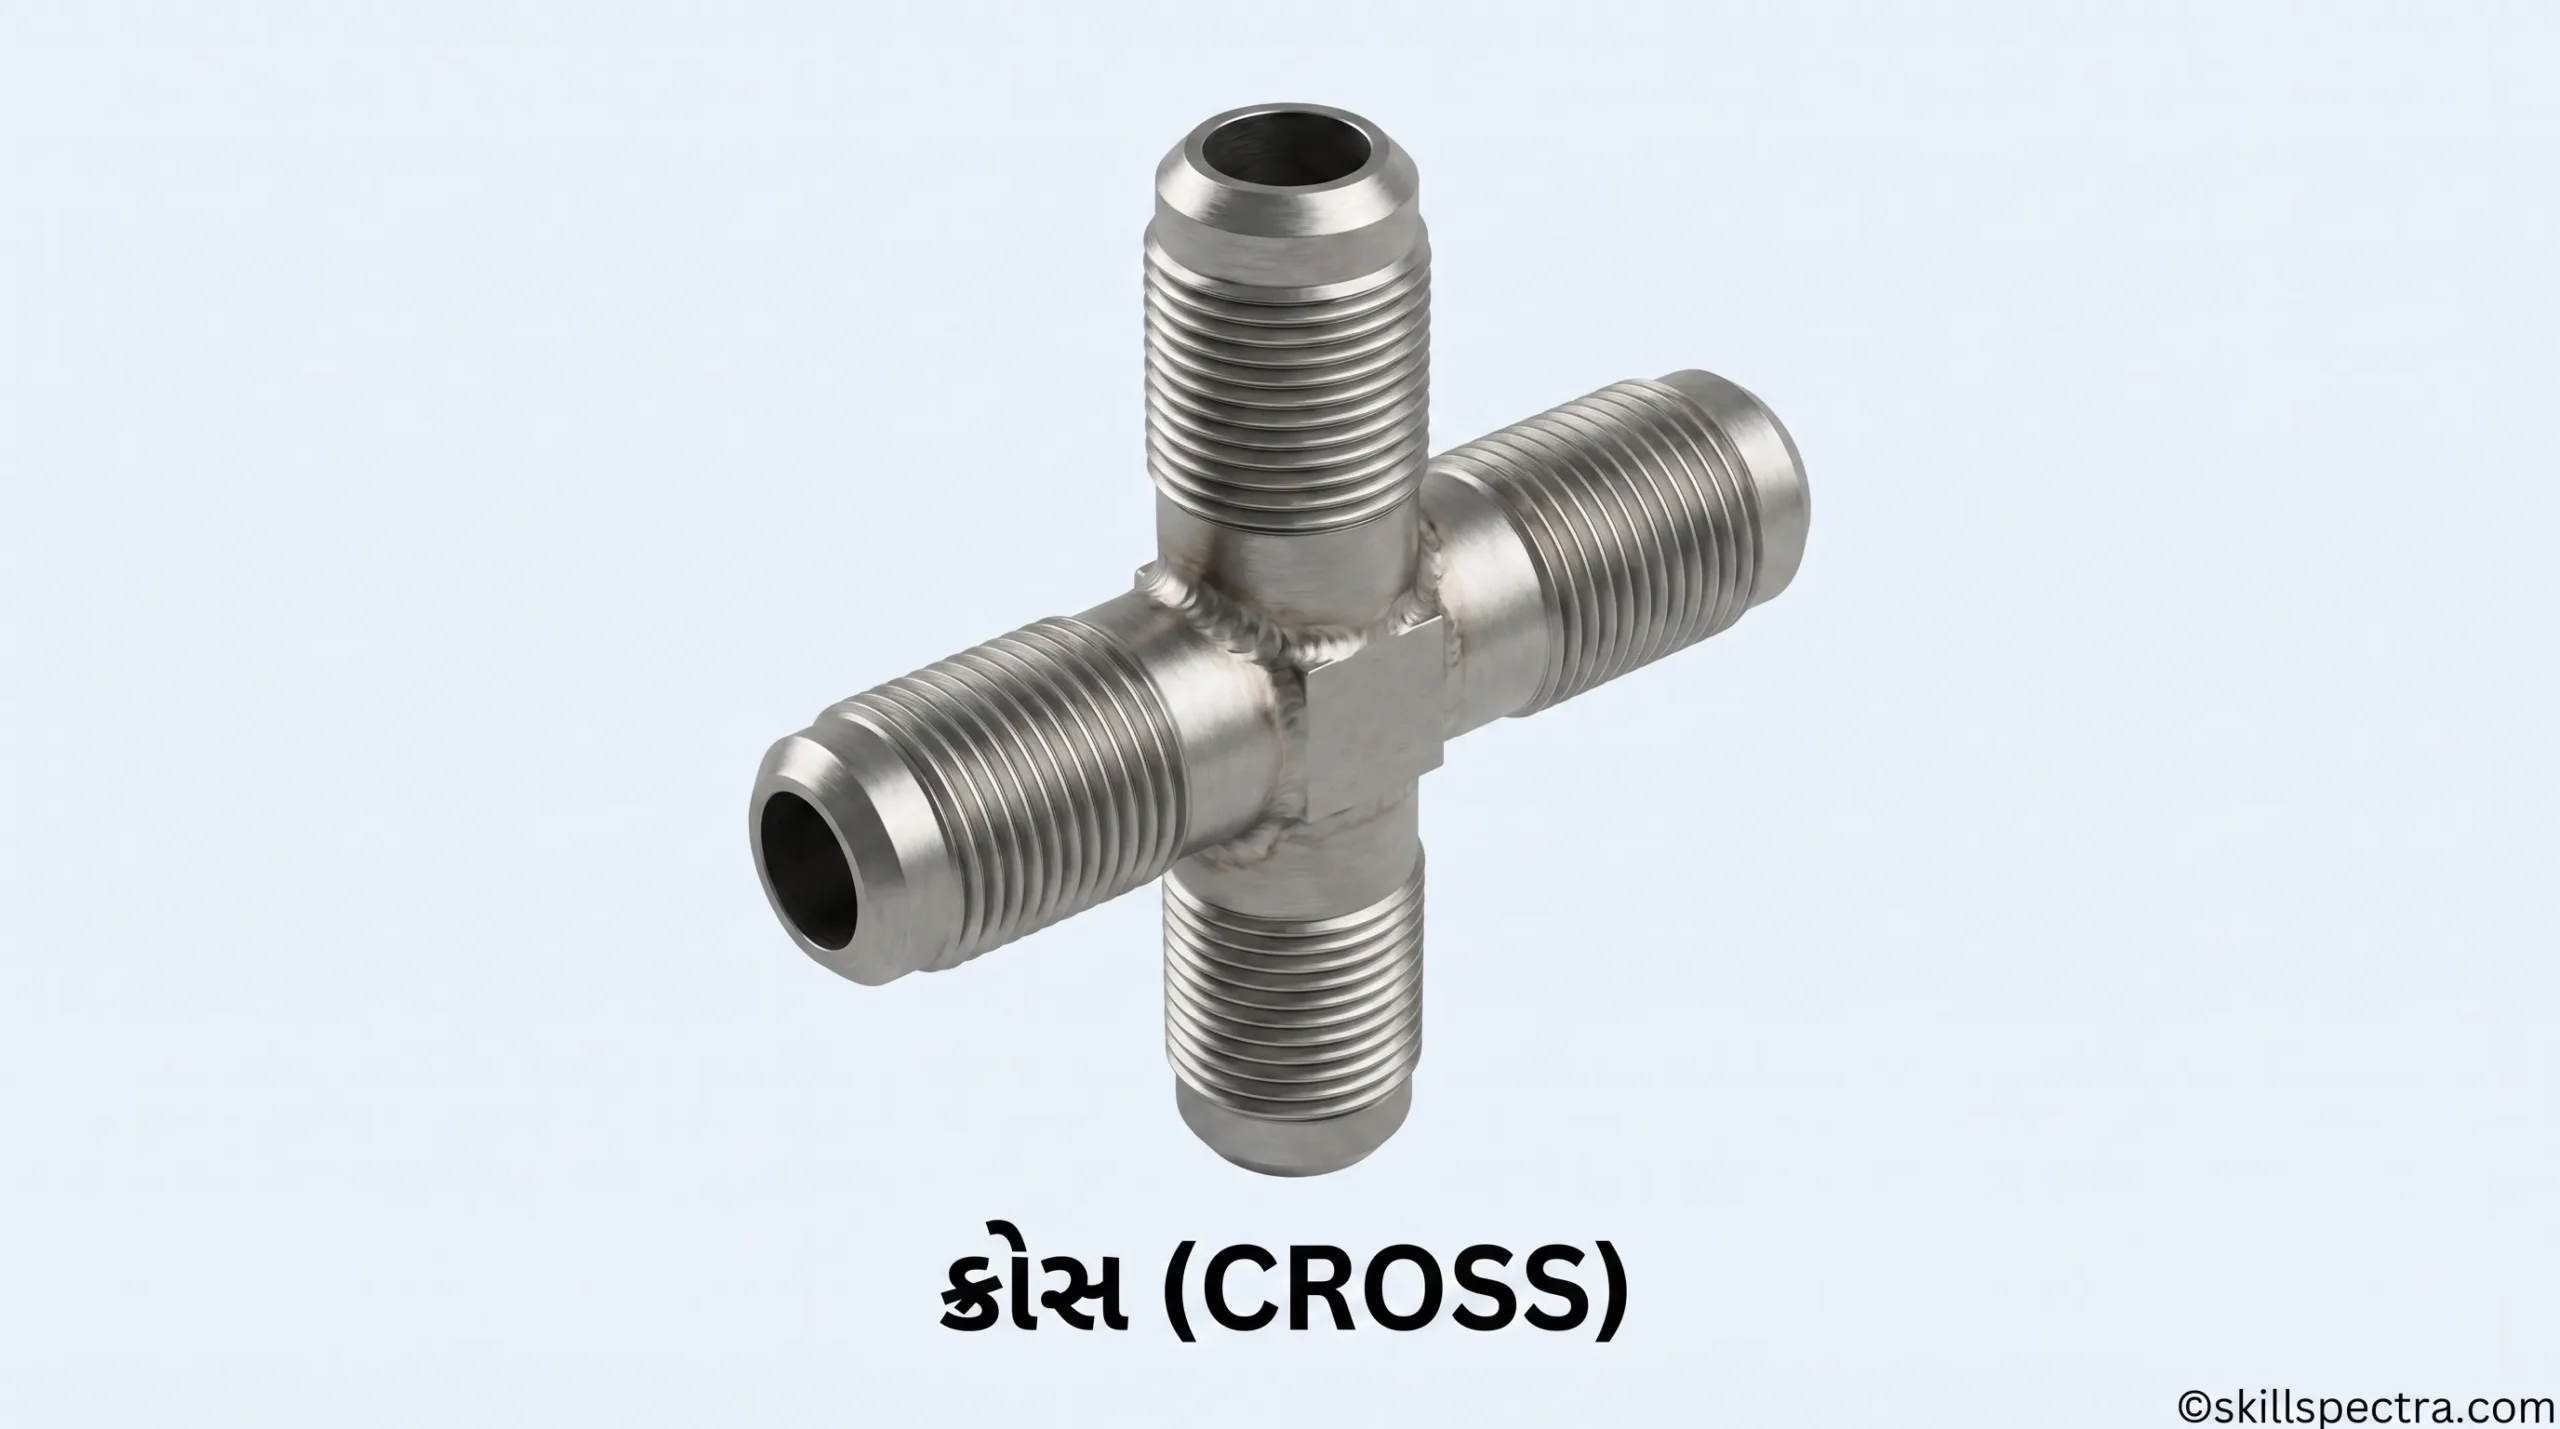
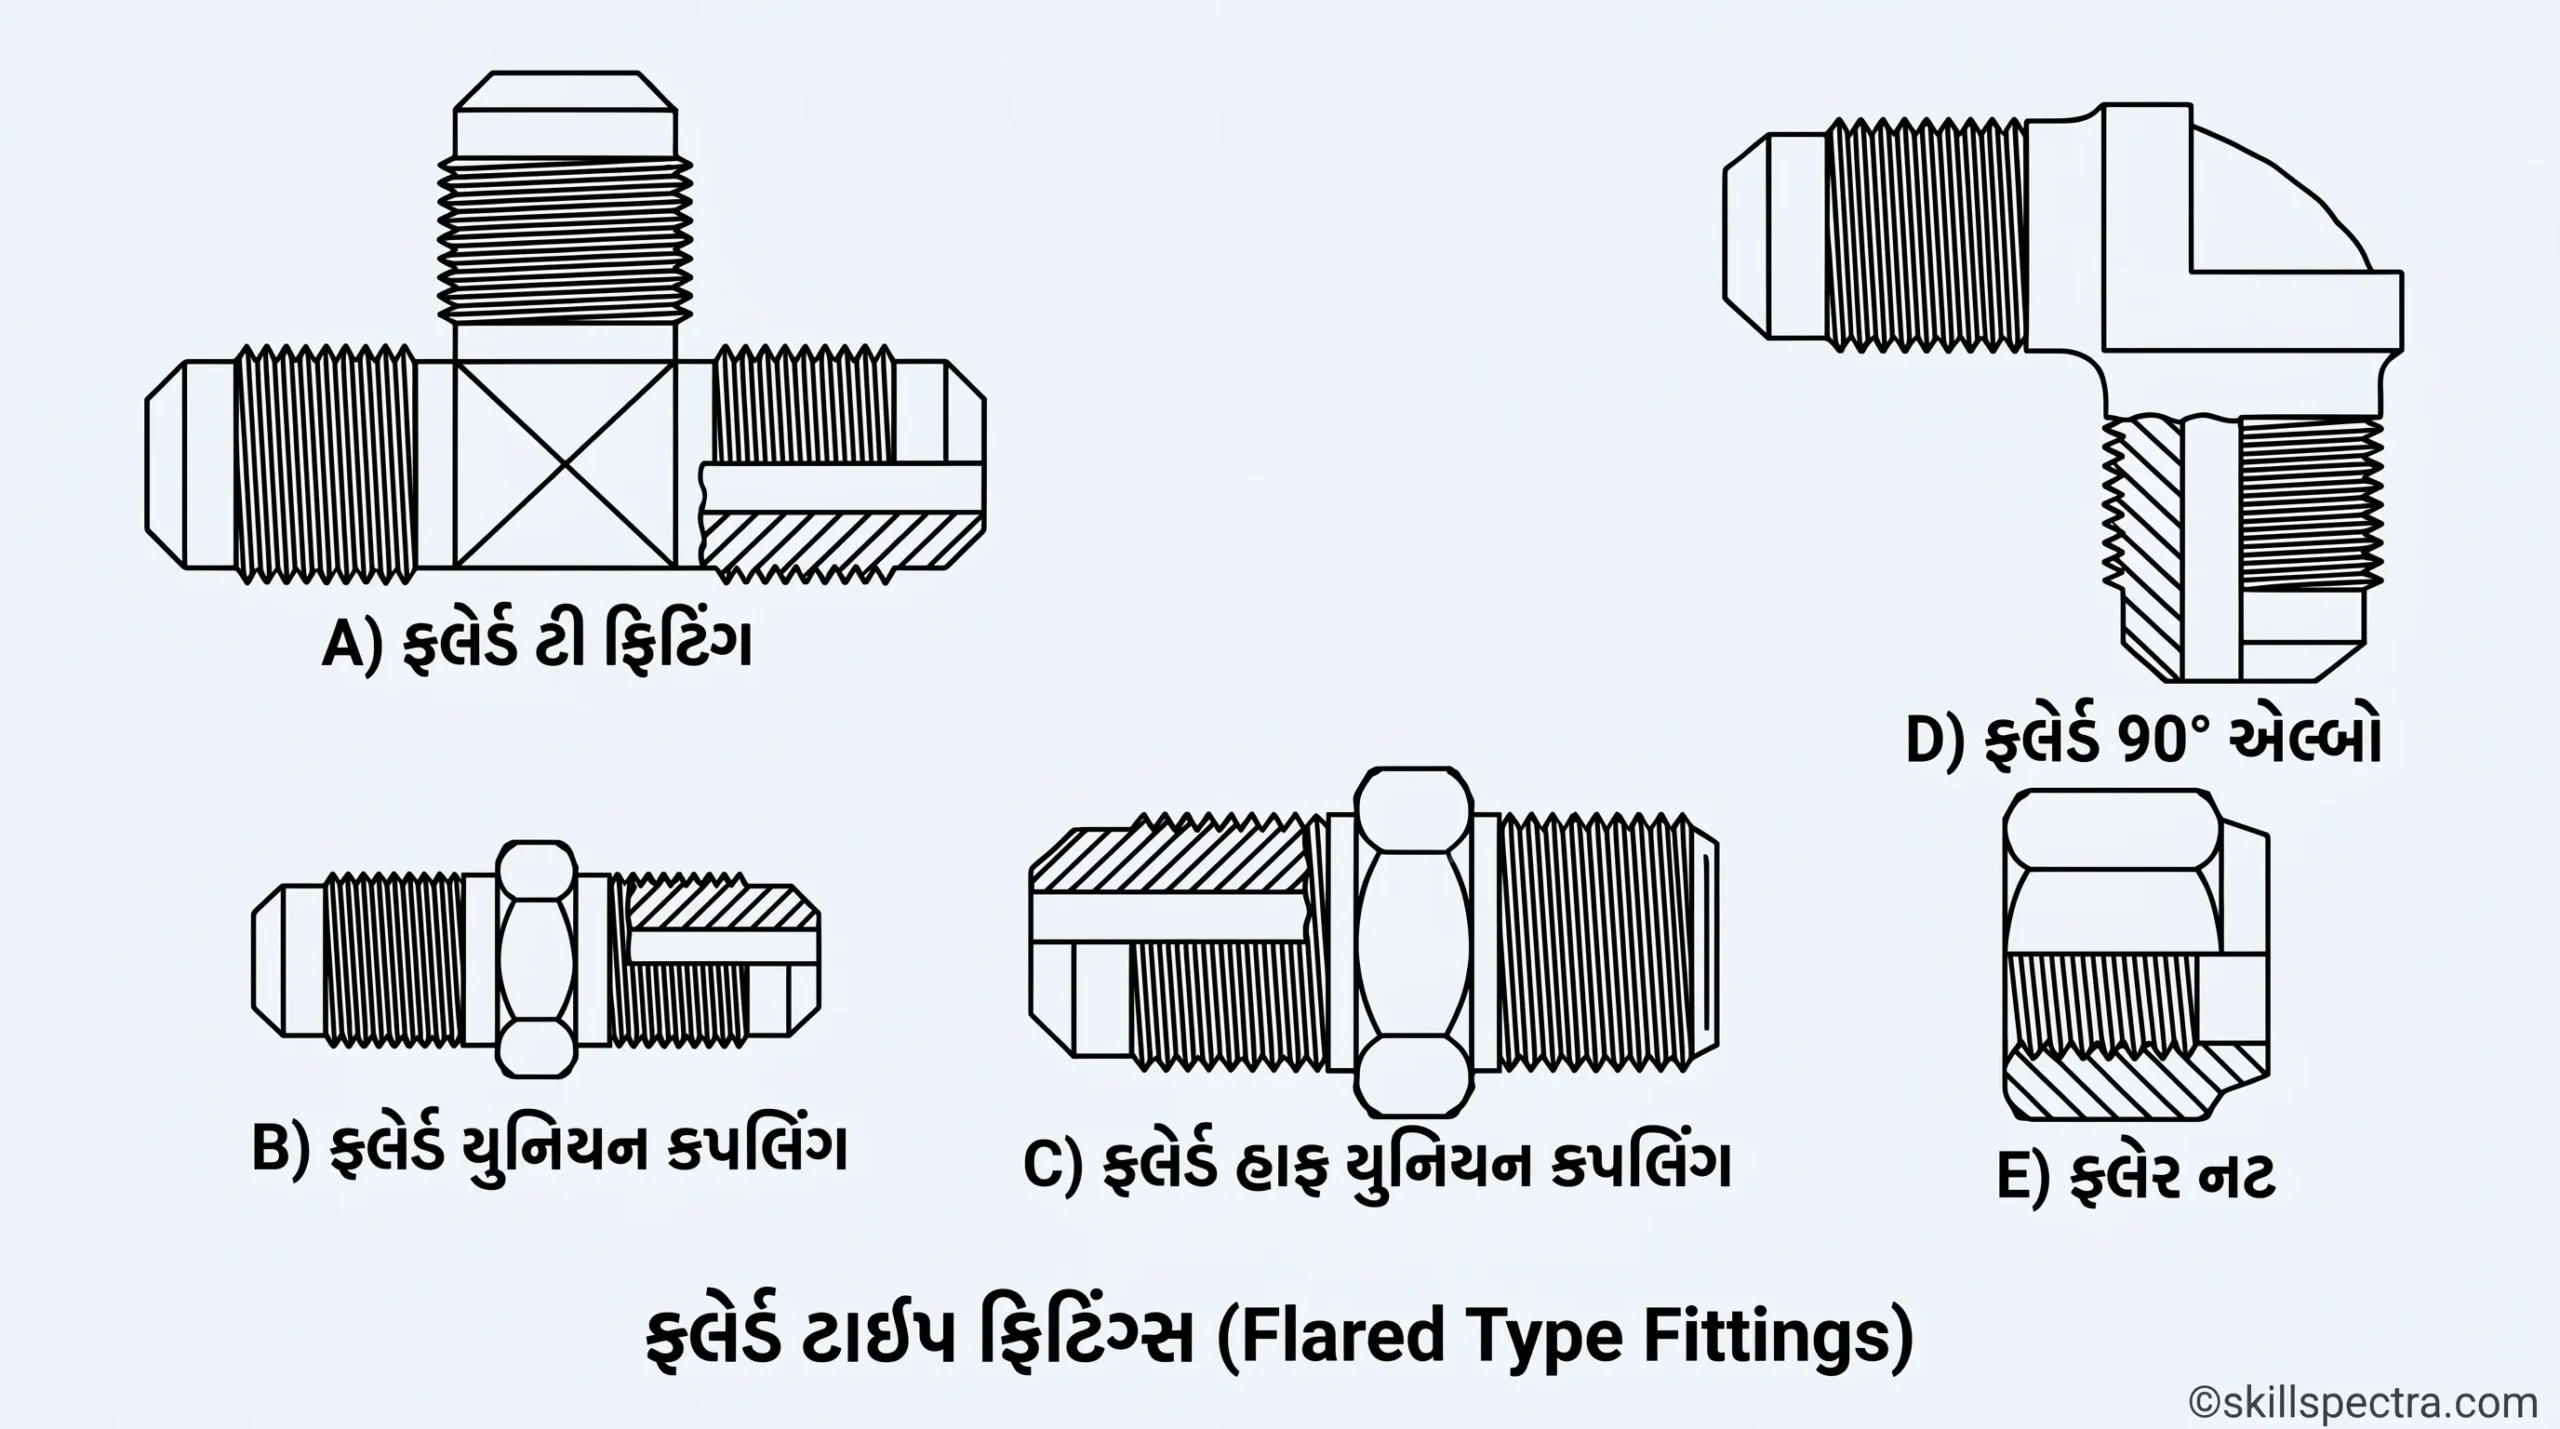
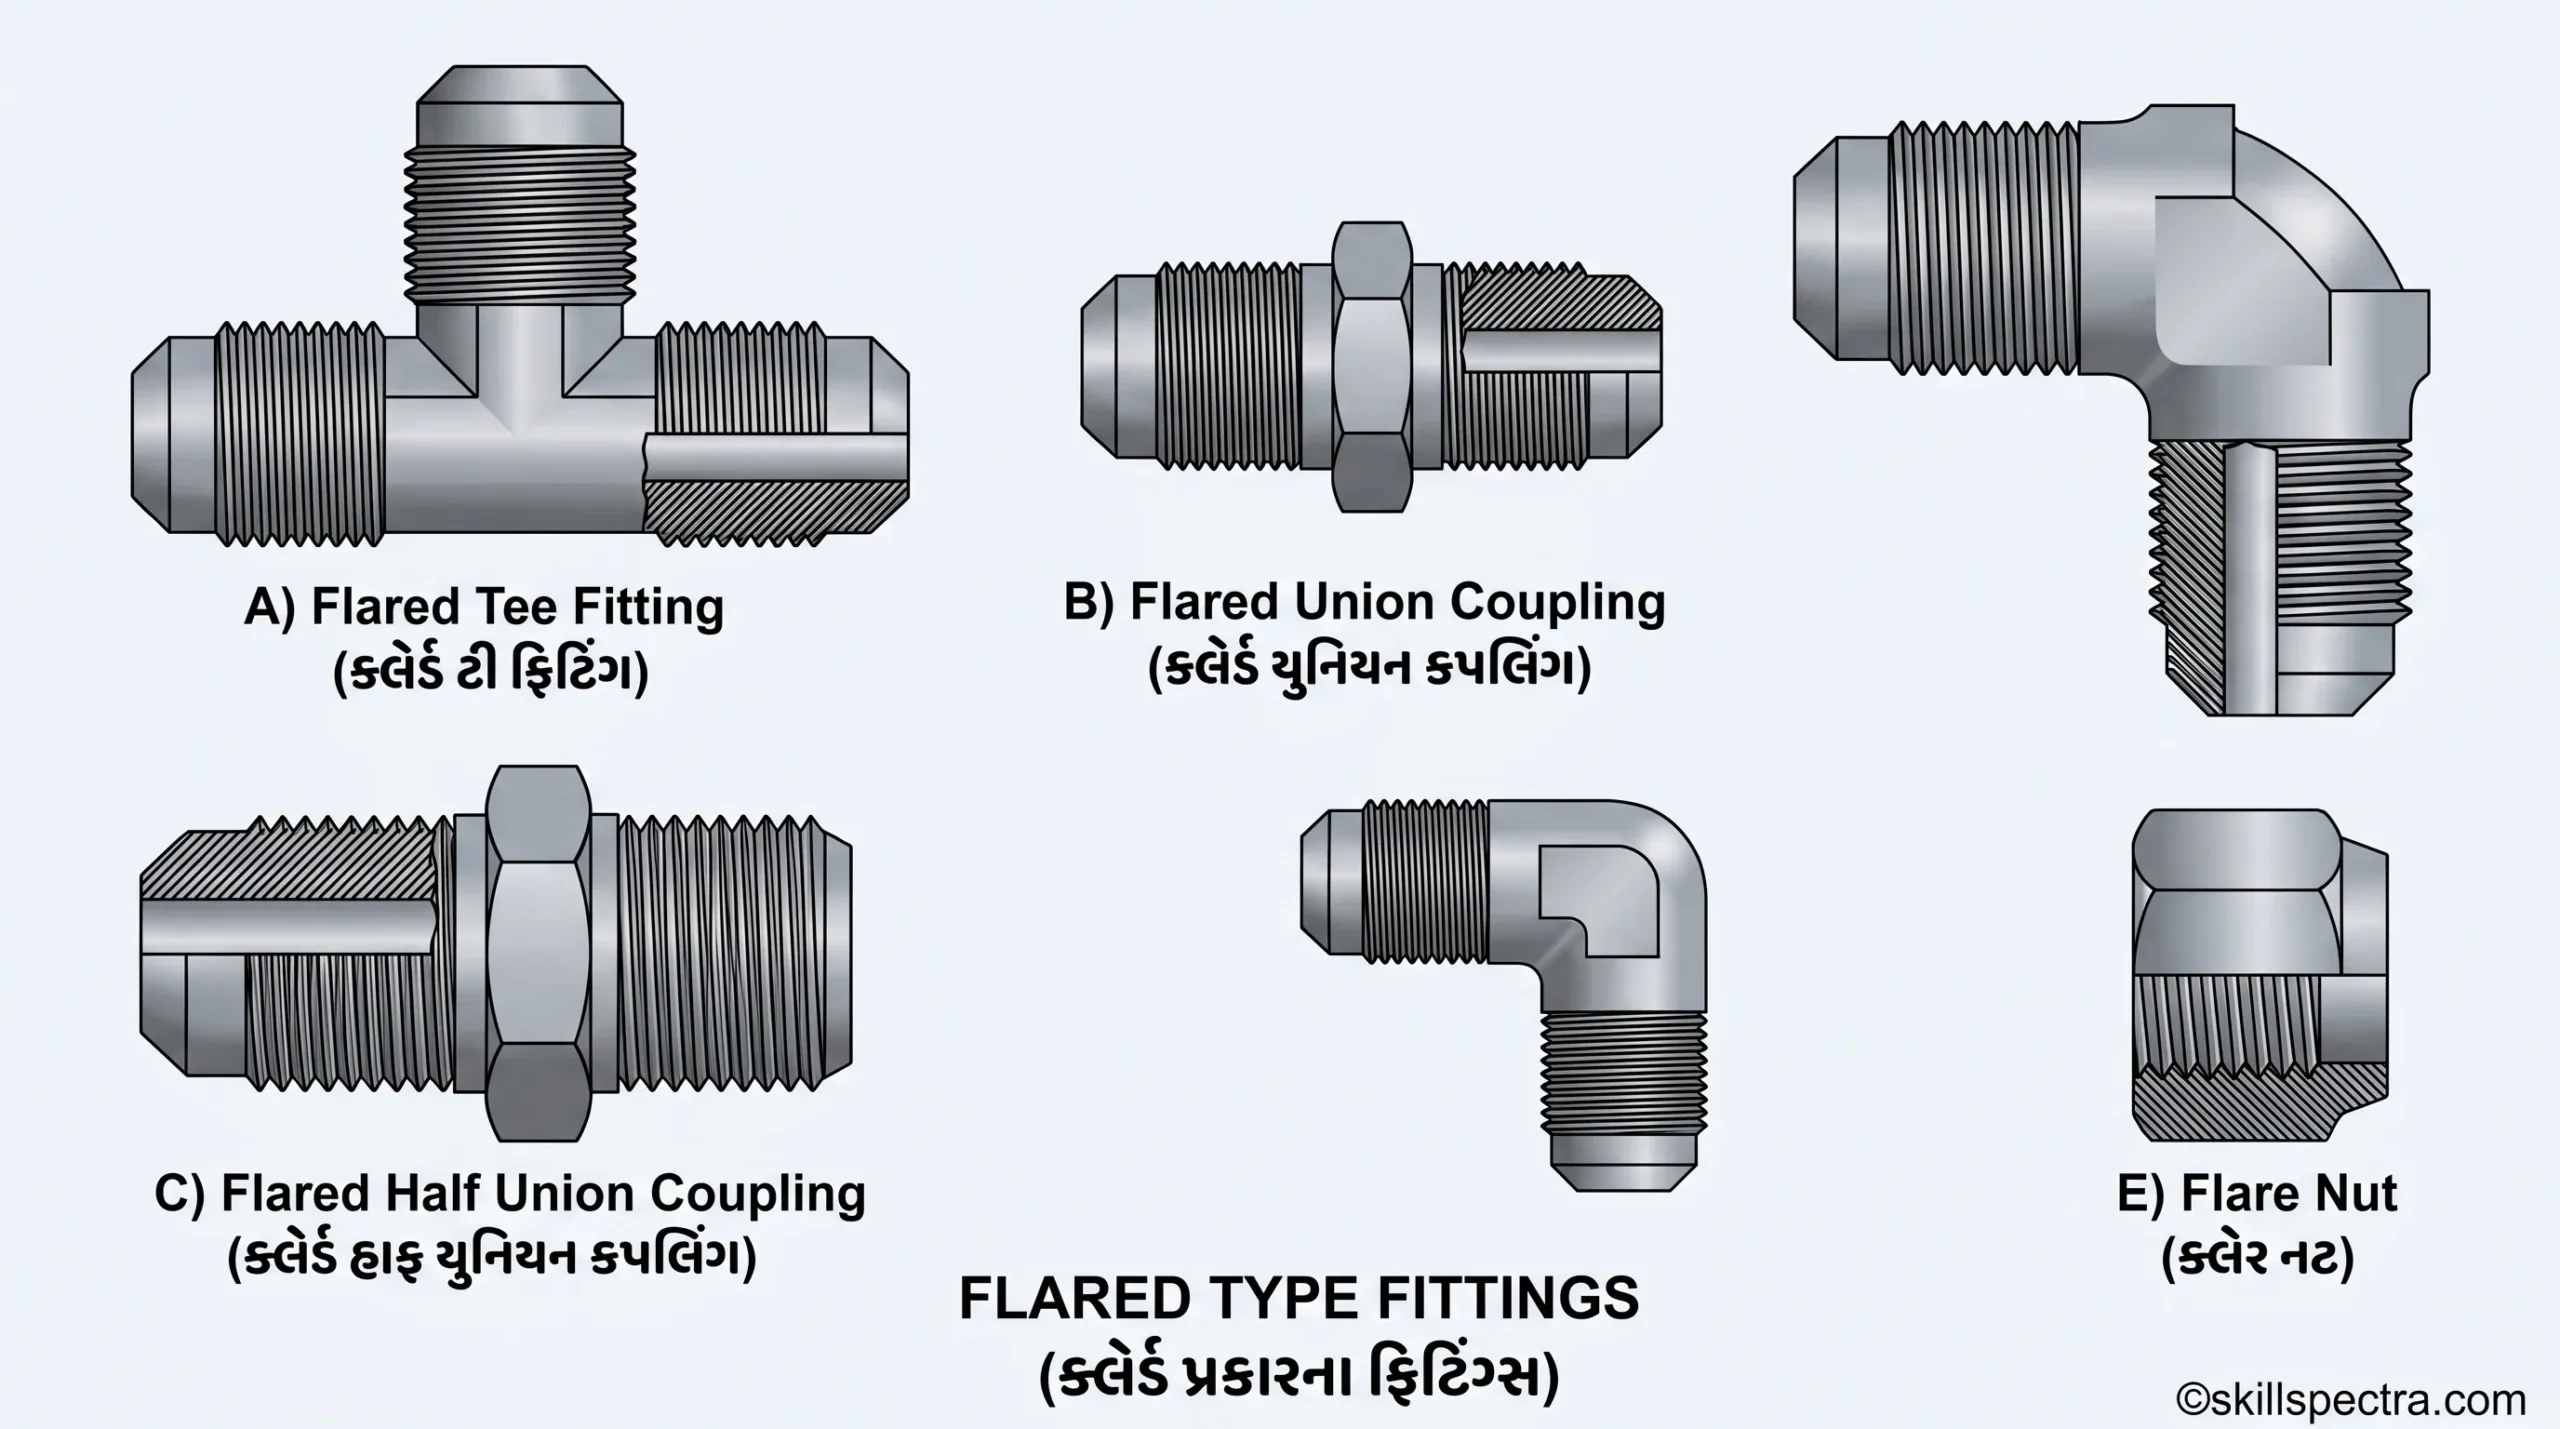
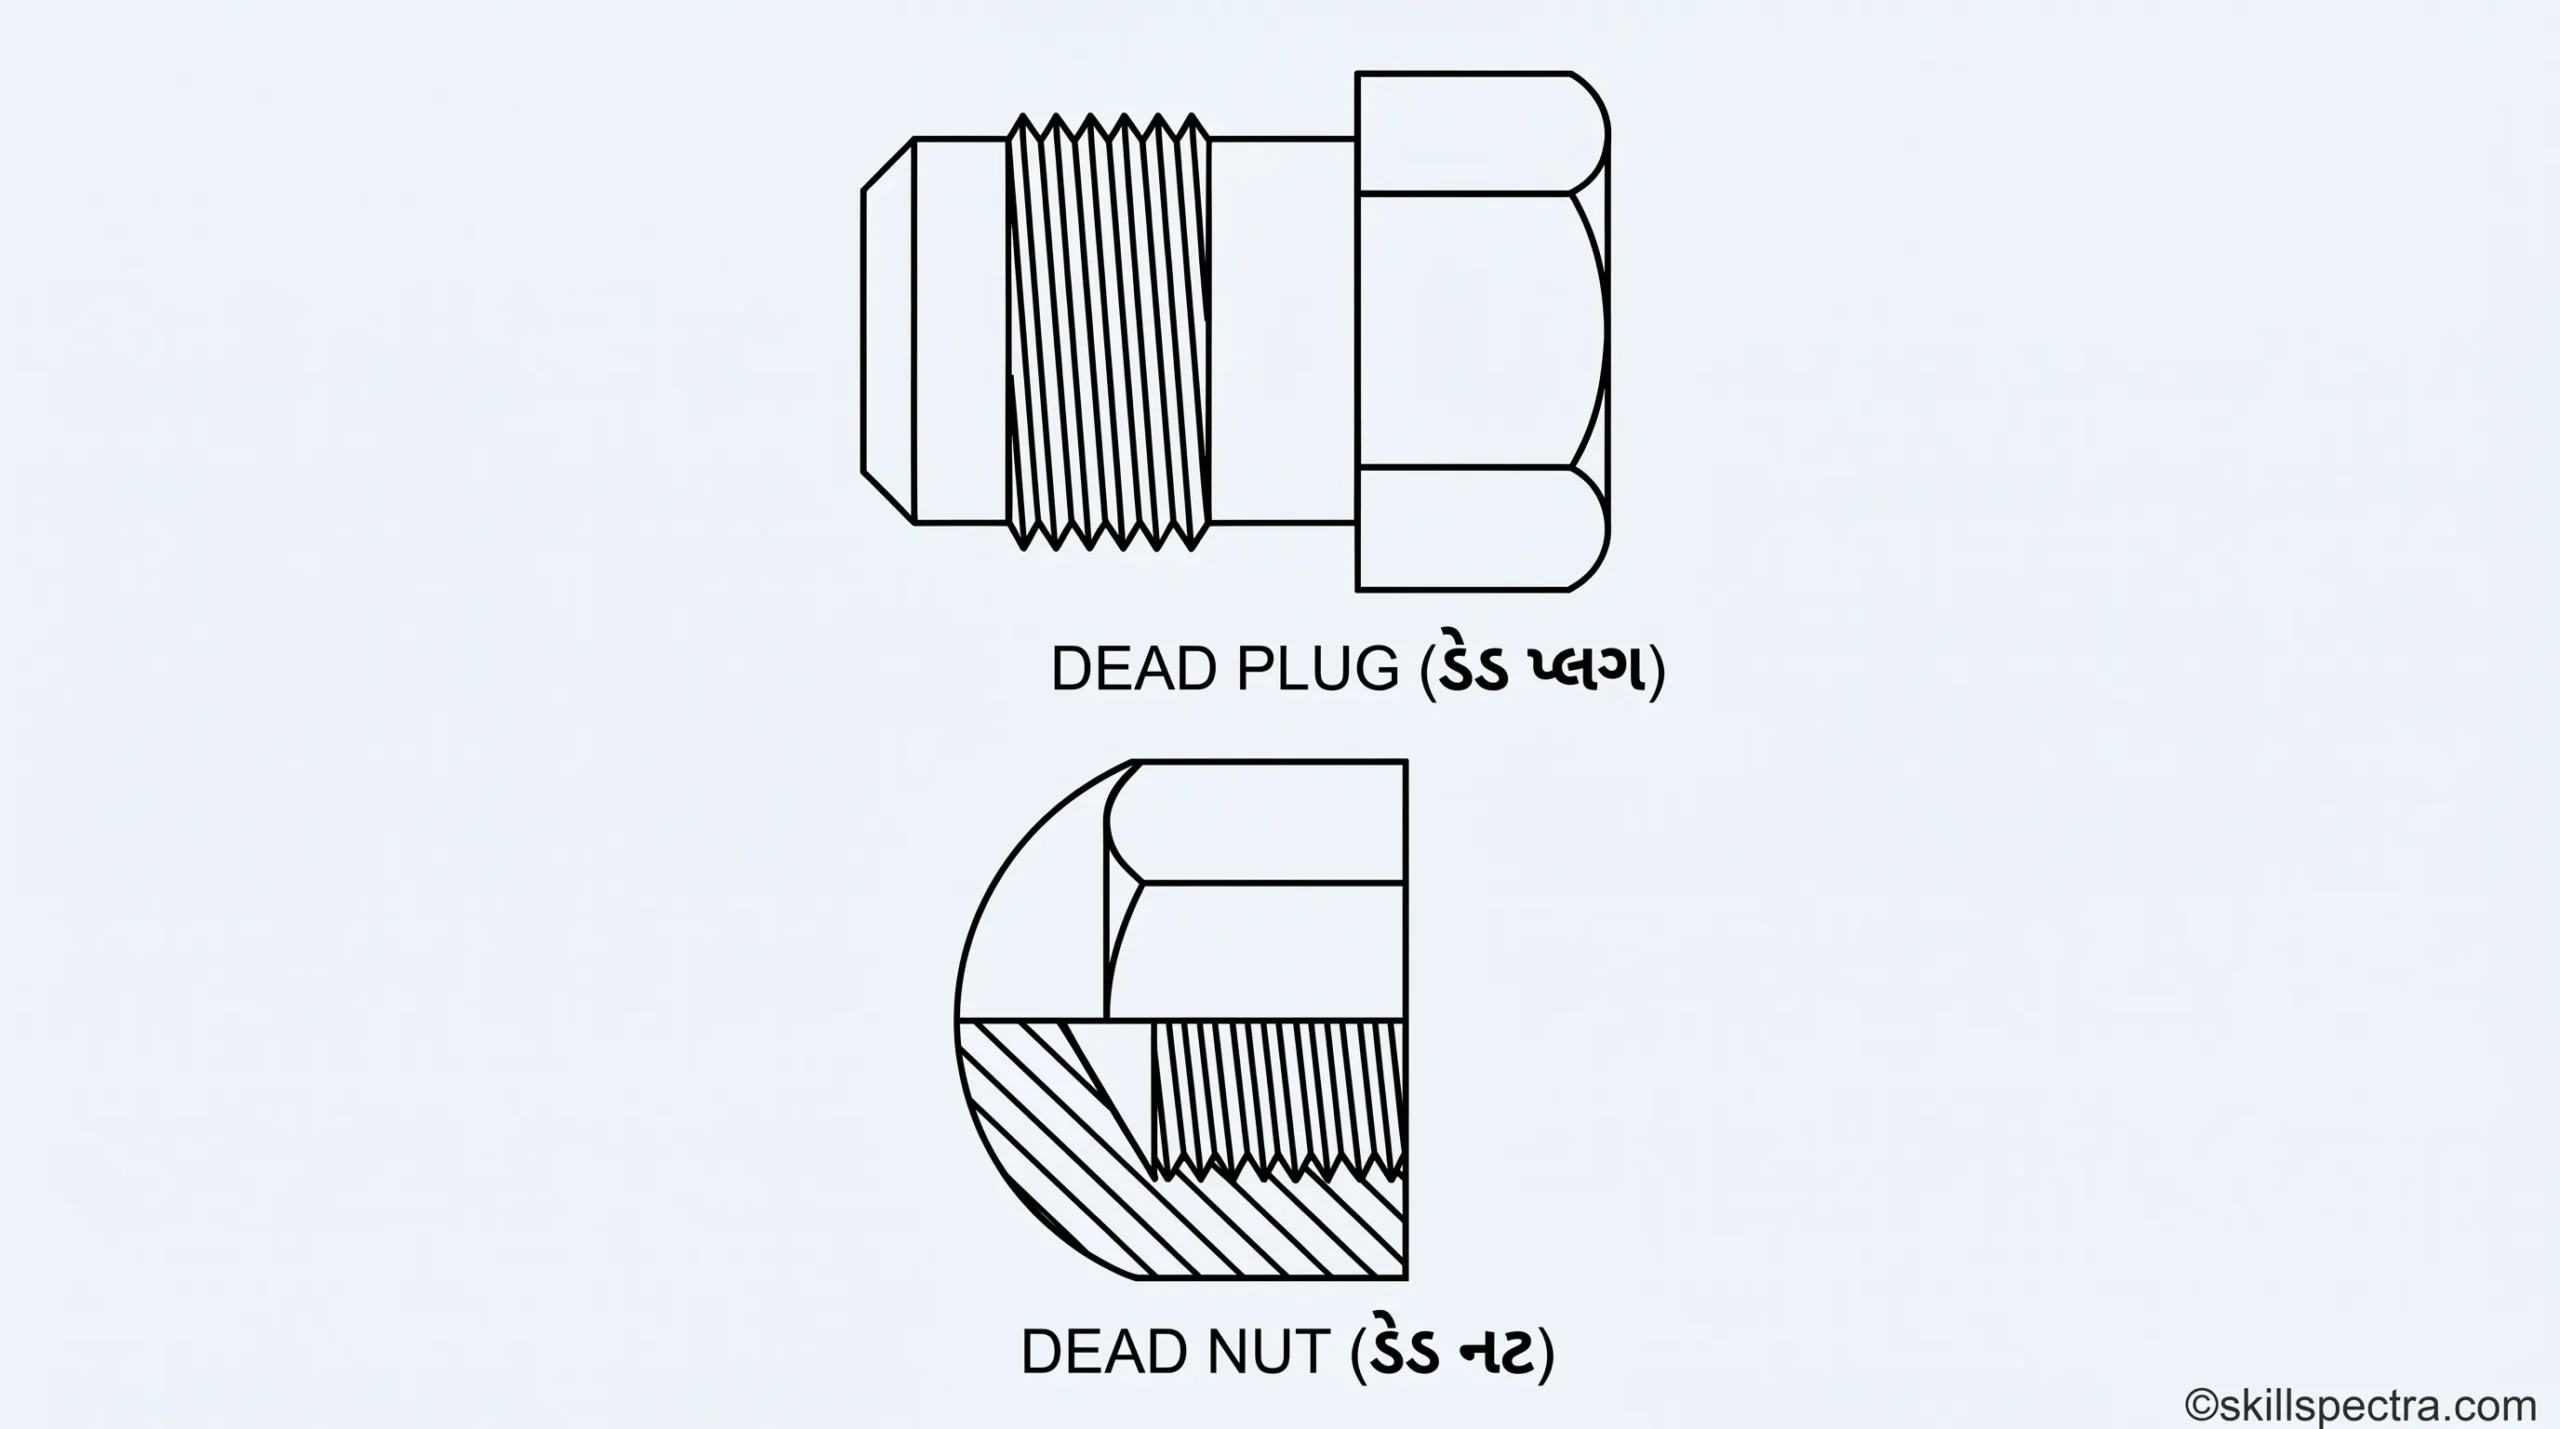
નરમ કોપર ટ્યુબિંગ (soft copper tubing) ને જોડવા માટે flared type connection વપરાય છે. સામાન્ય રીતે વપરાતા fittings નીચે મુજબ છે (Fig 4 to 6):
- A) Flared Tee Fitting 👕
- B) Flared Union Coupling 🔗
- C) Flared Half Union Coupling
- D) Flared 90° Elbow 📐
- E) Flare Nut
- Cross
- Dead Plug & Dead Nut 🔩
Pressurizing the Joint on Tubing (જોઈન્ટનું ટેસ્ટિંગ):
જોઈન્ટ લીક થાય છે કે નહીં તે તપાસવા માટે Air pressure નો ઉપયોગ થાય છે:
- Air Compressor માંથી: 150 PSI અથવા 10 Kg/cm² પ્રેશર આપવું.
- લીક શોધવા માટે Soap solution (સાબુનું દ્રાવણ) વાપરી શકાય છે. 🫧
✂️ Pipe Cutter (પાઈપ કટર )
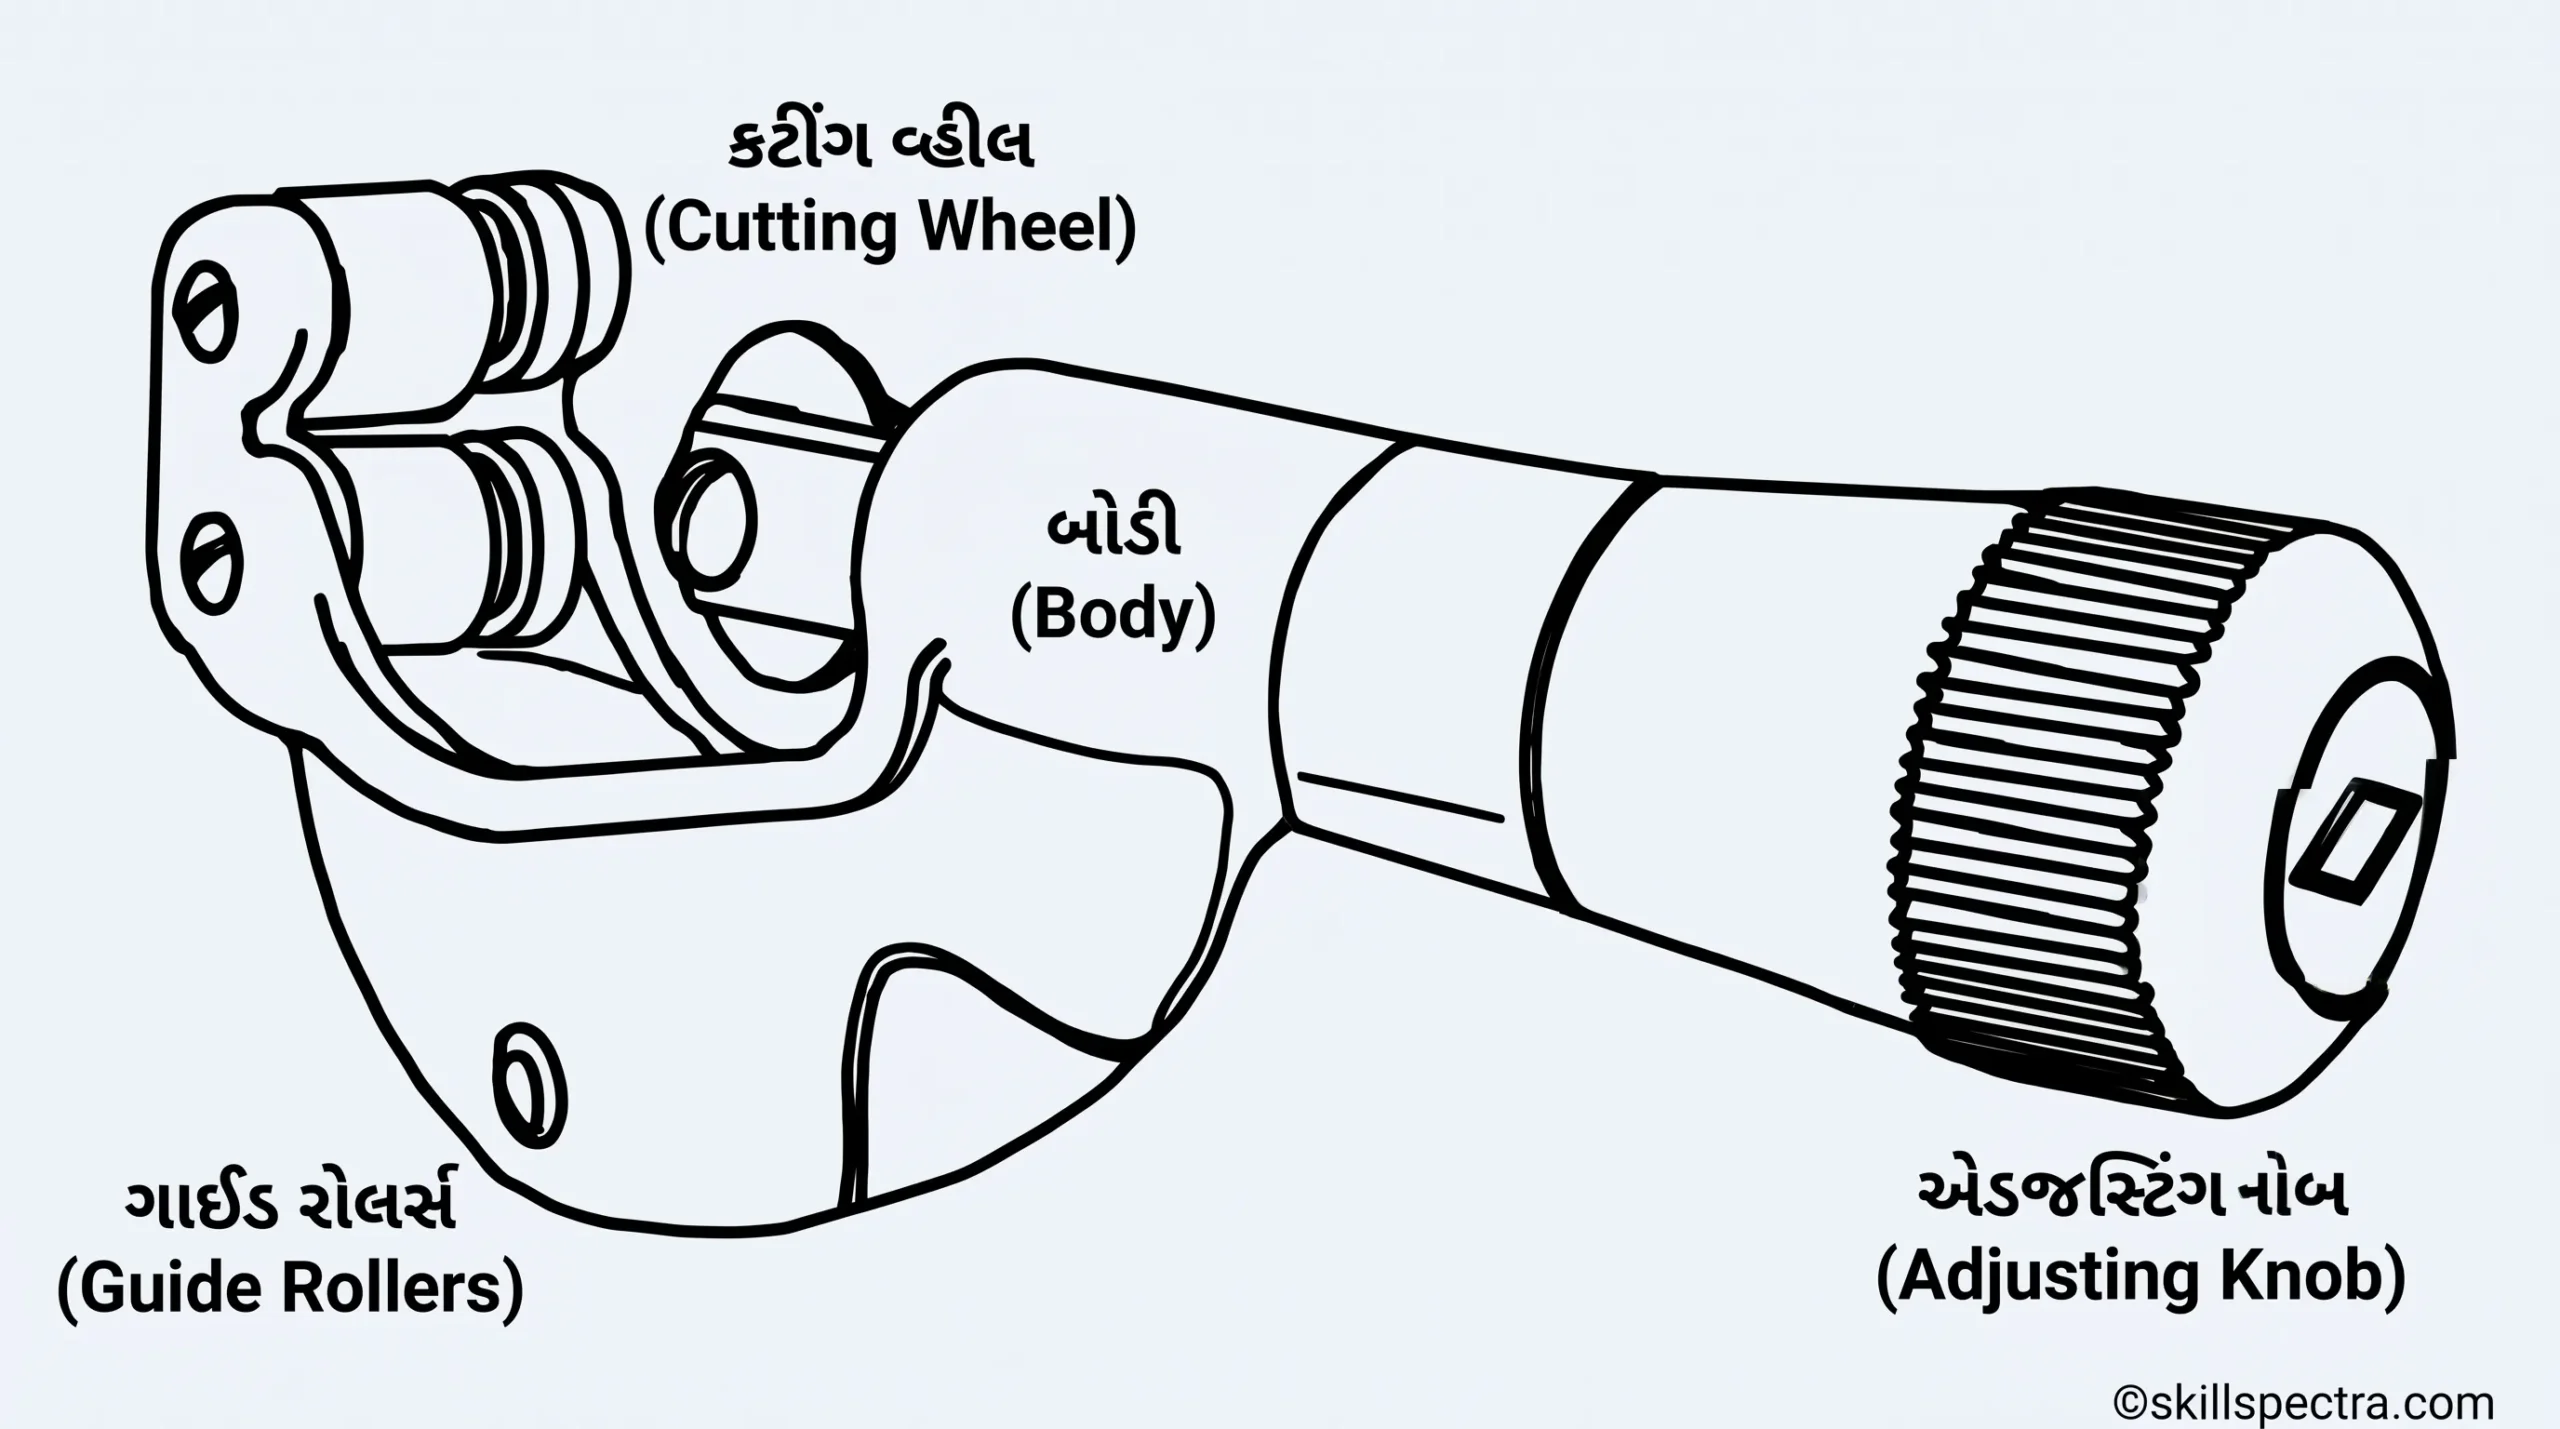
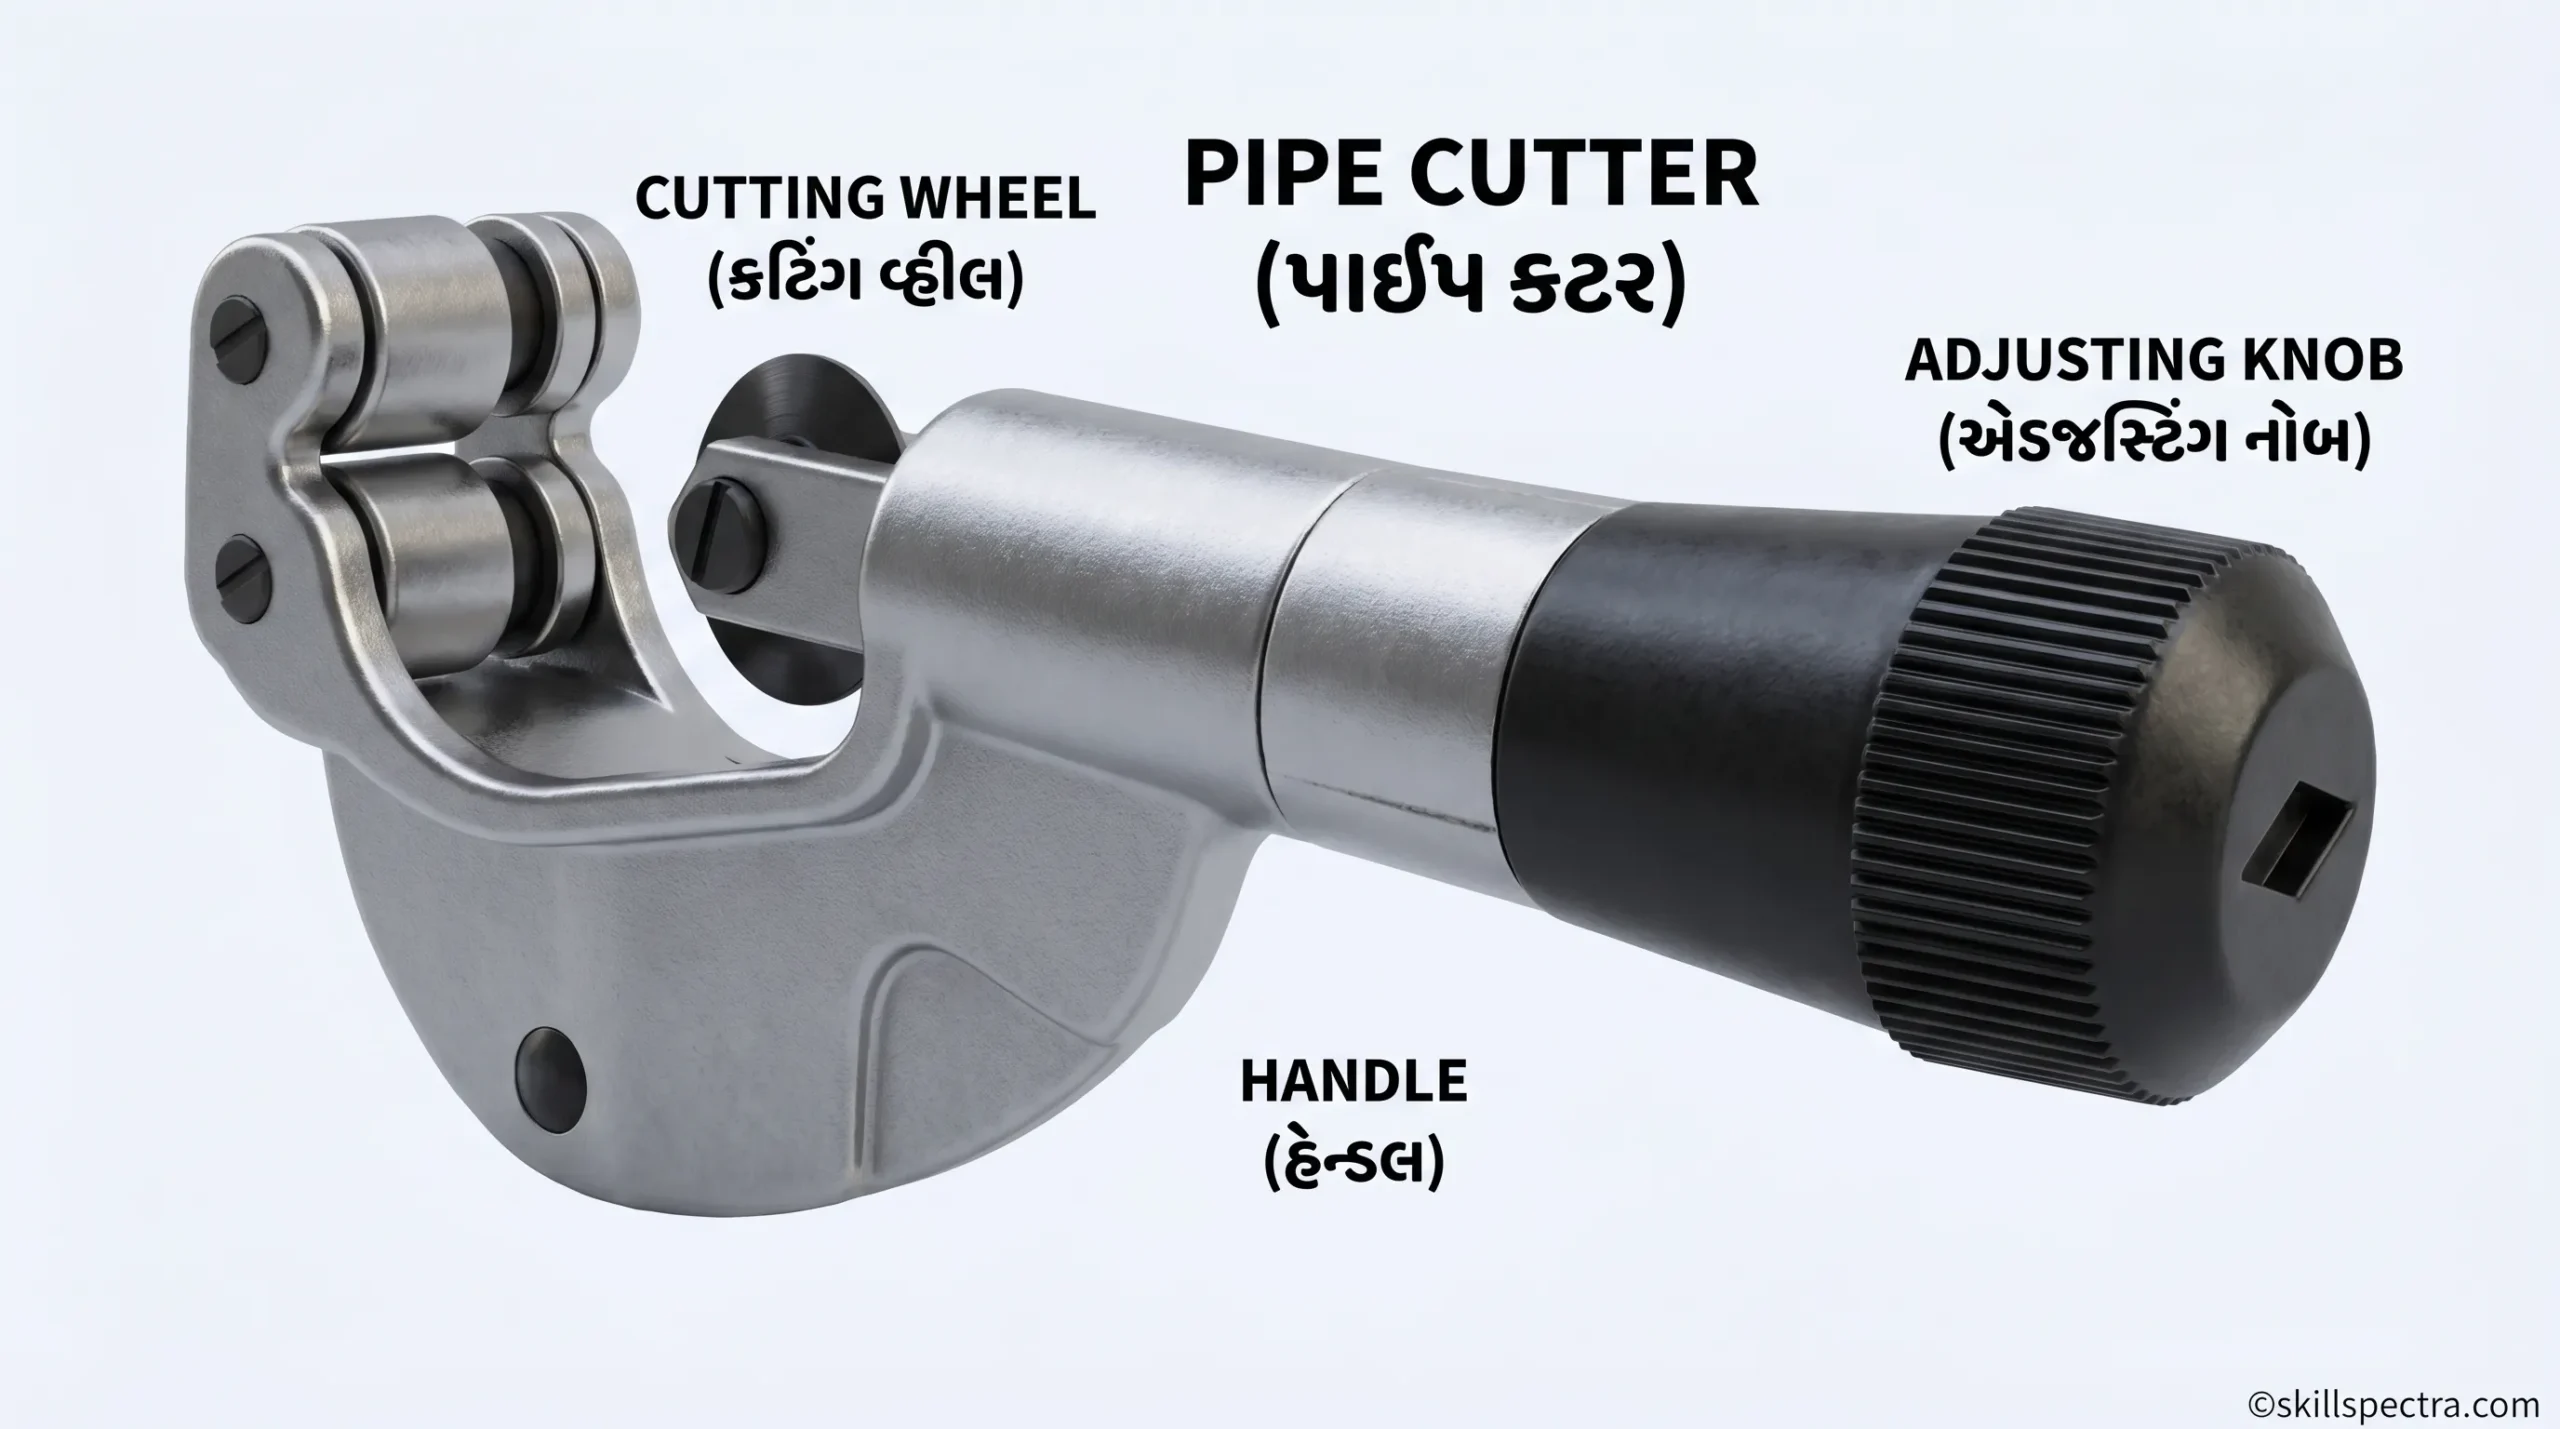
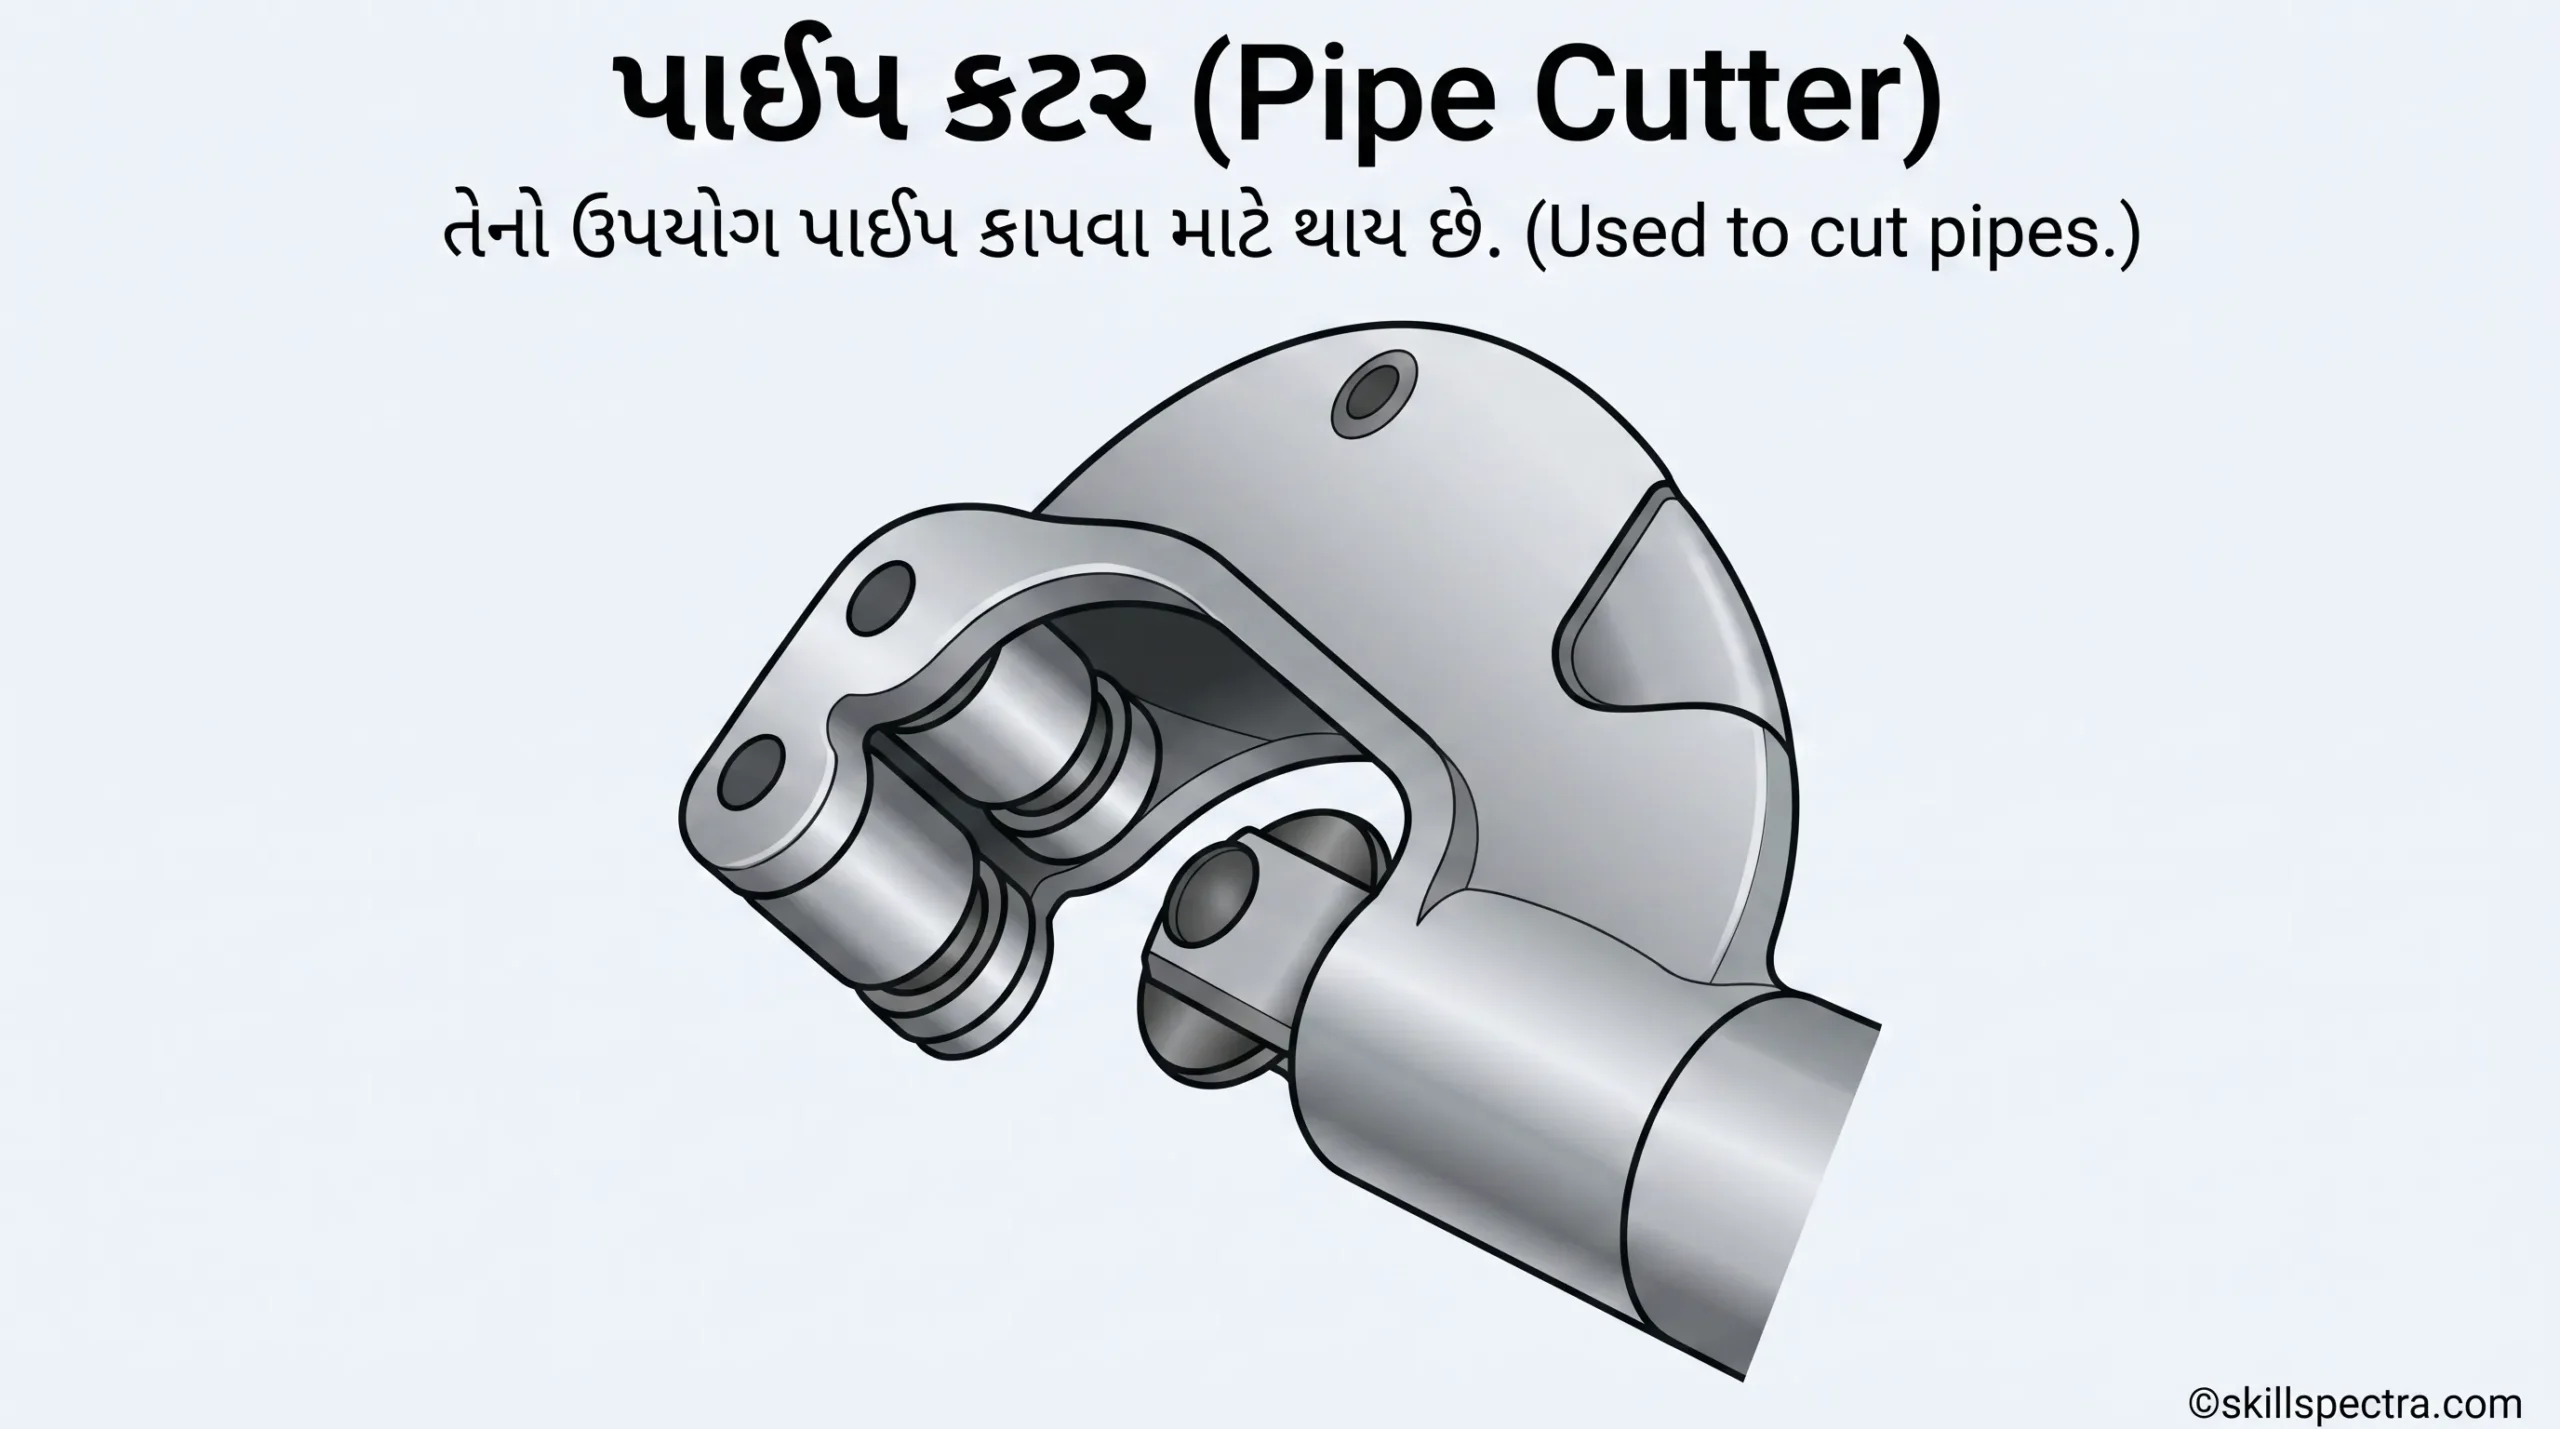
પાઈપ અને મેટલ ટ્યુબિંગ કાપવા માટે કરવત (saw) કરતા Pipe cutter વધુ અનુકૂળ અને ઉત્તમ છે.
- તેમાં એક sharpened wheel હોય છે જે કટિંગ કરે છે.
- જેમ જેમ ટૂલ પાઈપની આસપાસ ફરે છે, તેમ સ્ક્રુ દ્વારા પ્રેશર વધારવામાં આવે છે, જે પાઈપને ચોકસાઈથી કાપે છે.
🏗️ Puller (પુલર)
Objectives (ઉદ્દેશ્યો):
- Puller નું કાર્ય (function) જણાવવું.
- Puller ના પ્રકારો જણાવવા.
Puller ની વ્યાખ્યા:
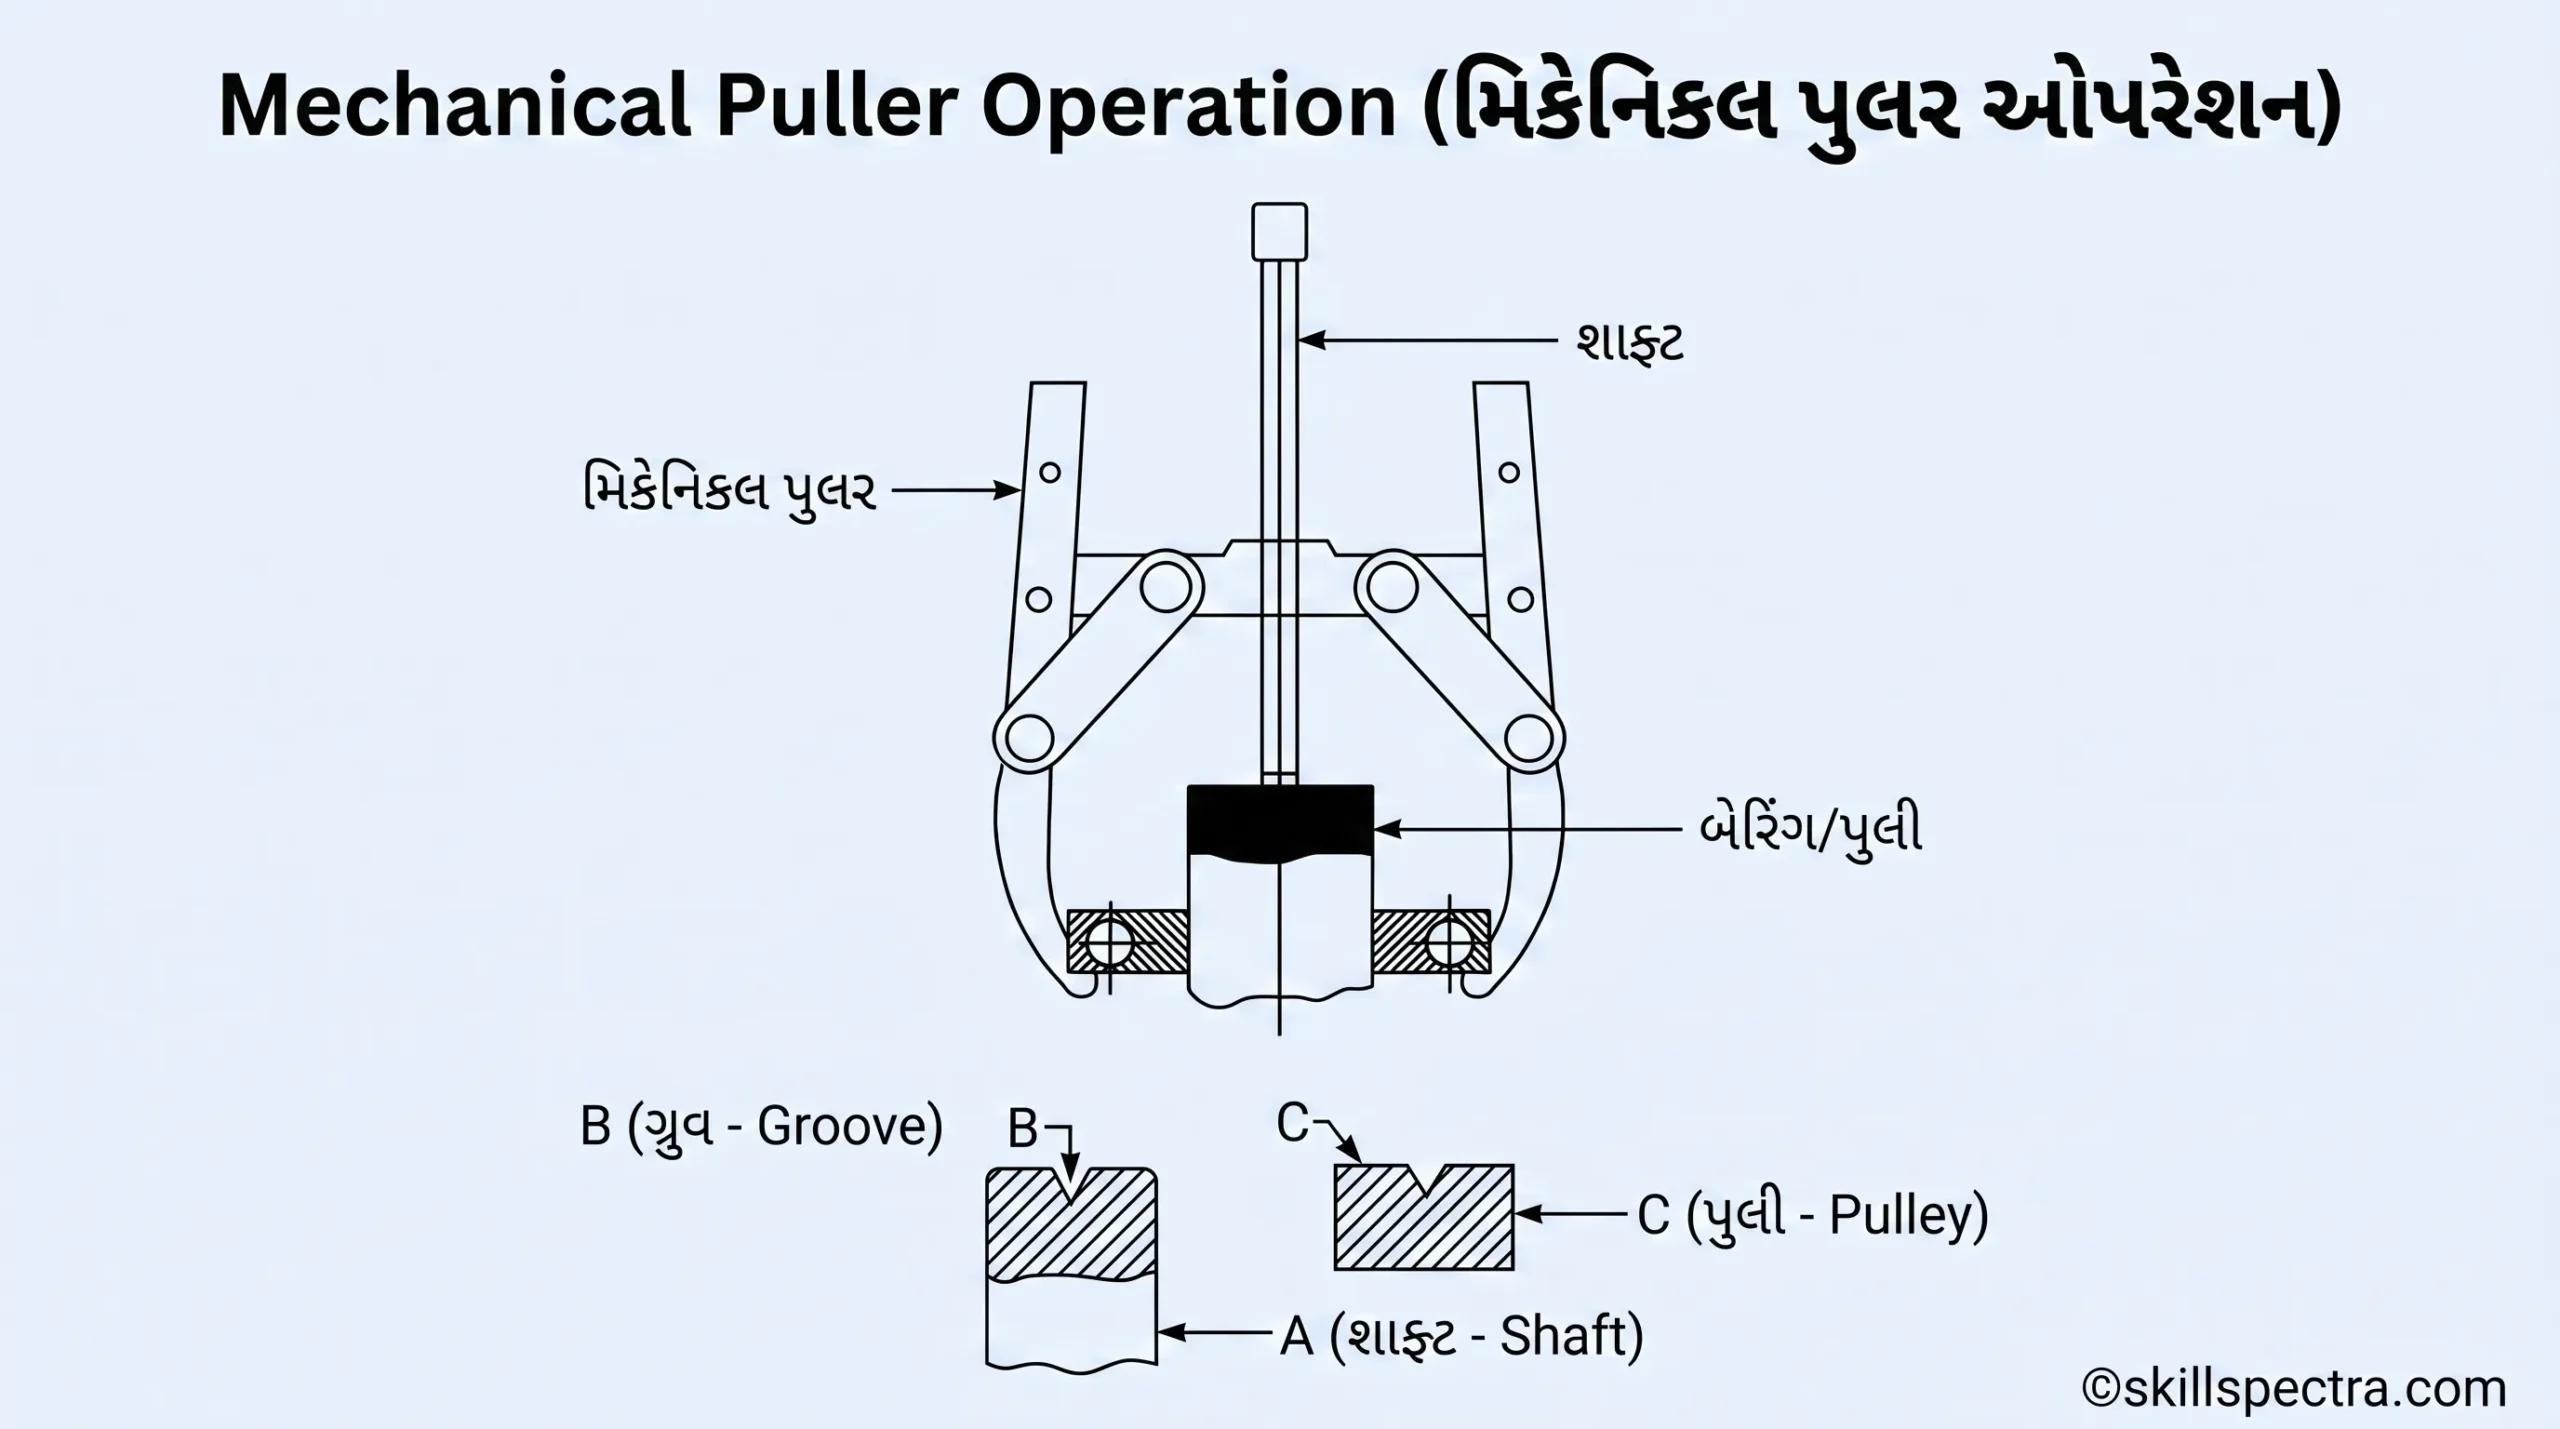
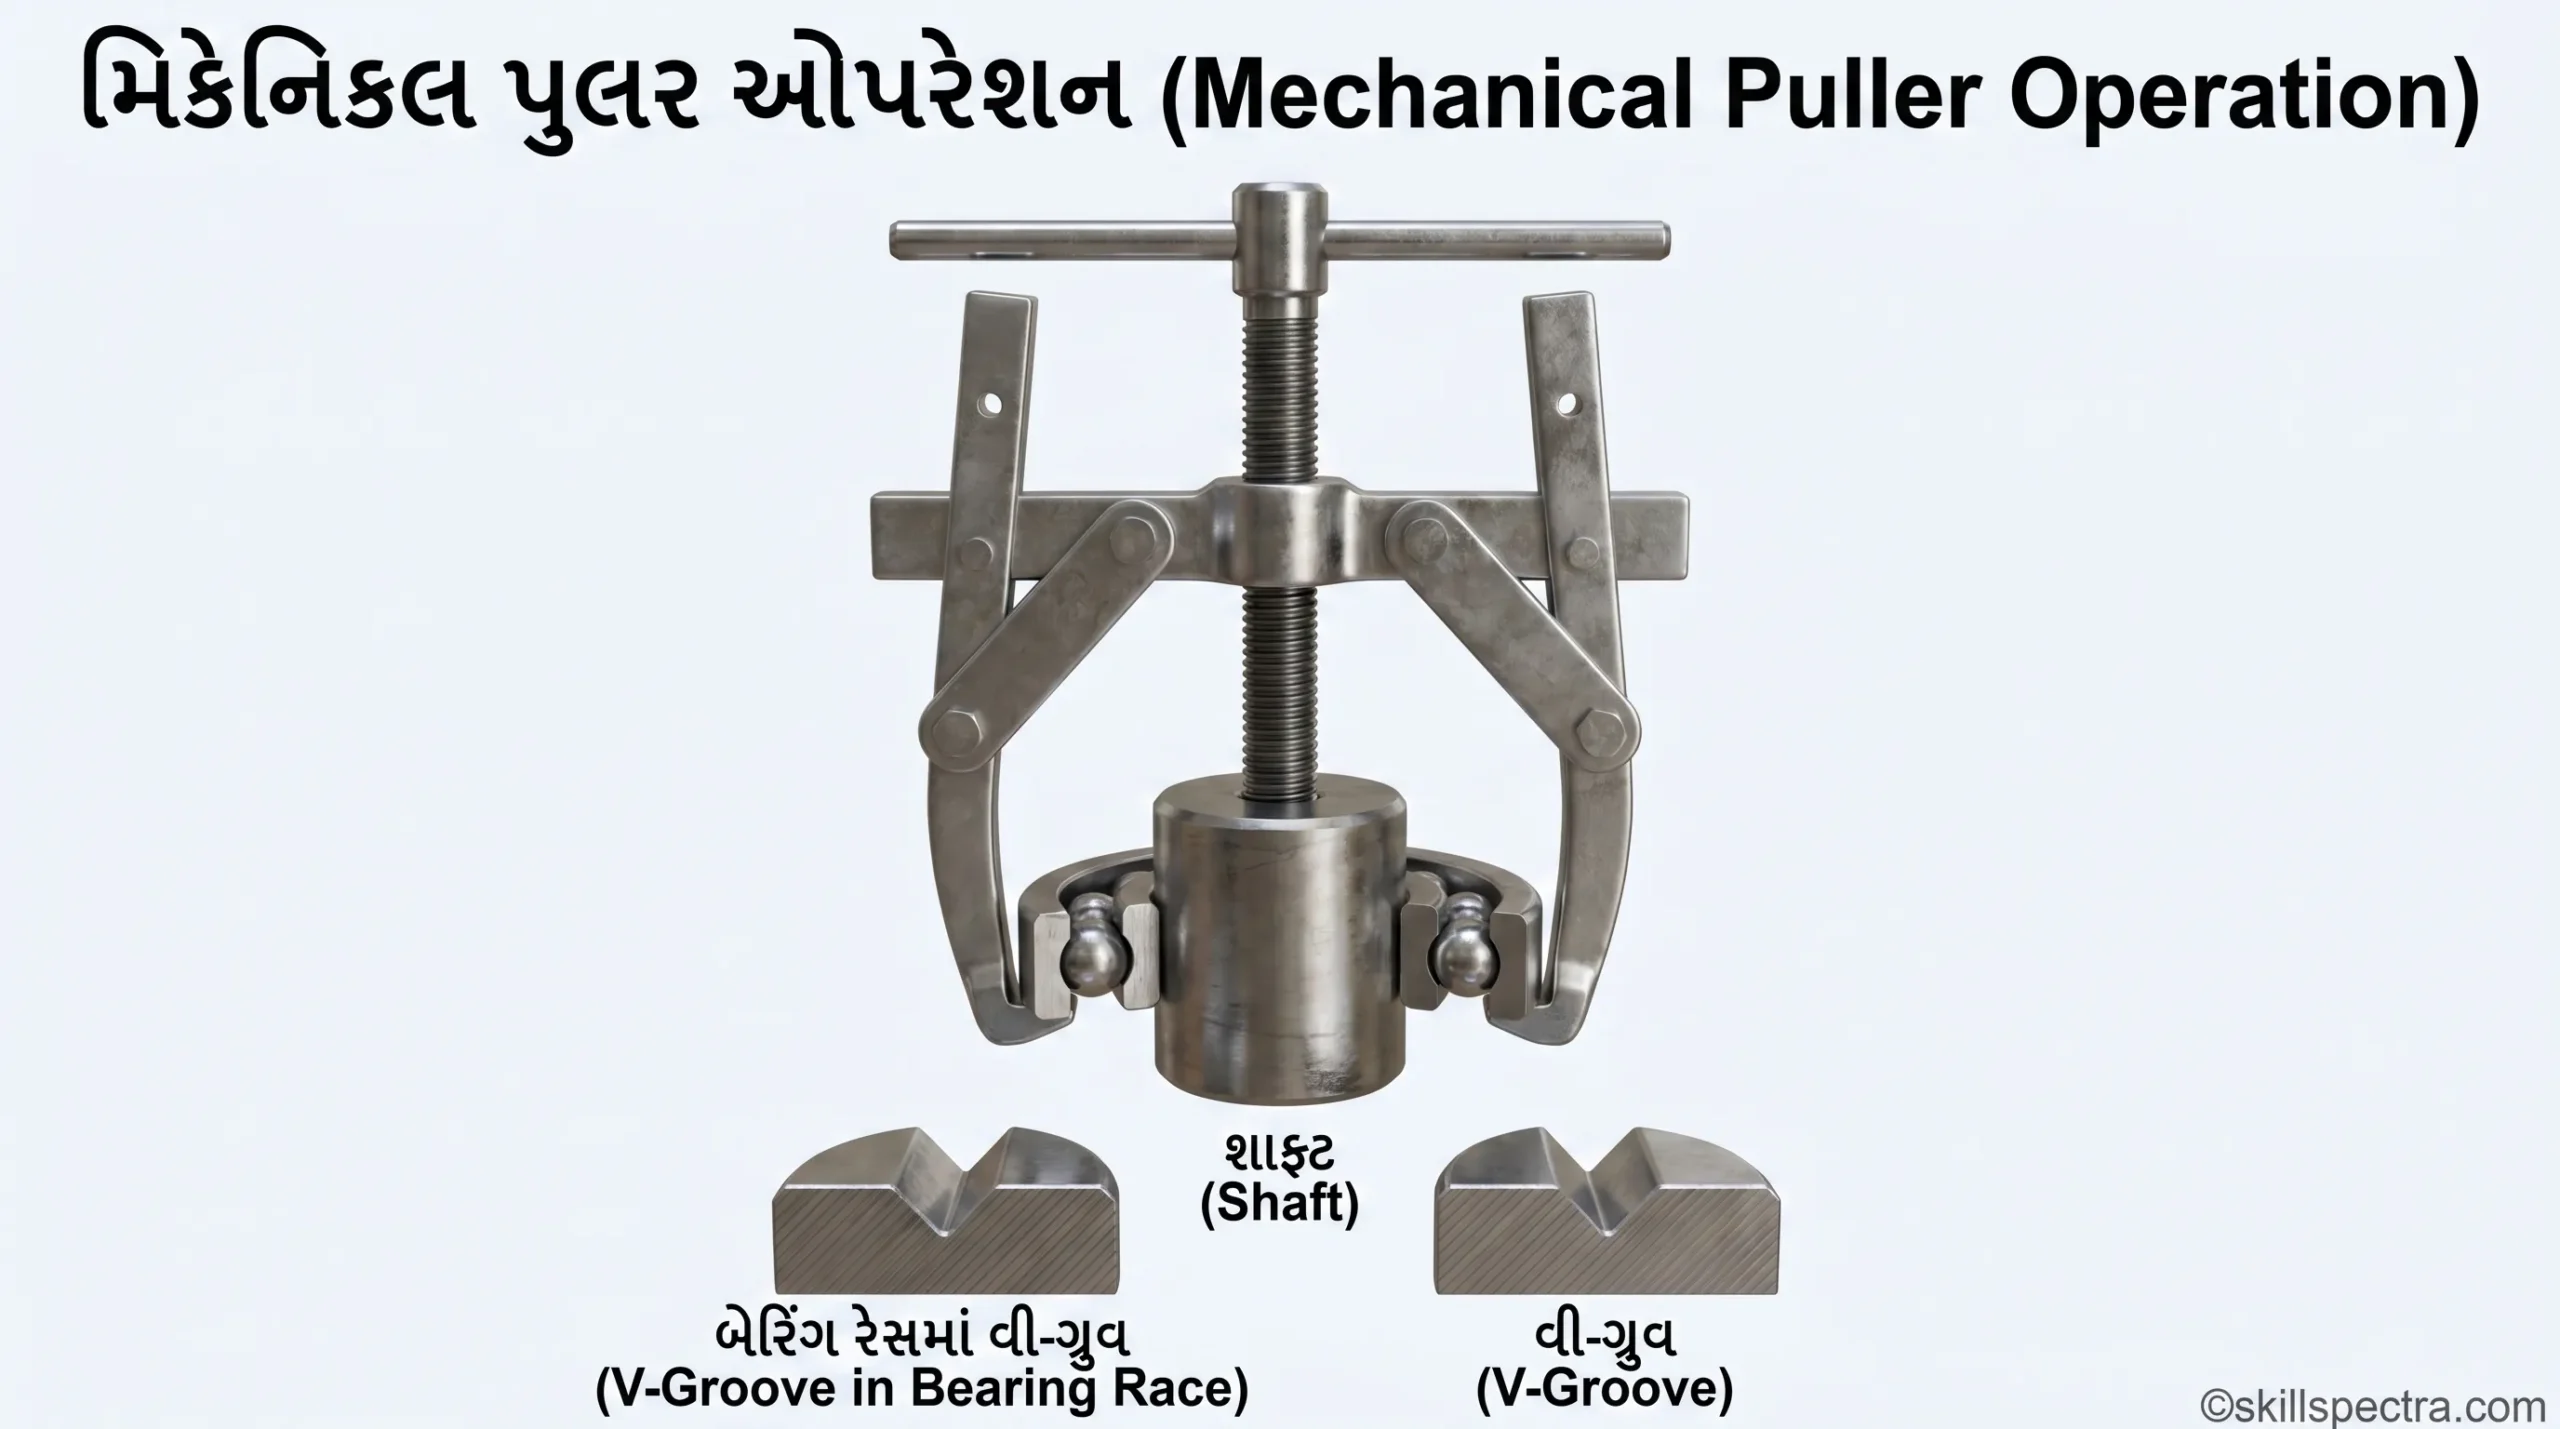
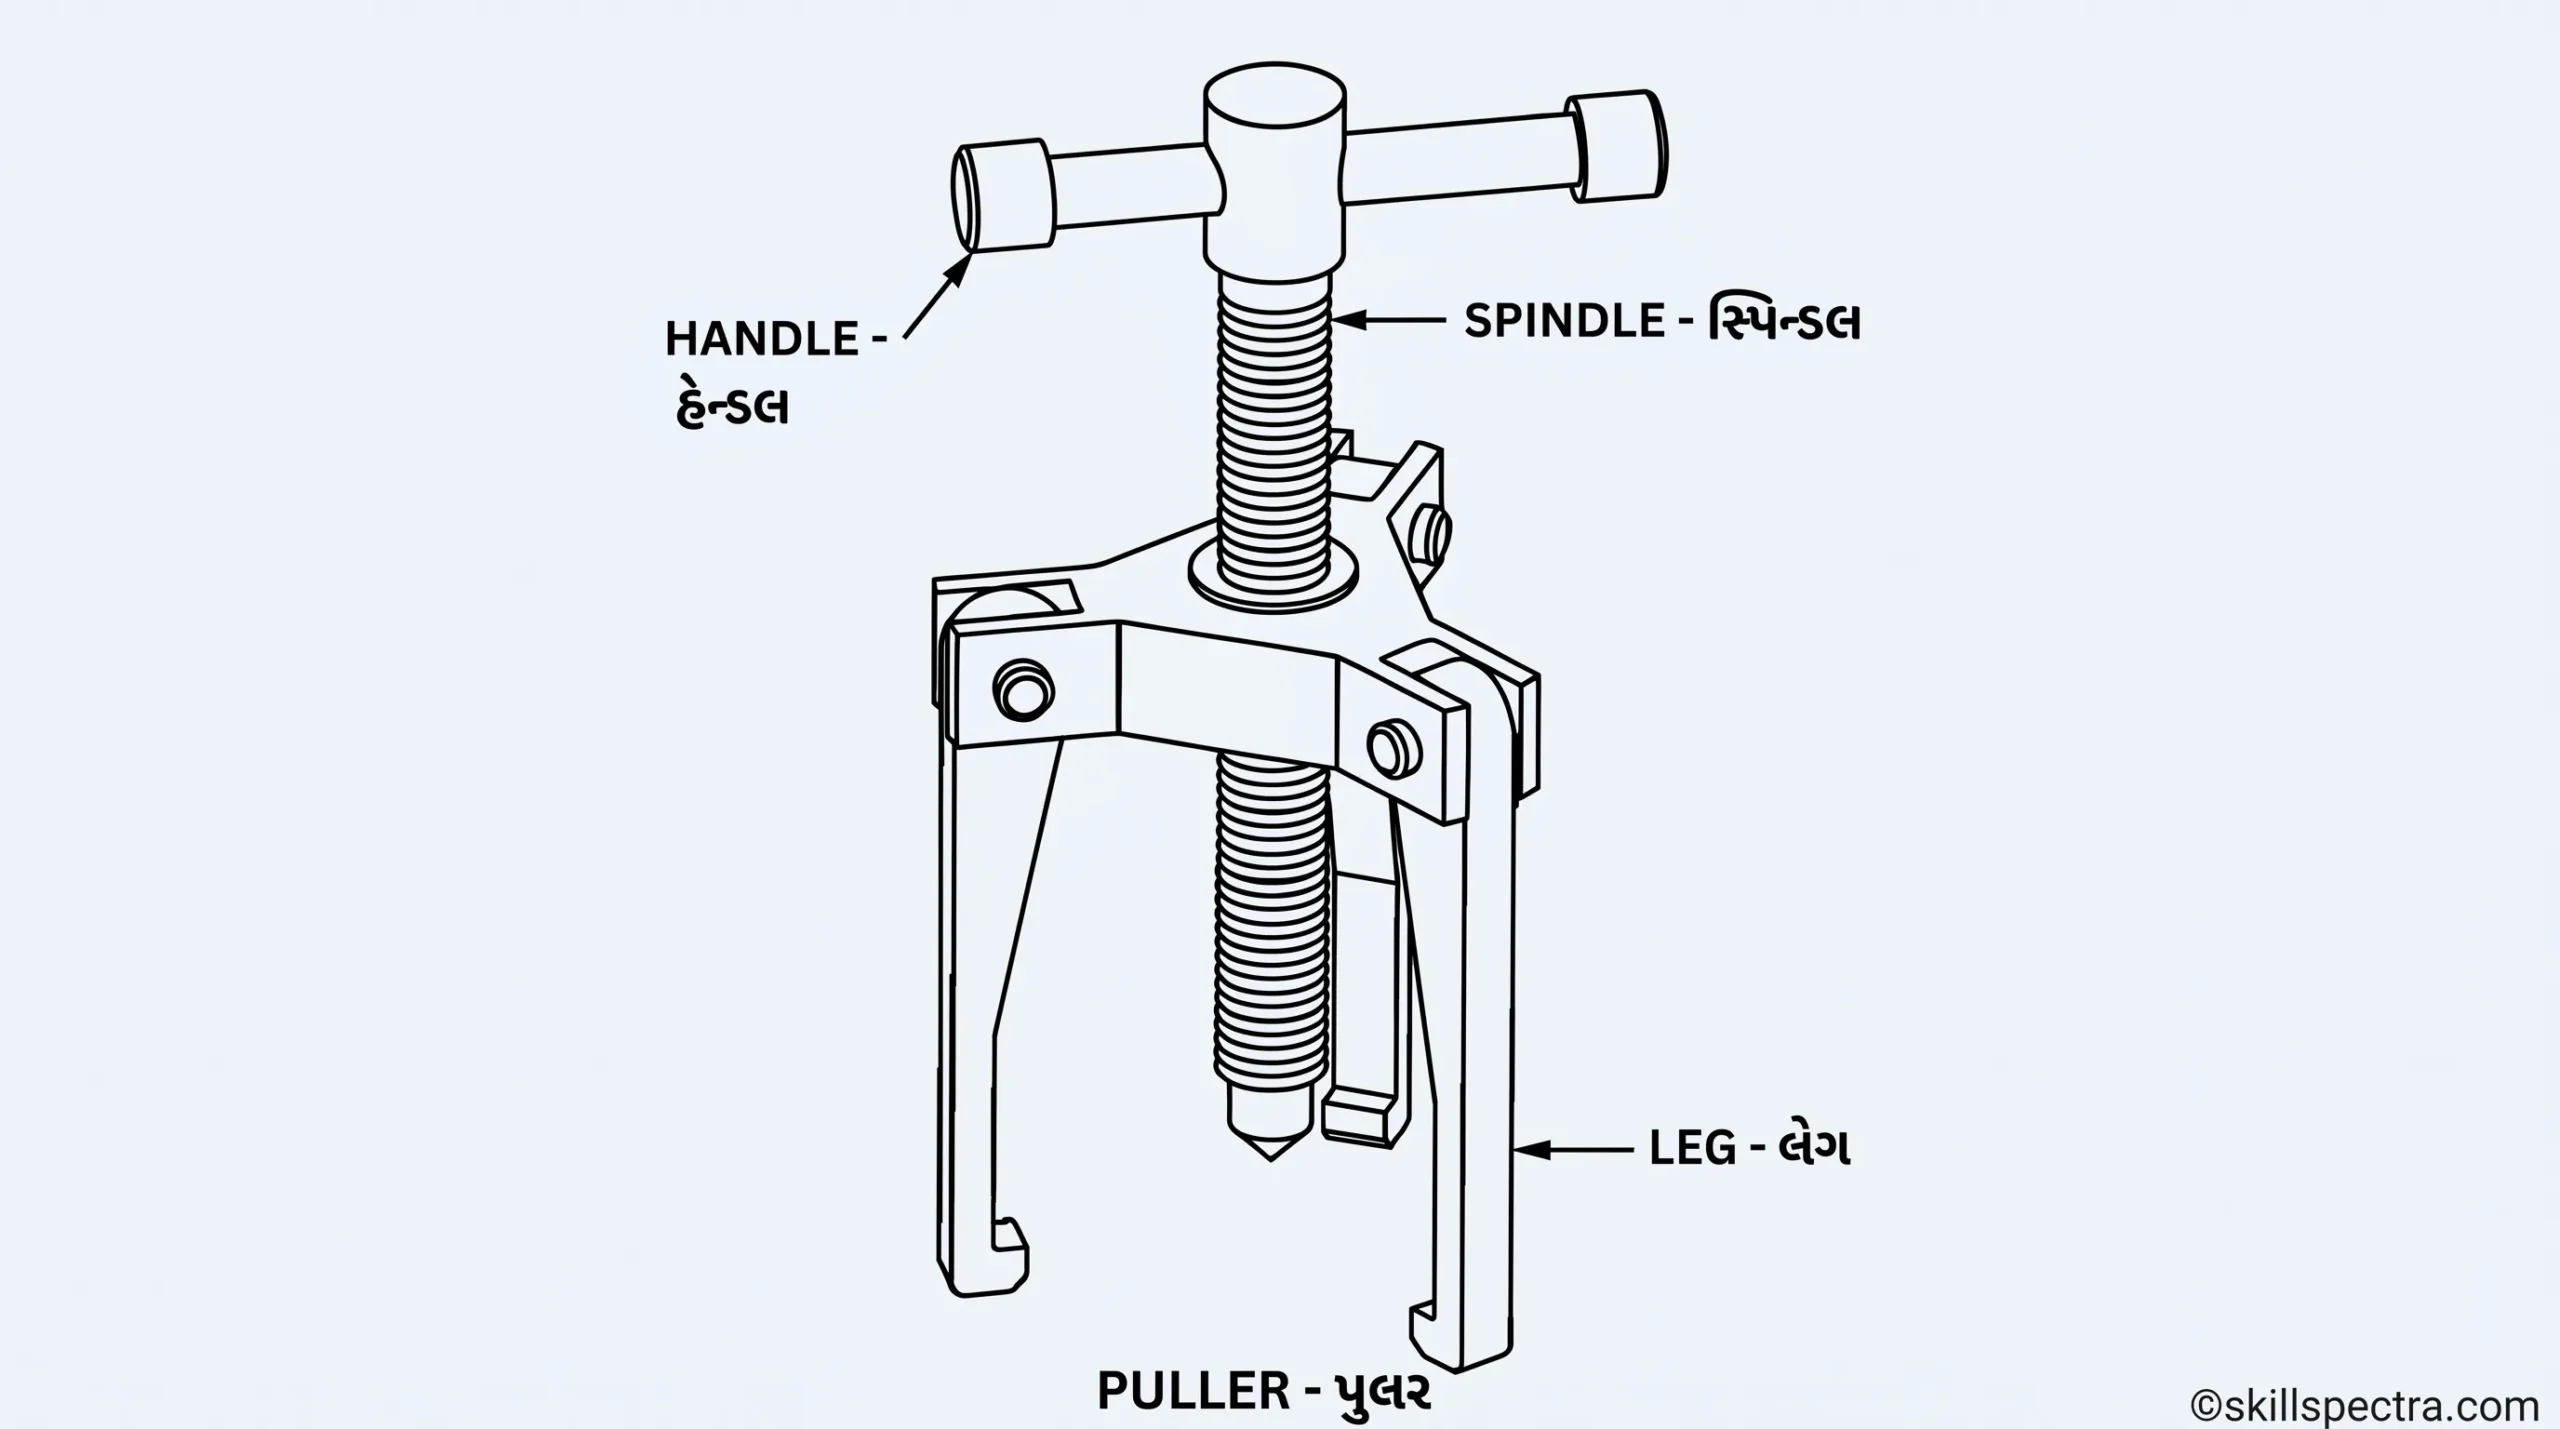
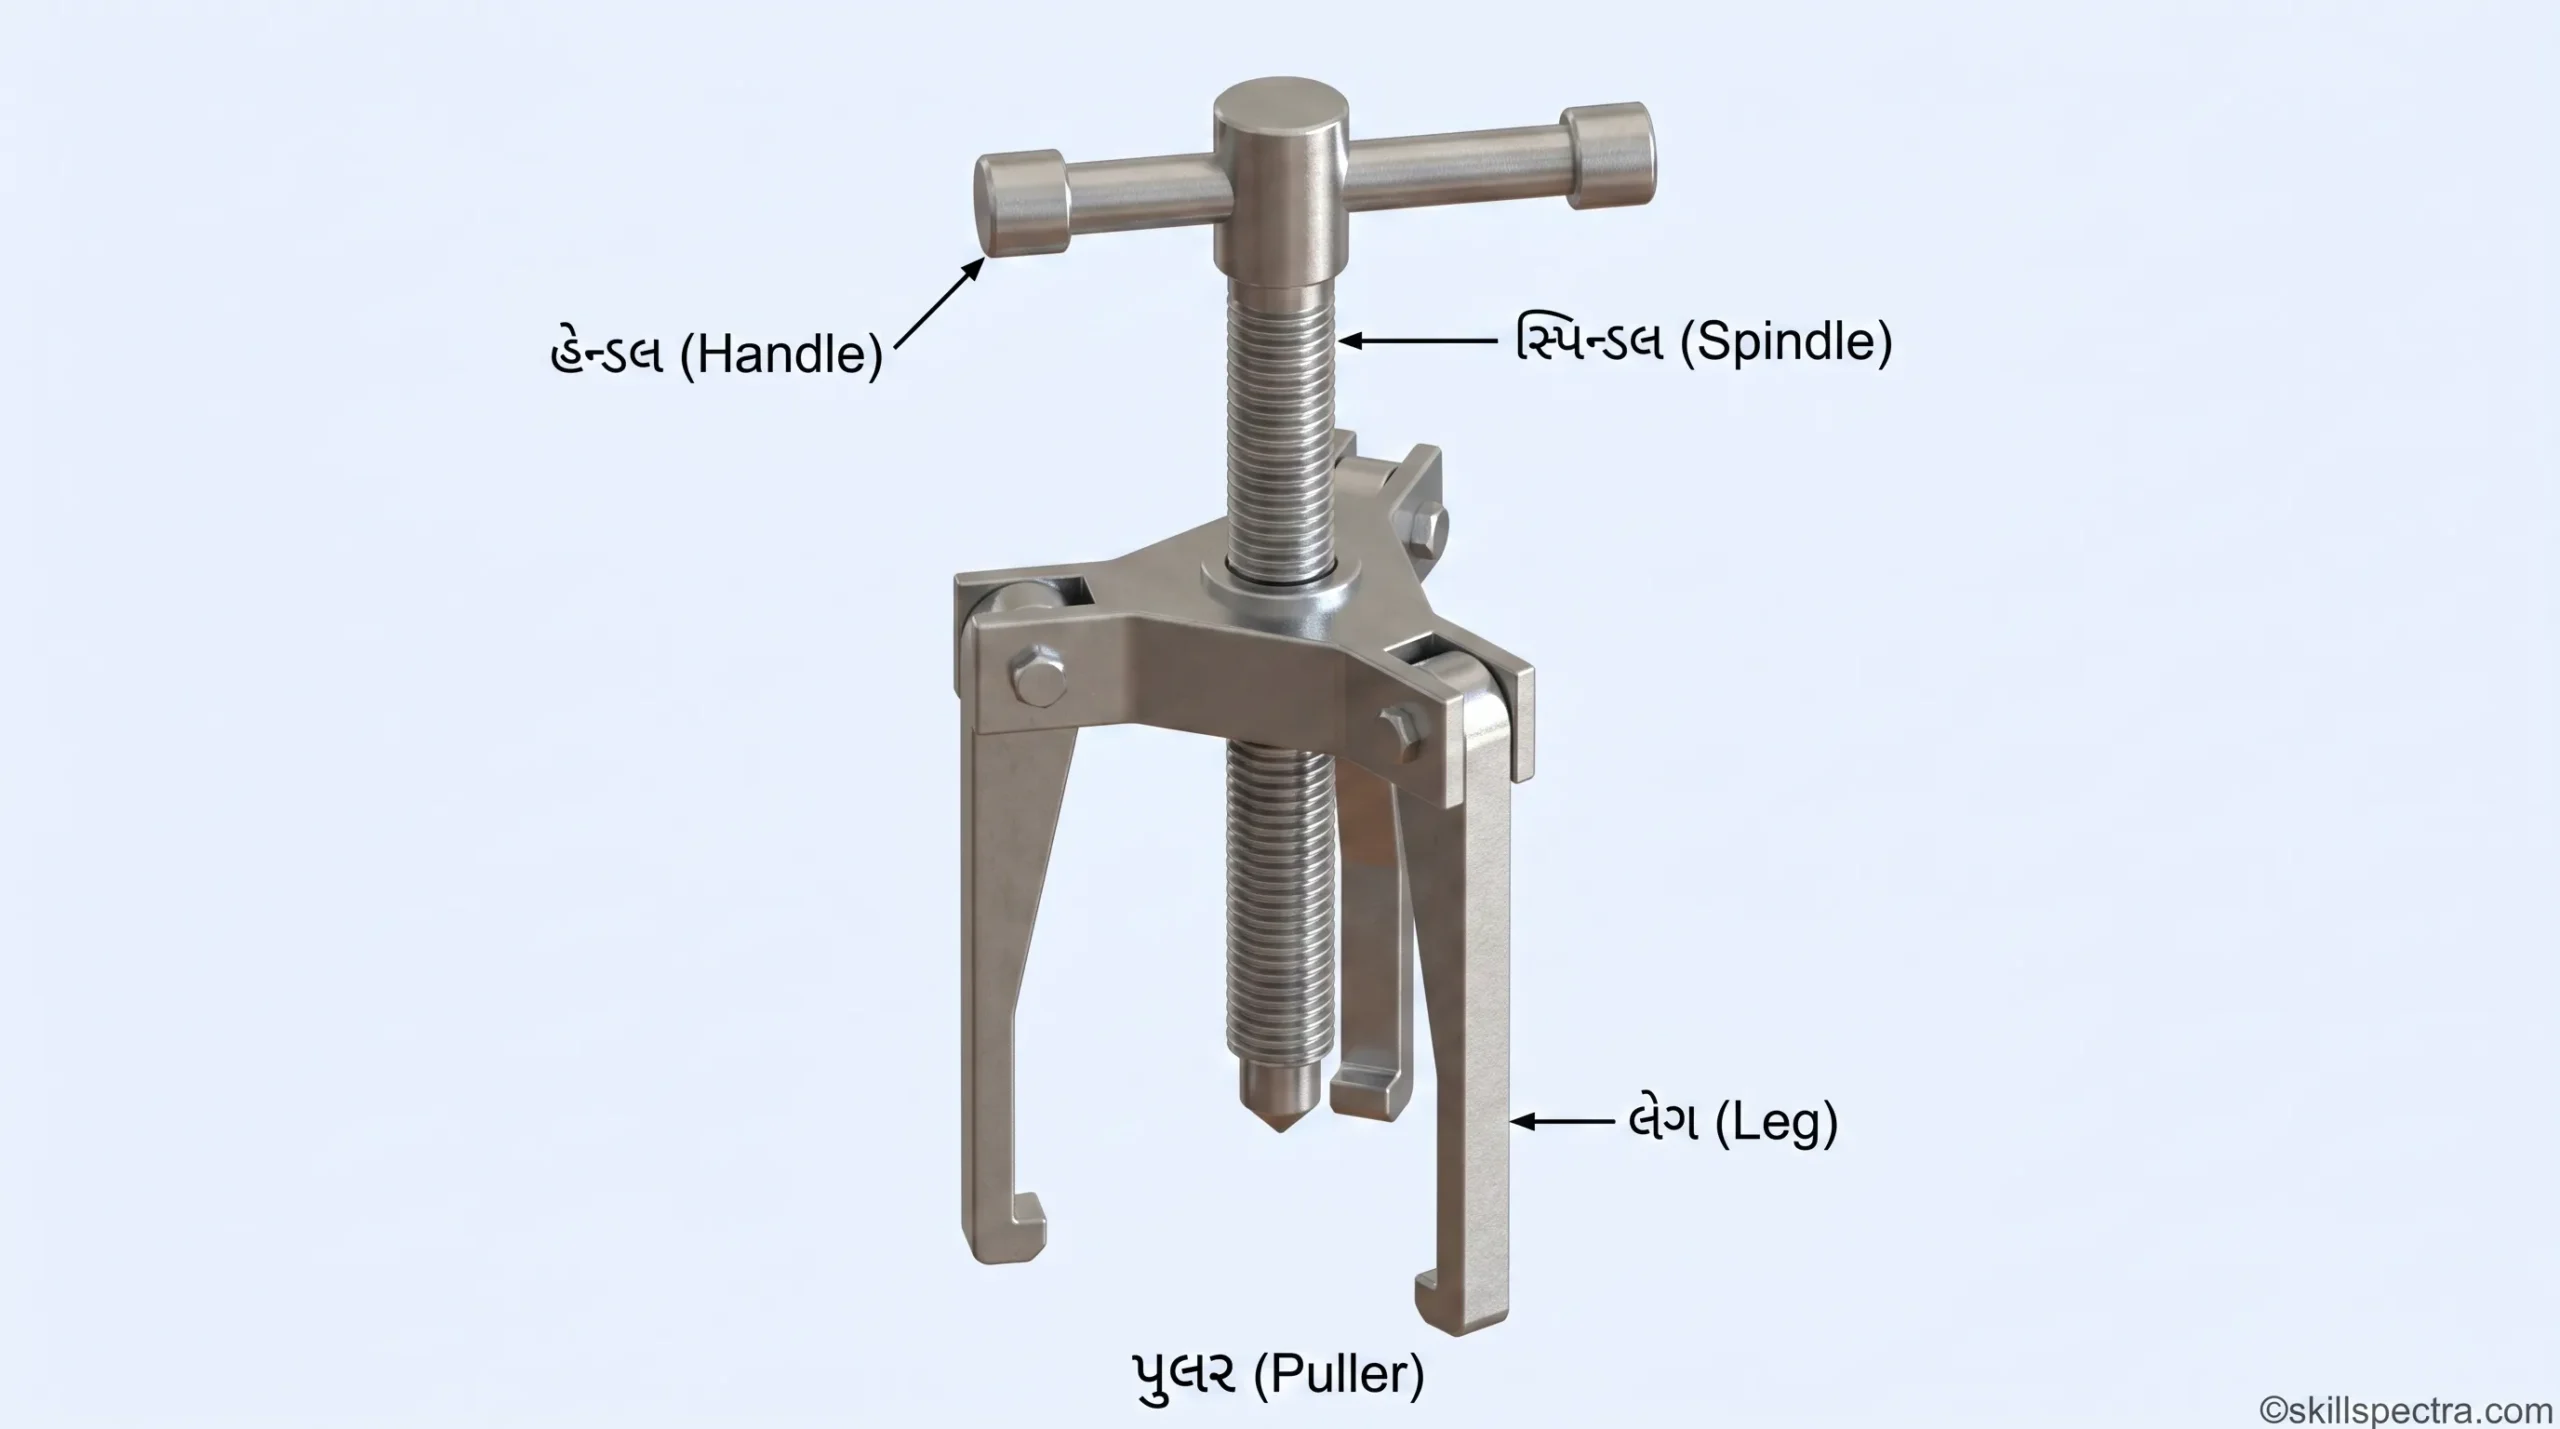
Puller એ એક સામાન્ય વર્કશોપ ટૂલ છે જેનો ઉપયોગ gears, bearings, pulleys, flanges, અને bushes ને બહાર કાઢવા (remove) માટે થાય છે. ⚙️ તે સ્ટીલના મટીરીયલમાંથી બનેલું હોય છે, જેમાં સામાન્ય રીતે બે અથવા ત્રણ legs (પગ) હોય છે જે ભાગને પકડી રાખે છે. વચ્ચેના threaded shaft ને ફેરવવાથી gear/bearing પર દબાણ આવે છે અને તે નુકસાન થયા વગર બહાર નીકળી આવે છે.
Classification (વર્ગીકરણ):
- Based on Application & Legs: બે પગવાળા (Two legs) અને ત્રણ પગવાળા (Three legs) પુલર.
- Based on Power: Mechanical puller અને Hydraulic puller.
- Two legs puller: ખાસ કરીને gears કાઢવા માટે.
- Three legs puller: Pulleys કાઢવા માટે.
- Special pullers: Crankshaft bearing removal, brake drum removal વગેરે માટે.
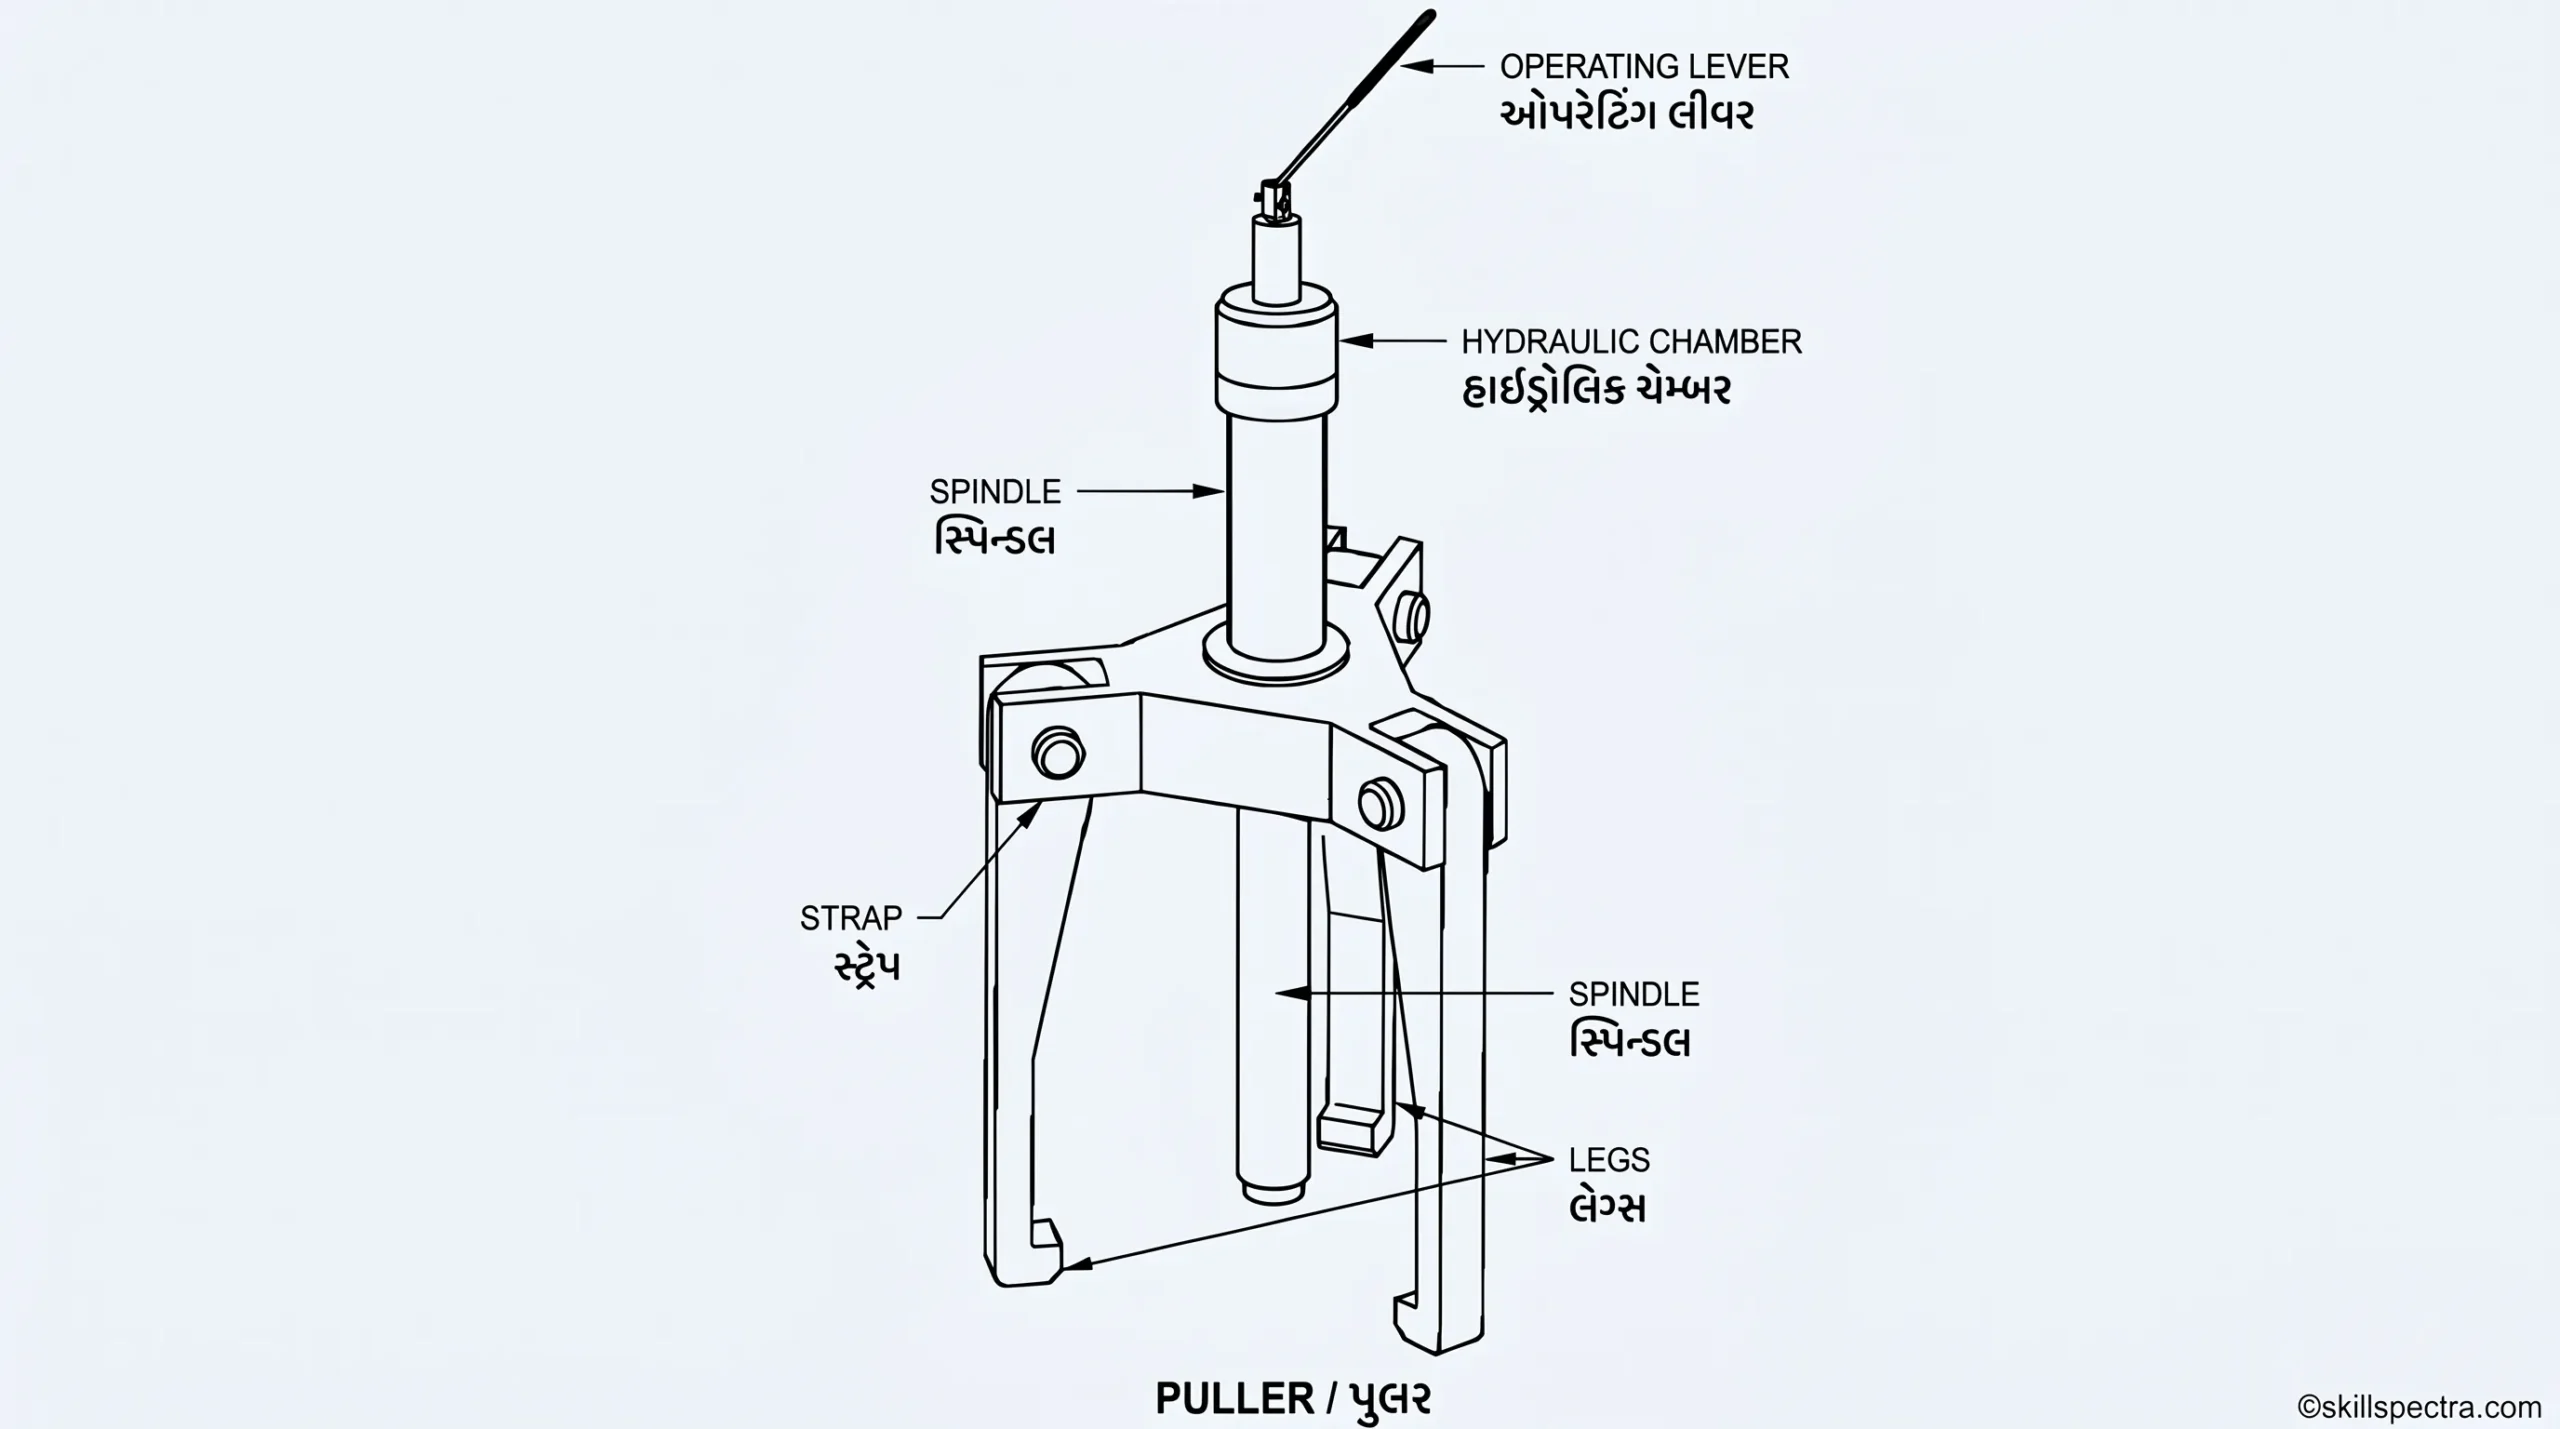
Hydraulic Puller:
આ પુલર સમય બચાવે છે અને સલામત છે. તેની ક્ષમતા 4 tons થી 30 tons સુધીની હોય છે. ઓટોમોટિવમાં તેનો ઉપયોગ ખાસ કરીને engine liner ને સિલિન્ડર બ્લોકમાંથી બહાર કાઢવા માટે થાય છે. 🚜
🛡️ Safety (સલામતી):
- હંમેશા યોગ્ય PPE gear પહેરો. 🥽
- પુલર પર ક્યારેય હથોડી (hammer) ન મારો.
- વપરાશ પહેલા સેન્ટર બોલ્ટના આંટા (threads) પર graphite grease લગાવો.
- પુલરને ક્યારેય ગરમ (heat) ન કરો.
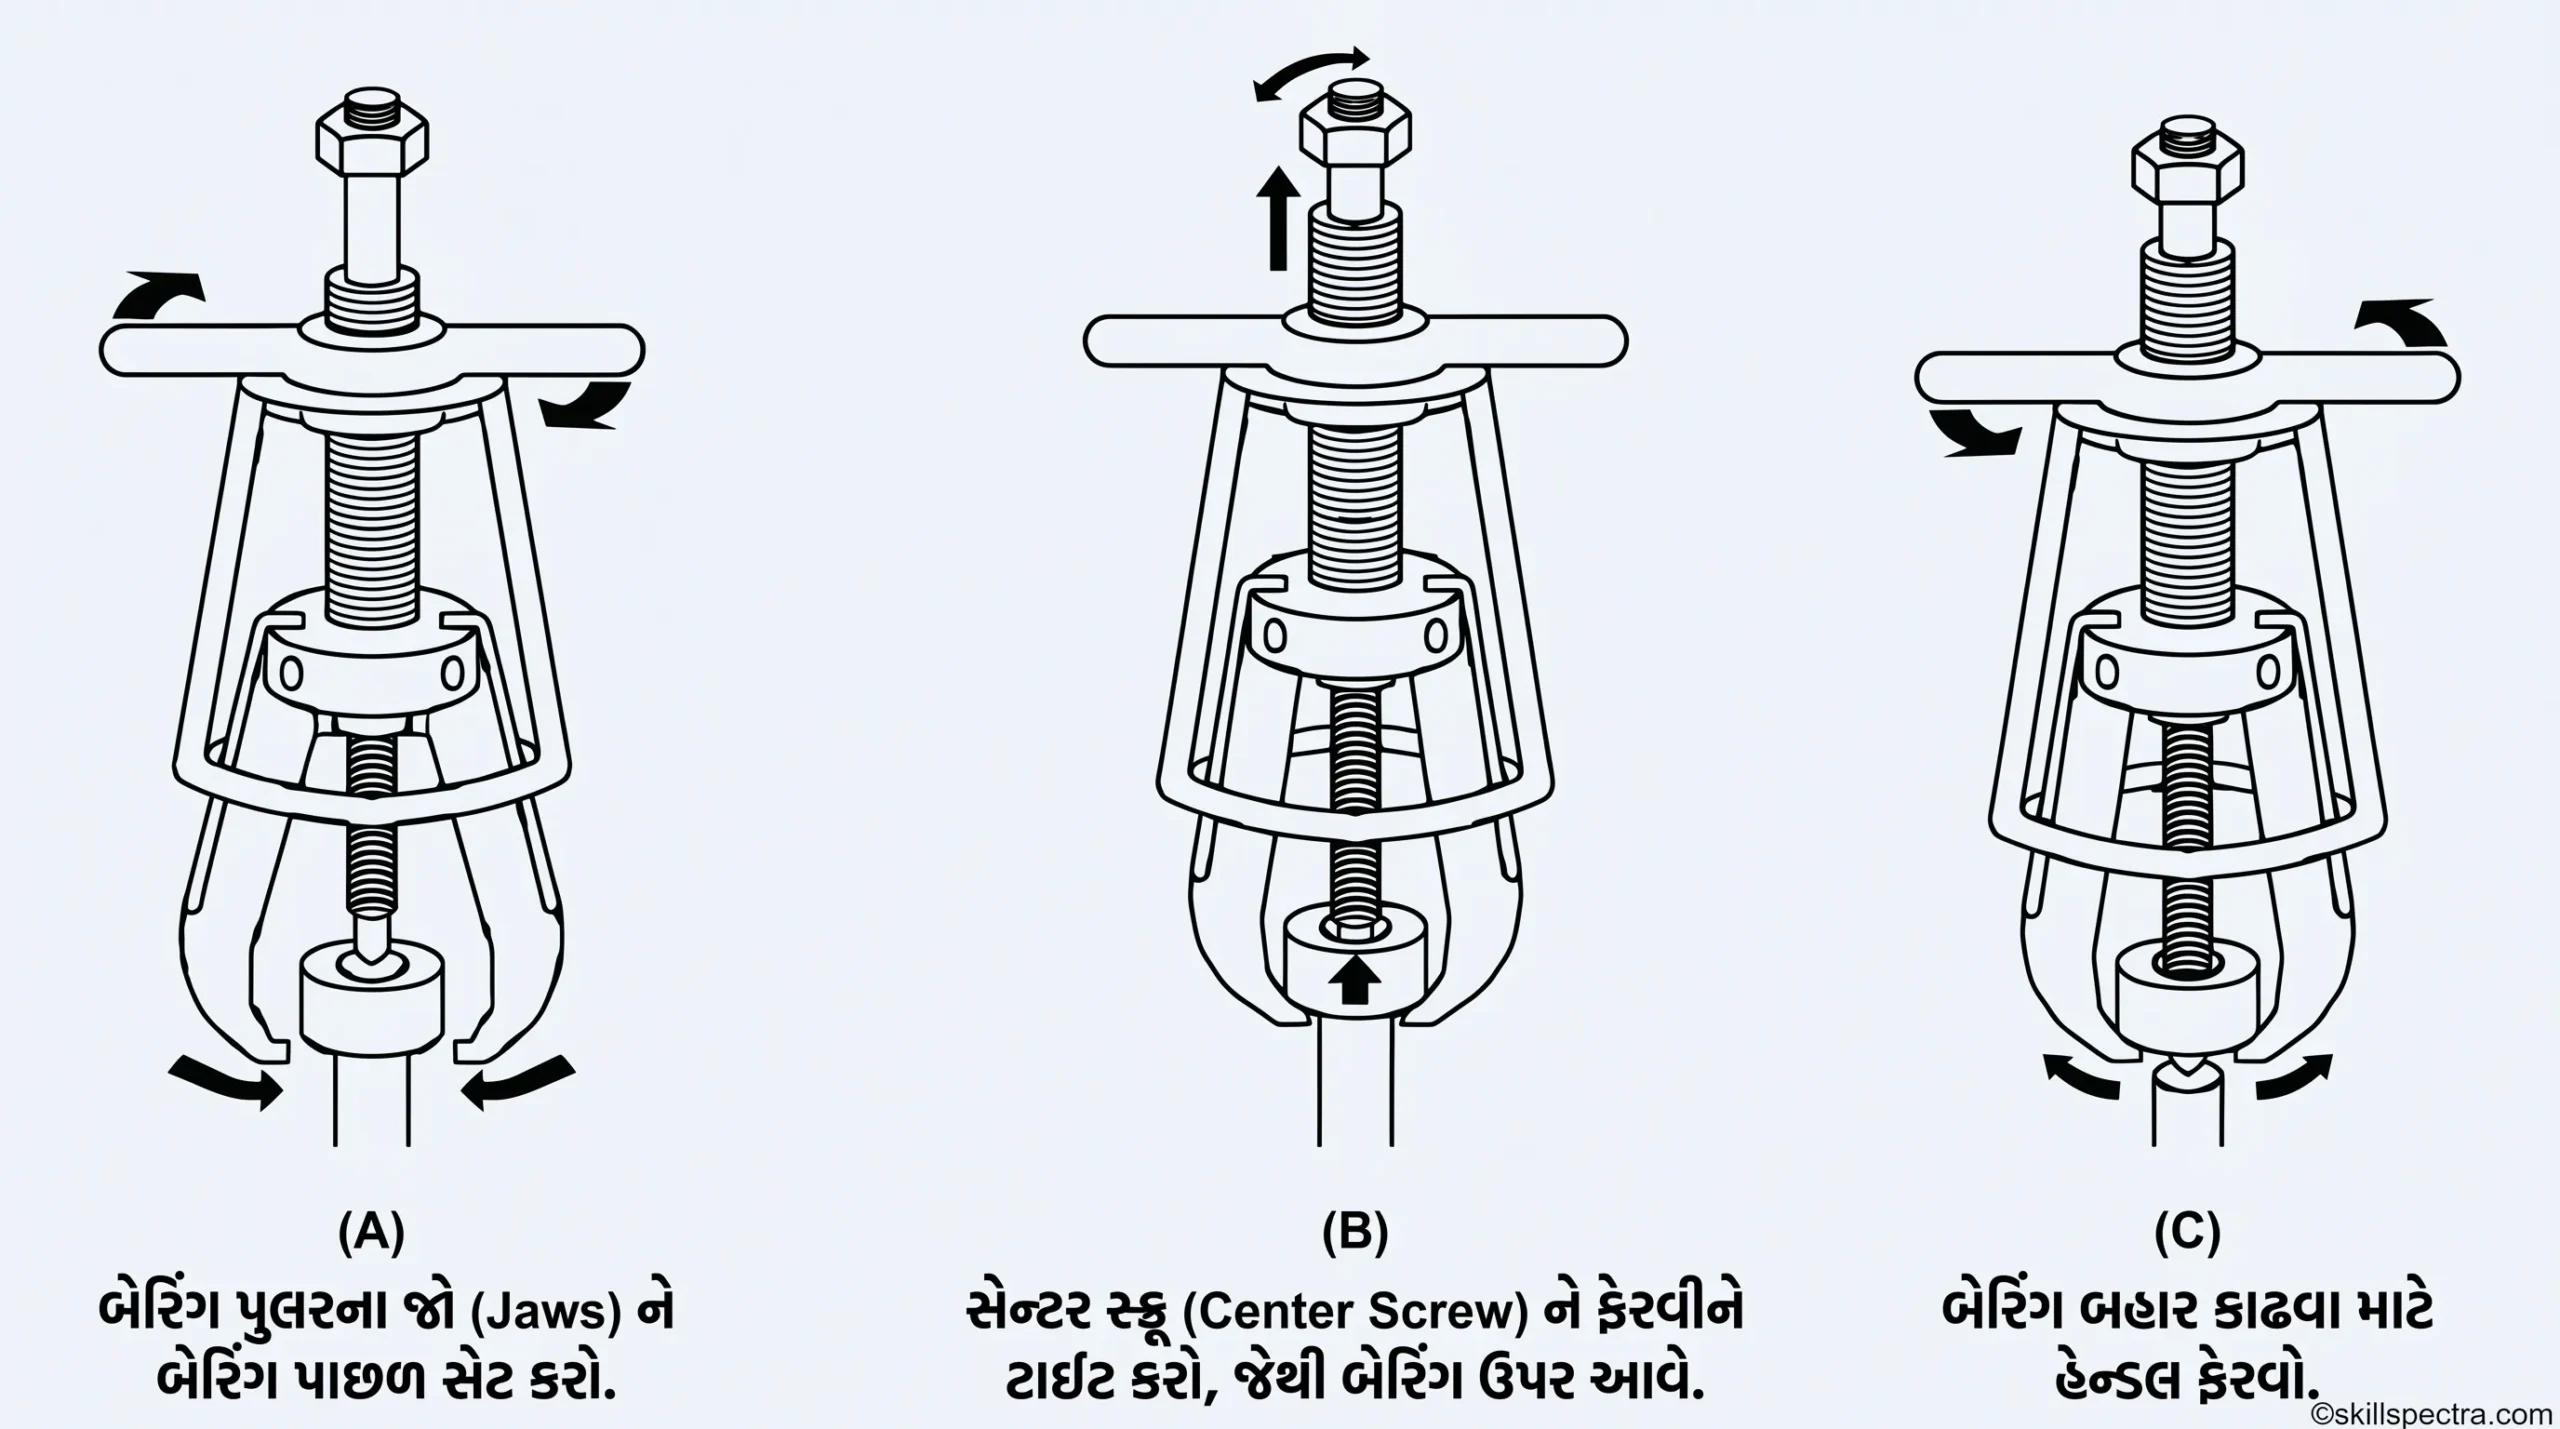
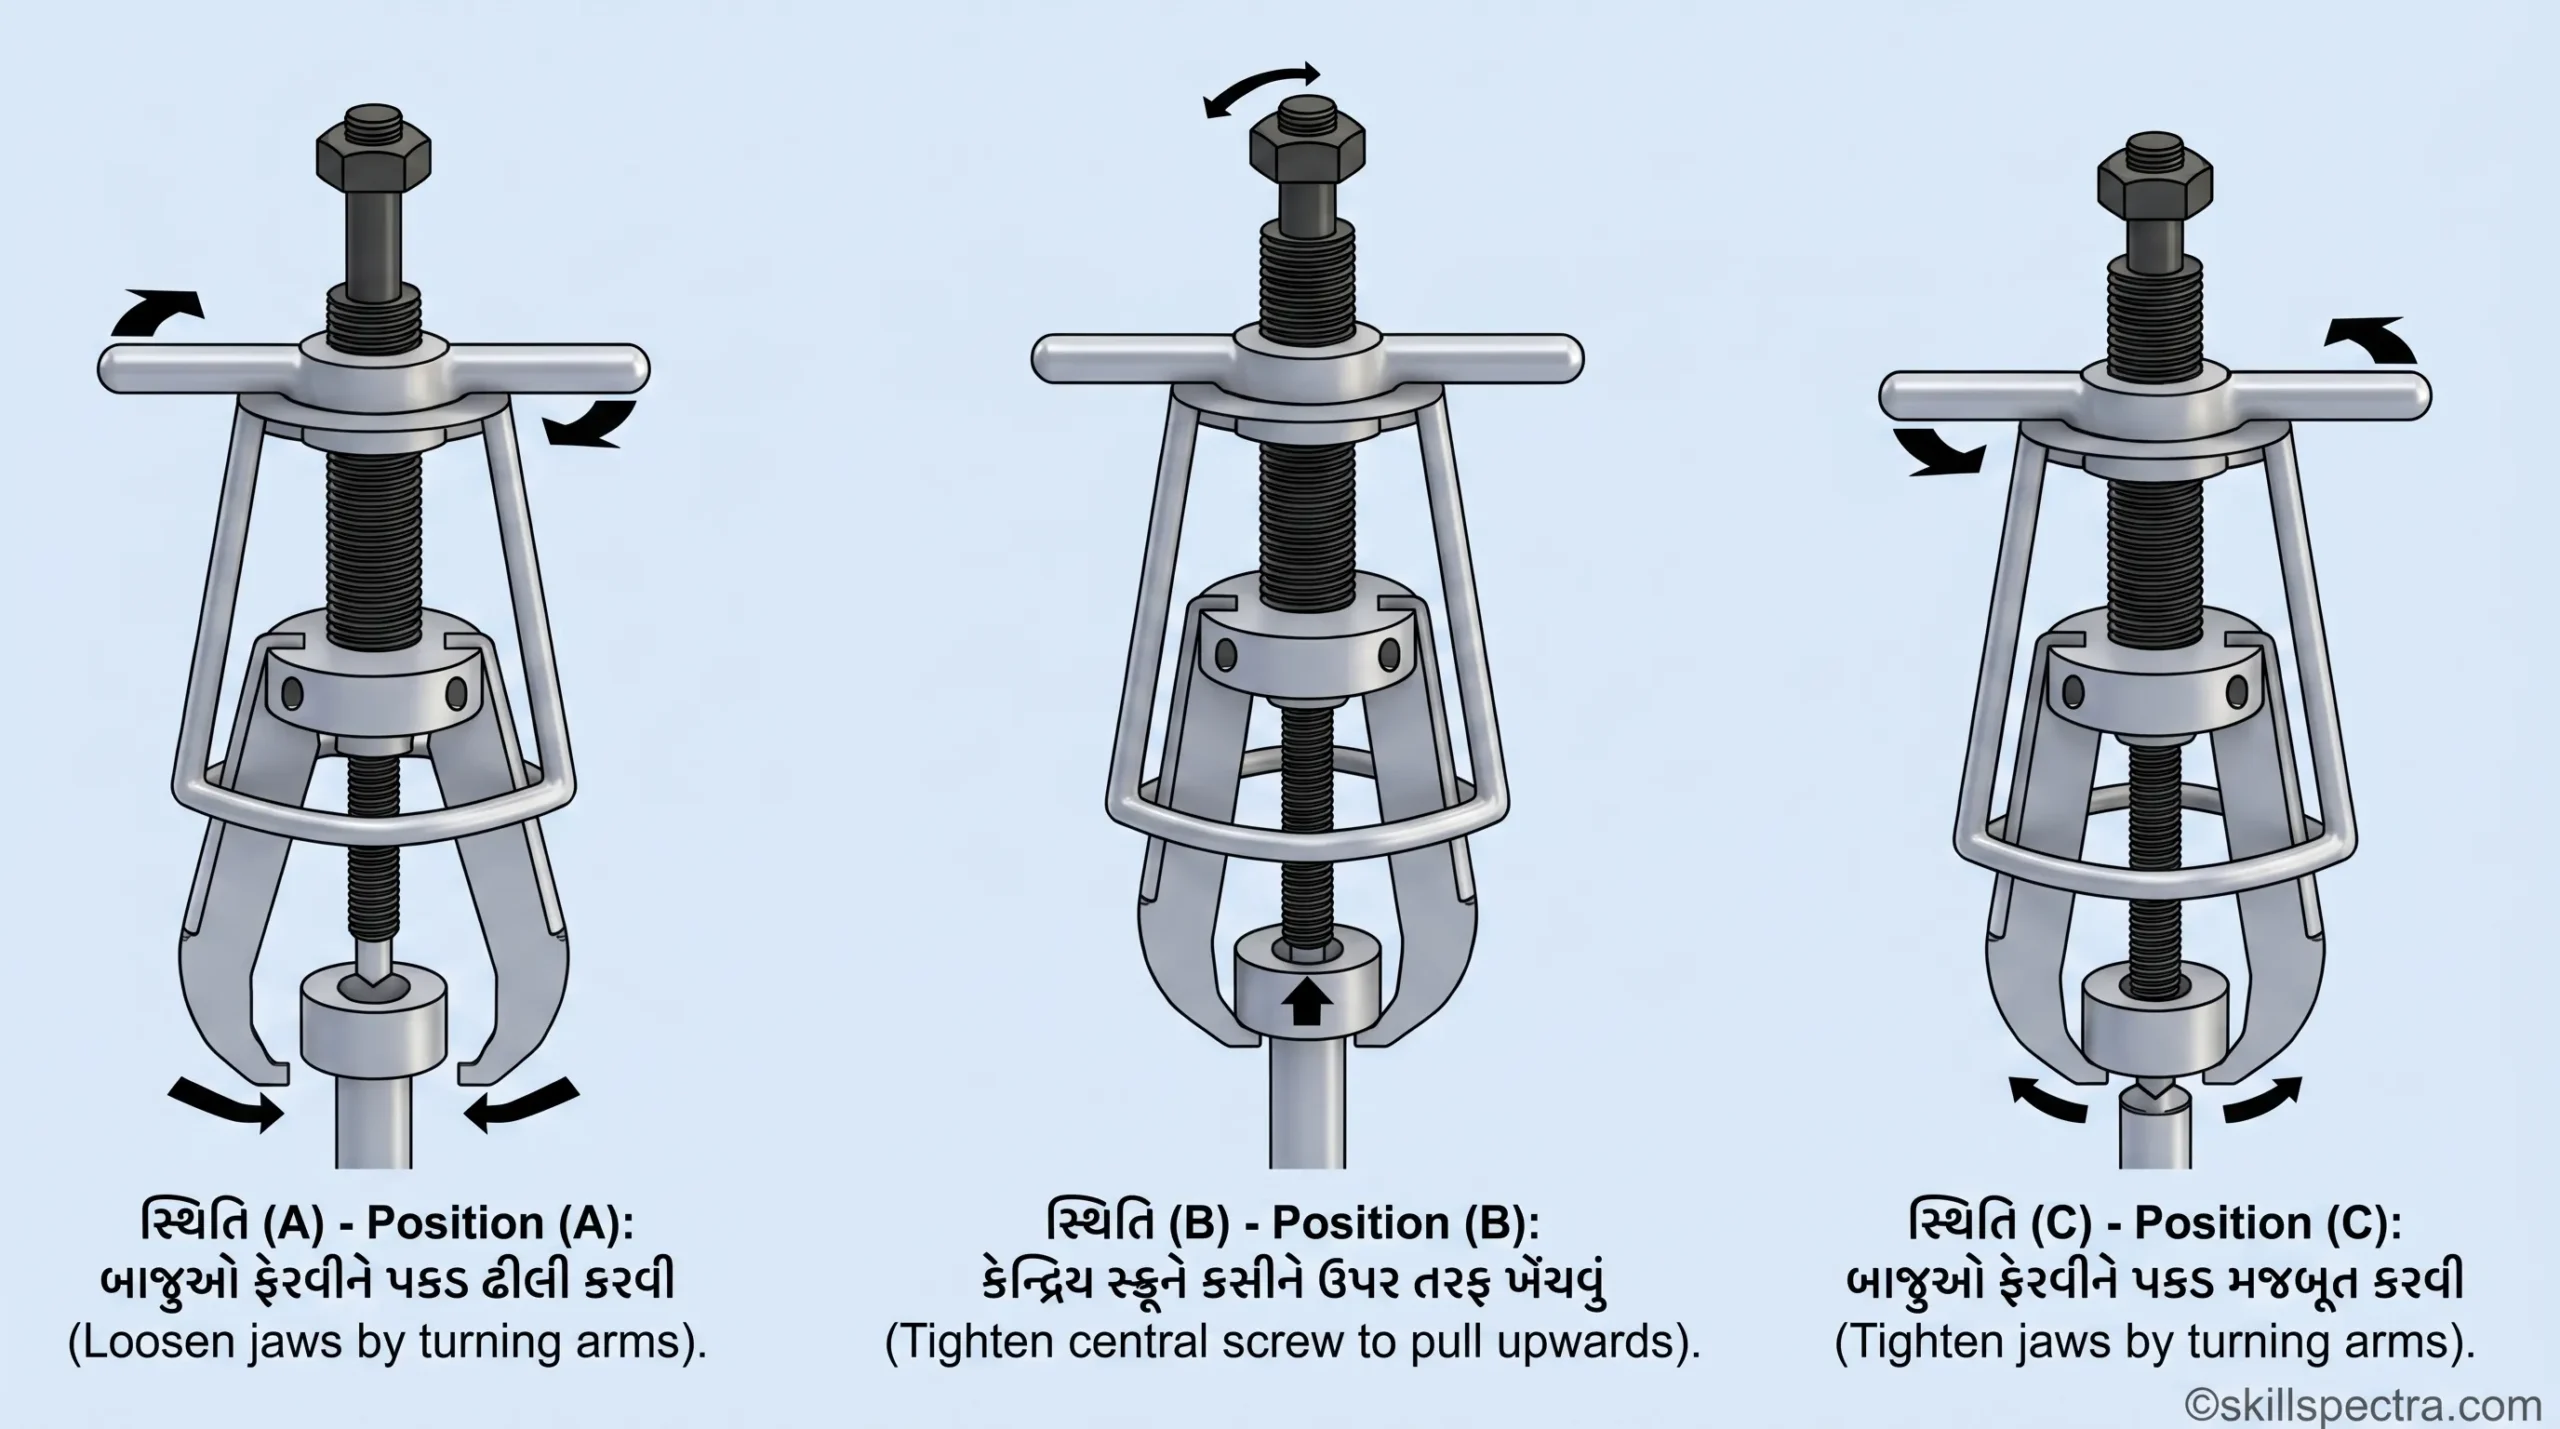
Mechanical Puller Operation:
- વપરાશ પહેલા સ્પિન્ડલ સાફ કરી ગ્રીસ લગાવો.
- શાફ્ટમાં center hole હોવો જોઈએ, જો ન હોય તો shaft protector વાપરો.
- Jaws ને પકડવા માટે strap bolts ટાઈટ કરો.
- રેન્ચની મદદથી સ્પિન્ડલને ધીમેથી ફેરવો.
- ખાતરી કરો કે jaws જે ભાગ કાઢવાનો છે તેની સાથે બરાબર સંપર્કમાં છે.
- Tighten the spindle with proper wrench.
- Tighten the strap bolts: સૌ પ્રથમ, strap bolts ને બરાબર tight કરો જેથી puller ના ભાગો હલી ન જાય.
- Apply pulling force by turning the spindle: ત્યારબાદ, spindle ને ફેરવીને (turning) જરૂરી pulling force લગાવો.
Hydraulic Puller Operation ⚙️💧
Hydraulic Puller નો ઉપયોગ જ્યારે વધારે ફોર્સની જરૂર હોય ત્યારે કરવામાં આવે છે.
-
Support Check: ખાતરી કરો કે તમામ items ને puller સિવાય અન્ય રીતે support આપવામાં આવ્યો છે.
-
Installation: Cylinder ને puller માં install કરવા માટે તેના collar threads ને clockwise ફેરવીને jawhead assembly માં બેસાડો. ખાતરી કરો કે puller collar threads પૂરી રીતે engaged છે. Lift plate ને cylinder ના coupler end પર લગાવો. Cylinder માંથી saddle હટાવો અને ram point ને plunger માં નાખો. એવો ram point પસંદ કરો જે shaft સાથે maximum contact પૂરો પાડે.
-
Operation Start: Puller ને પકડો અને T-handle ને counter-clockwise ફેરવીને જડબા (jaws) ખોલો.
-
Tightening onto Component: T-Handle ને clockwise ફેરવીને jaws ને component પર મજબૂતીથી સેટ કરો.
-
Final Pulling: ખાતરી કરો કે puller ખેંચવાના component સાથે square (સીધું) છે. Plunger ને ત્યાં સુધી આગળ વધારો જ્યાં સુધી ram point shaft ને અડકે નહીં જેથી સાચું alignment મળી રહે. Puller નું center point shaft ના center point સાથે aligned હોવું જોઈએ. Component ને shaft પરથી ખેંચવા માટે plunger ને ધીમે ધીમે આગળ વધારો. 🛑 ખાસ સૂચના: Pulling operation દરમિયાન ક્યારેય T-handle ને ફરીથી tight કરવાનો પ્રયત્ન ન કરવો.
🗝️ Keywords:
જો તમે આ લેખ તમારી વેબસાઇટ પર મૂકવા માંગતા હોવ, તો આ કીવર્ડ્સનો ઉપયોગ કરો: Mechanic Diesel Lesson Gujarati, Torque Wrench use in Gujarati, Flaring methods types, Hydraulic Puller mechanism, Pipe cutter vs Saw, ITI Mechanic Diesel Theory, Flare fittings guide, Automotive tools Gujarati tutorial.